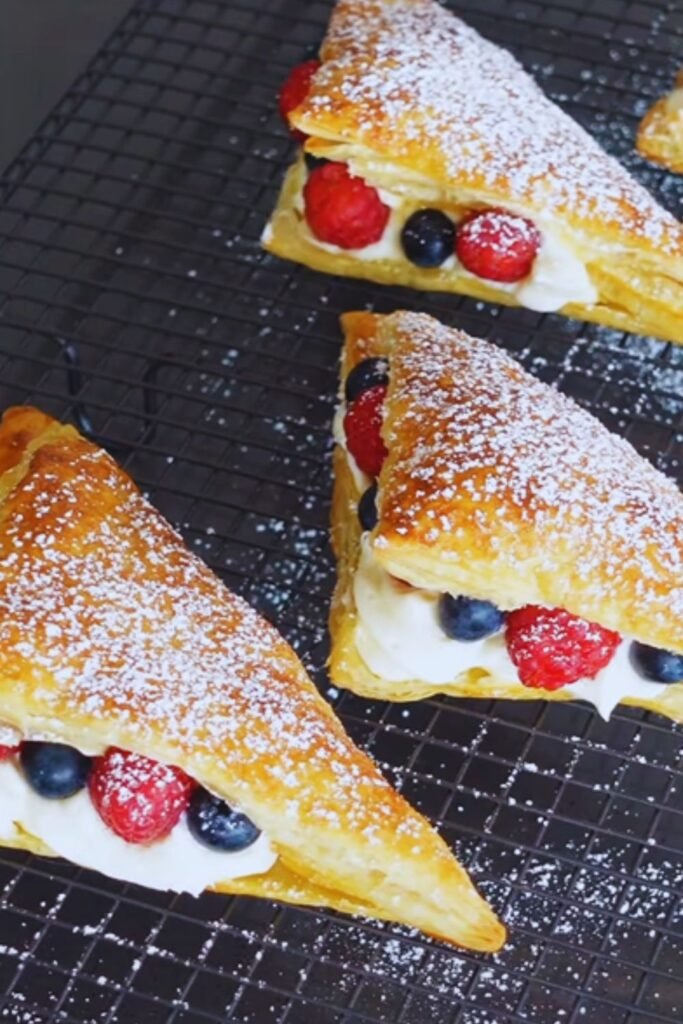
Have you ever bitten into a dessert so light and delicate that it seemingly dissolves on your tongue, leaving behind nothing but pure bliss? That’s exactly what happens with a perfectly crafted Vanilla Custard Puff Pastry Cake, also known as Mille-Feuille in French pastry tradition. I’ve spent years perfecting this recipe, and today I’m thrilled to share all my secrets with you.
The first time I attempted this dessert, I was intimidated by its elegant appearance. Multiple layers of flaky puff pastry alternating with silky vanilla custard, topped with a delicate glaze—it seemed like something only professional pastry chefs could achieve. But with practice and patience, I discovered that this impressive dessert is actually quite manageable for home bakers willing to invest a little time.
What makes this dessert truly special is the contrast between textures—the crisp, flaky layers of buttery puff pastry against the smooth, creamy vanilla custard. It’s a symphony of sensations that dance across your palate with each bite.
The History Behind the Layers
Before diving into the recipe, I love understanding the origins of what I’m creating. The Vanilla Custard Puff Pastry Cake has roots in French cuisine, where it’s known as “Mille-Feuille” (meaning “thousand leaves” in reference to the many layers of puff pastry). Dating back to at least the 19th century, this dessert has evolved over time and spread throughout Europe with regional variations.
In Italy, you might find it called “Napoleone,” while in Britain it’s often referred to as a “Vanilla Slice” or “Custard Slice.” In Russia and post-Soviet countries, a similar dessert called “Napoleon Cake” is immensely popular, especially during celebrations.
What I find fascinating is how this basic concept—layering puff pastry with cream—has been adapted and embraced across cultures, each adding their own unique twist. My version leans toward the traditional French preparation but incorporates a few personal touches I’ve developed over the years.
Essential Ingredients
The beauty of this dessert lies in its simplicity. While it requires attention to detail, the ingredient list is surprisingly straightforward:
For the Pastry Layers:
- 2 sheets of high-quality all-butter puff pastry (approximately 320g each)
- 2 tablespoons of confectioners’ sugar (for dusting)
For the Vanilla Custard:
- 500ml whole milk
- 1 vanilla bean, split lengthwise and seeds scraped
- 6 large egg yolks
- 150g granulated sugar
- 45g cornstarch
- 30g unsalted butter, cut into small cubes
- Pinch of salt
For the Glaze:
- 200g confectioners’ sugar
- 3-4 tablespoons warm water
- Optional: 1 teaspoon vanilla extract
- Optional: Food coloring for decorative patterns
Let me share a crucial tip I’ve learned through multiple test batches: the quality of your puff pastry matters tremendously. While homemade puff pastry is wonderful if you have the time and patience, a high-quality store-bought all-butter puff pastry yields excellent results. The key word here is “all-butter”—avoid pastry made with shortening or other fats as they simply don’t provide the same flavor profile or flaky texture.
Equipment You’ll Need
Having the right tools makes assembly much easier:
- Baking sheets
- Parchment paper
- Rolling pin
- Sharp knife or pizza cutter
- Ruler (for precise cutting)
- Heavy-bottomed saucepan
- Whisk
- Rubber spatula
- Fine-mesh sieve
- Pastry brush
- Offset spatula
- Refrigerator and freezer space
I’ve found that a ruler is particularly helpful for getting those perfectly even layers that make the final presentation so impressive. Don’t skip this seemingly minor tool—it makes a world of difference!
Detailed Step-by-Step Instructions
Preparing the Puff Pastry
- Preheat your oven to 200°C (400°F).
- Lightly dust your work surface with flour and carefully unroll the puff pastry sheets.
- Using a rolling pin, roll each sheet to even out any wrinkles and ensure uniform thickness (about 3-4mm).
- Transfer the sheets to parchment-lined baking sheets.
- Place another sheet of parchment paper on top of each pastry sheet, then place another baking sheet on top to weigh it down. This prevents excessive puffing while maintaining the layers.
- Bake for 15-18 minutes until golden brown and crisp.
- Remove the top baking sheets and parchment paper, then dust the pastry sheets lightly with confectioners’ sugar.
- Return to the oven for 3-5 minutes until the sugar caramelizes slightly.
- Allow to cool completely on wire racks.
- Once cool, use a sharp knife and ruler to trim the edges and cut each sheet into three equal rectangles, creating a total of six identical pieces.
One mistake I often see is underbaking the pastry. You want it thoroughly crisp because it will soften slightly once assembled with the custard. A properly baked pastry should be deeply golden, not pale blonde.
Making the Vanilla Custard
- In a heavy-bottomed saucepan, heat the milk with the vanilla bean pod and scraped seeds until just below boiling point. Remove from heat and let steep for 15 minutes.
- Meanwhile, in a large bowl, whisk together the egg yolks and sugar until pale and slightly thickened.
- Sift the cornstarch and salt into the egg mixture and whisk until smooth.
- Remove the vanilla bean pod from the milk (rinse and dry it for future use in sugar or other recipes).
- Gradually pour about one-third of the hot milk into the egg mixture, whisking constantly to prevent curdling.
- Pour this mixture back into the remaining milk in the saucepan, whisking continuously.
- Return the saucepan to medium heat and cook, whisking constantly, until the custard thickens and begins to bubble. This should take about 3-4 minutes.
- Continue to cook for another 1-2 minutes after bubbling starts, still whisking constantly, to ensure the cornstarch is fully cooked.
- Remove from heat and immediately whisk in the butter pieces until melted and incorporated.
- Strain the custard through a fine-mesh sieve into a clean bowl to remove any lumps.
- Press a piece of plastic wrap directly onto the surface of the custard to prevent a skin from forming.
- Refrigerate until completely cool and thickened, at least 2 hours or overnight.
I’ve learned through trial and error that the key to silky-smooth custard is constant whisking and accurate temperature control. If you rush this process or let your attention wander, you risk ending up with scrambled eggs or lumpy custard. Patience is truly a virtue here.
Preparing the Glaze
- In a medium bowl, sift the confectioners’ sugar to remove any lumps.
- Gradually add warm water, 1 tablespoon at a time, whisking until you achieve a smooth, pourable consistency that’s not too runny.
- If desired, add vanilla extract for flavor.
- If creating a pattern, divide a small portion of the glaze into separate bowls and tint with food coloring as desired.
The glaze should be thick enough to coat the back of a spoon but thin enough to pour smoothly. Getting this consistency right takes practice, but it’s worth it for that professional finish.
Assembly
This is where your patience and precision pay off:
- Place one rectangle of puff pastry on your serving platter or cake board.
- Give your chilled custard a gentle whisk to loosen it if needed.
- Using an offset spatula, spread a generous layer of vanilla custard (about 1 cm thick) evenly over the pastry.
- Carefully place another rectangle of pastry on top, pressing down very gently.
- Repeat the layering process until you’ve used all six pastry rectangles, finishing with pastry on top.
- Refrigerate for 30 minutes to allow the layers to set.
- Pour the prepared glaze over the top layer, spreading it evenly with an offset spatula and allowing some to drip down the sides for a decorative effect.
- If creating a pattern, pipe thin lines of colored glaze across the white glaze, then drag a toothpick or skewer perpendicular to the lines to create a feathered effect.
- Return to the refrigerator for at least 1 hour to set completely before serving.
I’ve found that chilling between steps helps maintain the structural integrity of the cake. Don’t skip these refrigeration periods—they’re crucial for a clean slice and beautiful presentation.
Storing and Serving
For optimal texture, I recommend assembling this cake no more than 8 hours before serving. While it will keep in the refrigerator for up to 2 days, the pastry gradually absorbs moisture from the custard, softening over time.
To serve, use a sharp serrated knife to cut clean slices. Wipe the knife clean between cuts for the most pristine presentation. If you’re feeling extra fancy, dust the top with a little more confectioners’ sugar just before serving.
Variations to Try
One of the joys of mastering a classic recipe is experimenting with variations. Here are some of my favorite twists:
Flavor Variations for the Custard:
- Add 2 tablespoons of espresso powder to the milk for a coffee-flavored custard
- Infuse the milk with 2 tablespoons of matcha powder for a Japanese-inspired version
- Replace the vanilla bean with the zest of 2 lemons for a bright citrus version
- Add 2 tablespoons of Baileys Irish Cream to the finished custard for an adult version
Topping Variations:
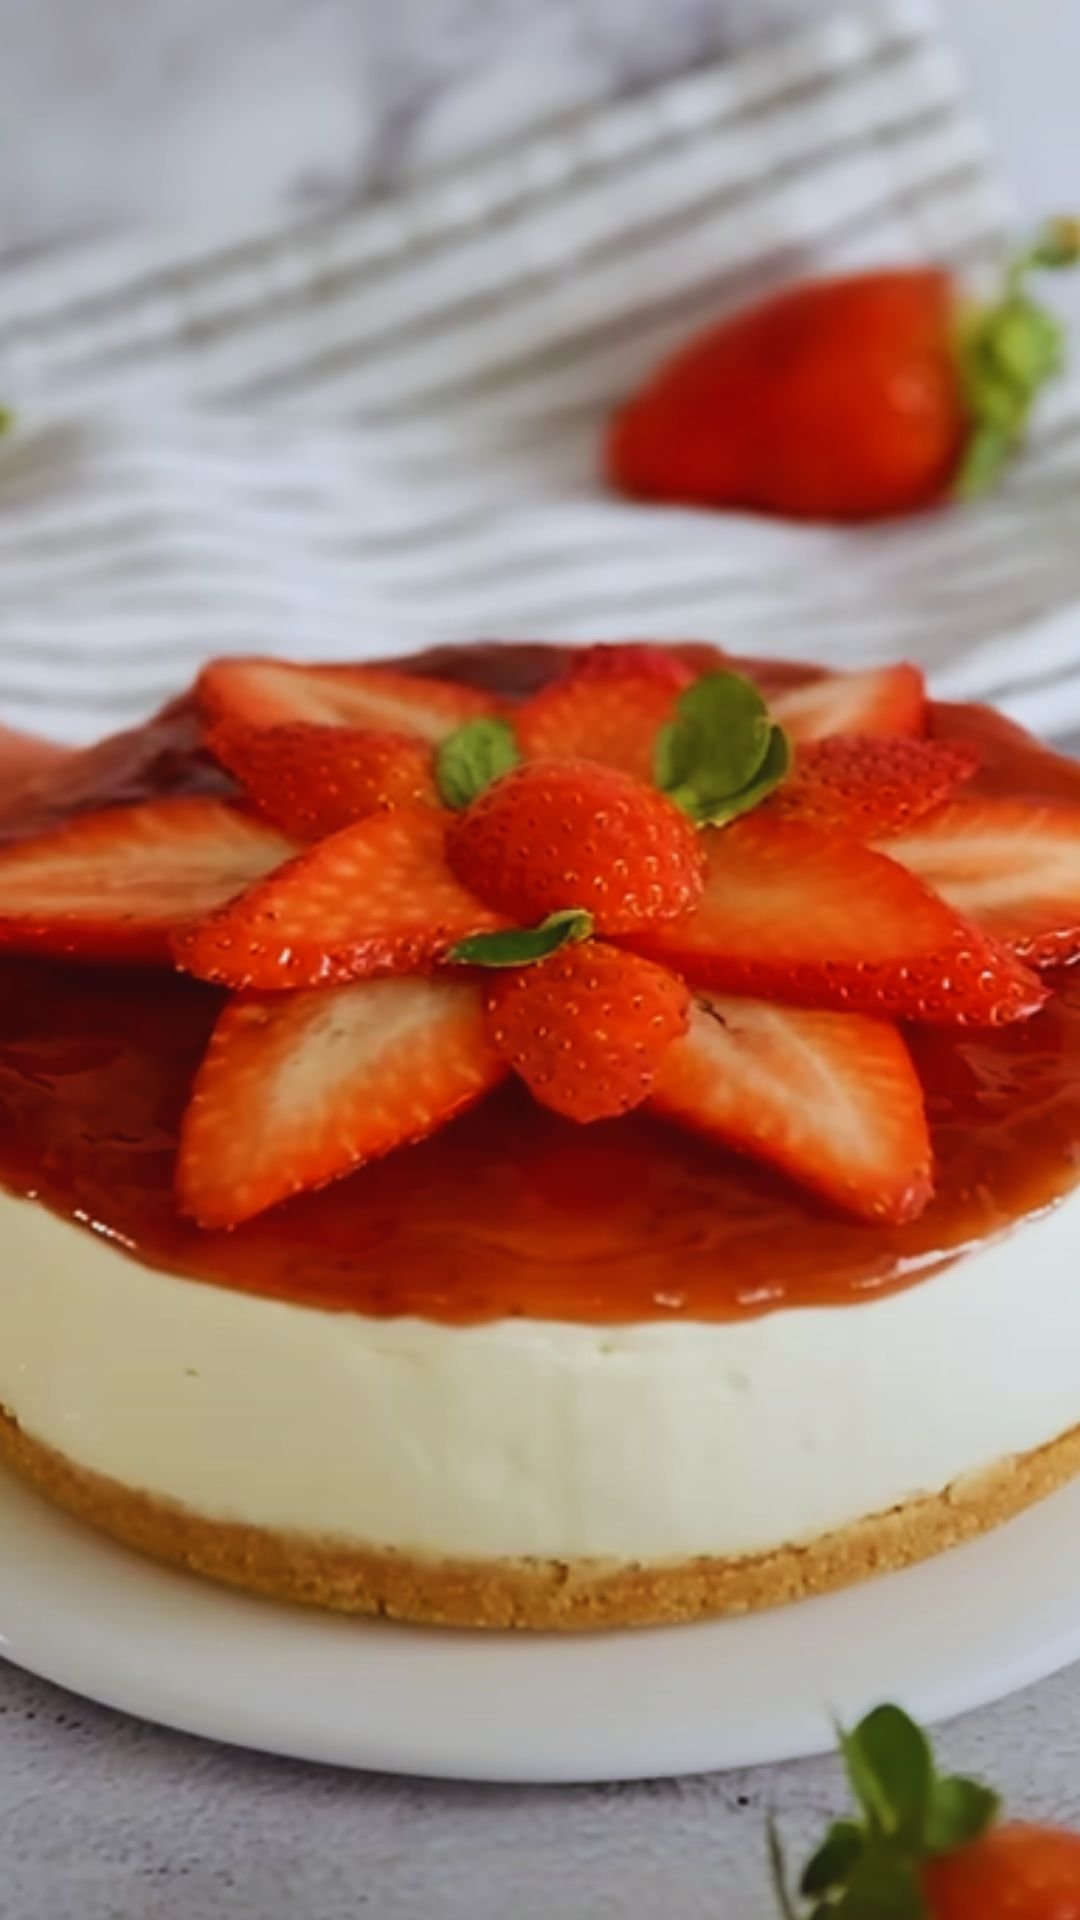
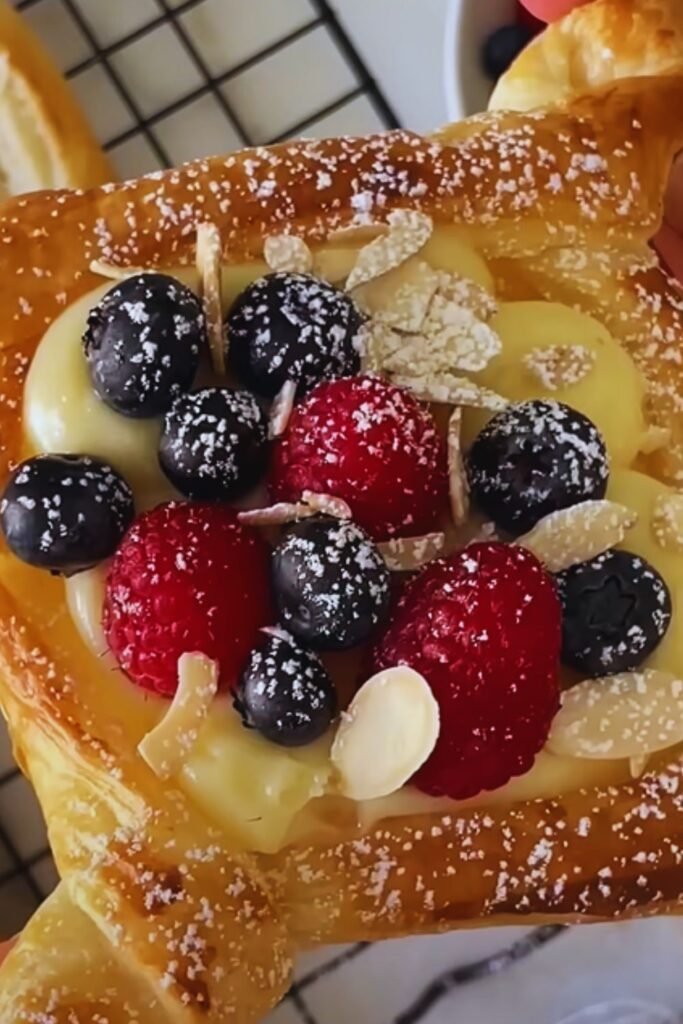
- Fresh seasonal berries arranged on top before glazing
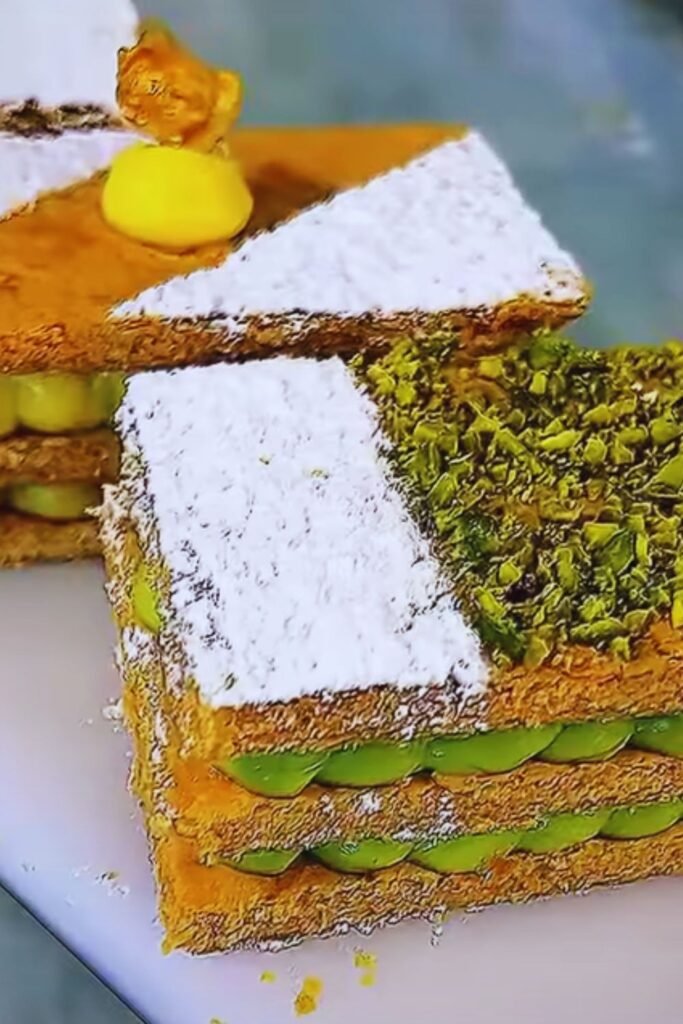
- Crushed pistachios sprinkled over the glaze while still wet
- A light dusting of cocoa powder for a tiramisu-inspired finish
- Toasted sliced almonds pressed into the sides
Nutritional Information
Understanding the nutritional content helps with portion control (though with something this delicious, that’s always challenging!). Here’s the approximate breakdown per serving (assuming 8 servings per cake):
| Nutrient | Amount per Serving |
|---|---|
| Calories | 475 kcal |
| Carbohydrates | 53g |
| Protein | 7g |
| Fat | 28g |
| Saturated Fat | 16g |
| Trans Fat | 0g |
| Cholesterol | 185mg |
| Sodium | 210mg |
| Fiber | 0.5g |
| Sugar | 30g |
Troubleshooting Common Issues
Even experienced bakers encounter challenges. Here are solutions to common problems:
| Issue | Likely Cause | Solution |
|---|---|---|
| Soggy pastry | Underbaking or assembling too far in advance | Bake pastry until deep golden; assemble closer to serving time |
| Lumpy custard | Cooking too quickly or not whisking enough | Strain custard; cook over medium-low heat with constant whisking |
| Custard too runny | Insufficient cooking time or cooling | Cook until bubbling for at least 1-2 minutes; chill thoroughly |
| Layers sliding | Too much custard or insufficient chilling | Use less custard between layers; chill thoroughly between steps |
| Uneven cutting | Dull knife or rushing | Use a sharp serrated knife; clean between cuts; chill well before cutting |
| Glaze too thick/thin | Incorrect water-to-sugar ratio | Add more water or sugar to adjust consistency |
Serving Suggestions
To elevate your Vanilla Custard Puff Pastry Cake to restaurant-quality presentation:
- Serve on individual dessert plates with a drizzle of high-quality caramel sauce
- Add a quenelle of lightly sweetened whipped cream on the side
- Include a scoop of vanilla bean ice cream for a hot-and-cold contrast
- Pair with fresh seasonal berries macerated in a touch of sugar and lemon juice
- Complement with a cup of espresso or a pot of Earl Grey tea
- For a refreshing non-alcoholic beverage pairing, try a sparkling water with a splash of elderflower cordial
Questions & Answers
Q: Can I make this dessert ahead of time for a party?
While you can prepare the components in advance, I recommend final assembly no more than 8 hours before serving. You can bake the puff pastry layers up to 2 days ahead (store in an airtight container at room temperature) and make the custard up to 3 days ahead (keep refrigerated with plastic wrap directly on the surface). Assemble and glaze on the day of serving for the best texture contrast.
Q: Is there a way to make this dessert less sweet?
Absolutely! You can reduce the sugar in the custard by up to 25% without affecting the texture. You can also make the glaze with less sugar or skip it entirely, opting instead for a simple dusting of confectioners’ sugar.
Q: My custard always seems to curdle. What am I doing wrong?
The most common culprit is adding hot milk to eggs too quickly or cooking the custard over too high heat. The key is to temper the eggs by slowly adding about a third of the hot milk while whisking continuously. Then, cook the mixture over medium-low heat, whisking constantly. If you notice any lumps forming, immediately remove from heat and whisk vigorously.
Q: How do I get clean slices when cutting the cake?
Chilling is crucial! Refrigerate the assembled cake for at least 2 hours before cutting. Use a long, sharp serrated knife, and dip it in hot water and wipe clean between each cut. Apply gentle pressure and use a sawing motion rather than pushing straight down.
Q: Can I use vanilla extract instead of a vanilla bean?
Yes, though the flavor won’t be quite as complex. If substituting, use 2 teaspoons of high-quality pure vanilla extract added after the custard is removed from heat. For a middle ground, vanilla bean paste (1 tablespoon) provides specks and flavor similar to a real bean.
Q: My puff pastry didn’t turn out flaky. What went wrong?
The most likely issues are either that your oven wasn’t hot enough or the pastry wasn’t chilled adequately before baking. Always preheat your oven thoroughly, and if your kitchen is warm, chill the rolled-out pastry for 15 minutes before baking. Also, make sure you’re using all-butter puff pastry for the best results.
Final Thoughts
Creating a Vanilla Custard Puff Pastry Cake requires patience and attention to detail, but the resulting dessert is well worth the effort. What I love most about this recipe is how it transforms simple ingredients into something truly spectacular. The contrast between the crisp pastry and silky custard creates a sensory experience that few other desserts can match.
Remember that perfection comes with practice. My first few attempts were hardly Instagram-worthy, but each try taught me something valuable. Embrace the process, learn from any mishaps, and soon you’ll be creating pastry shop-quality desserts in your own kitchen.
For me, the greatest joy comes from sharing these creations with friends and family. There’s something magical about watching someone take their first bite and seeing their eyes light up with pleasure. That moment makes every minute of preparation worthwhile.
I hope this detailed guide helps you create a Vanilla Custard Puff Pastry Cake that brings the same joy to your table. Happy baking!