There’s something irresistible about freshly made donuts, especially when they’re warm, chewy, and coated in cinnamon sugar. While American-style donuts have their charm, I’ve fallen head over heels for their Korean cousin – Kkwabaegi. These twisted treats have become my weekend baking obsession, and today I’m sharing everything I’ve learned about making them perfectly at home.
What Are Kkwabaegi?
Kkwabaegi (꽈배기), pronounced “kwah-bae-gi,” are traditional Korean twisted donuts that have been enjoyed for generations. Unlike American donuts with their perfectly round shape and hole in the middle, kkwabaegi feature a distinctive twisted rope pattern that gives them both visual appeal and an incredible texture.
These sweet treats are a staple in Korean bakeries and street food stalls, where they’re typically served warm with a generous coating of cinnamon sugar. What makes them particularly special is their chewy interior paired with a lightly crisp exterior – a textural contrast that keeps you coming back for more.
The History Behind Korean Twisted Donuts
My fascination with kkwabaegi began when I was exploring Korean street food culture. These twisted donuts have a rich history dating back several decades in Korea. While donuts themselves are not native to Korean cuisine, kkwabaegi represent the Korean adaptation of Western-style fried dough treats.
In the post-Korean War era, as American influences began to spread throughout South Korea, local bakers put their own spin on Western pastries. Kkwabaegi emerged as a distinctly Korean interpretation of fried dough – less sweet than their American counterparts but with a more complex texture and the signature twist that makes them instantly recognizable.
Today, these twisted treats are beloved across generations in Korea. School children enjoy them as after-school snacks, while adults pair them with coffee or tea for a perfect afternoon pick-me-up. The name itself is onomatopoeic, meant to mimic the sound of the dough being twisted together – a charming detail that adds to their cultural significance.
Why You’ll Love Making Kkwabaegi at Home
Before diving into the recipe, let me share why making kkwabaegi at home has become one of my favorite baking projects:
- Minimal ingredients: You likely have everything you need in your pantry already
- Therapeutic process: The kneading and twisting is surprisingly relaxing
- Customizable sweetness: Control the sugar level to suit your taste
- Impressive results: They look professional with minimal effort
- Family-friendly activity: Kids love helping with the twisting process
- Irresistible aroma: Your kitchen will smell amazing
Essential Ingredients for Authentic Kkwabaegi
The beauty of kkwabaegi lies in their simplicity. You’ll need just a handful of basic ingredients to create these delicious treats:
| Ingredient | Amount | Notes |
|---|---|---|
| All-purpose flour | 300g (about 2½ cups) | For best results, use bread flour or a mix of all-purpose and bread flour for extra chewiness |
| Milk | 120ml (½ cup) | Whole milk produces the richest flavor, but any milk works |
| Granulated sugar | 45g (¼ cup) | For the dough – adjust to taste |
| Active dry yeast | 7g (2¼ teaspoons) | Instant yeast can also be used |
| Salt | 3g (½ teaspoon) | Enhances flavor and strengthens dough structure |
| Unsalted butter | 30g (2 tablespoons) | Softened at room temperature |
| Vegetable oil | 1 liter (4 cups) | For frying – neutral oils like canola or corn oil work best |
| Cinnamon sugar | 100g (½ cup) | Mix 100g granulated sugar with 1-2 tablespoons ground cinnamon |
While these basic ingredients will produce delicious kkwabaegi, there are a few variations worth exploring as your confidence grows:
| Variation | Key Additional Ingredients | Result |
|---|---|---|
| Traditional | As listed above | Classic chewy texture with cinnamon sugar coating |
| Extra Chewy | Add 1 tablespoon milk powder | Enhanced chewiness and slight milky flavor |
| Honey Glazed | Replace cinnamon sugar with honey glaze (½ cup honey + 2 tablespoons butter) | Glossy appearance with floral sweetness |
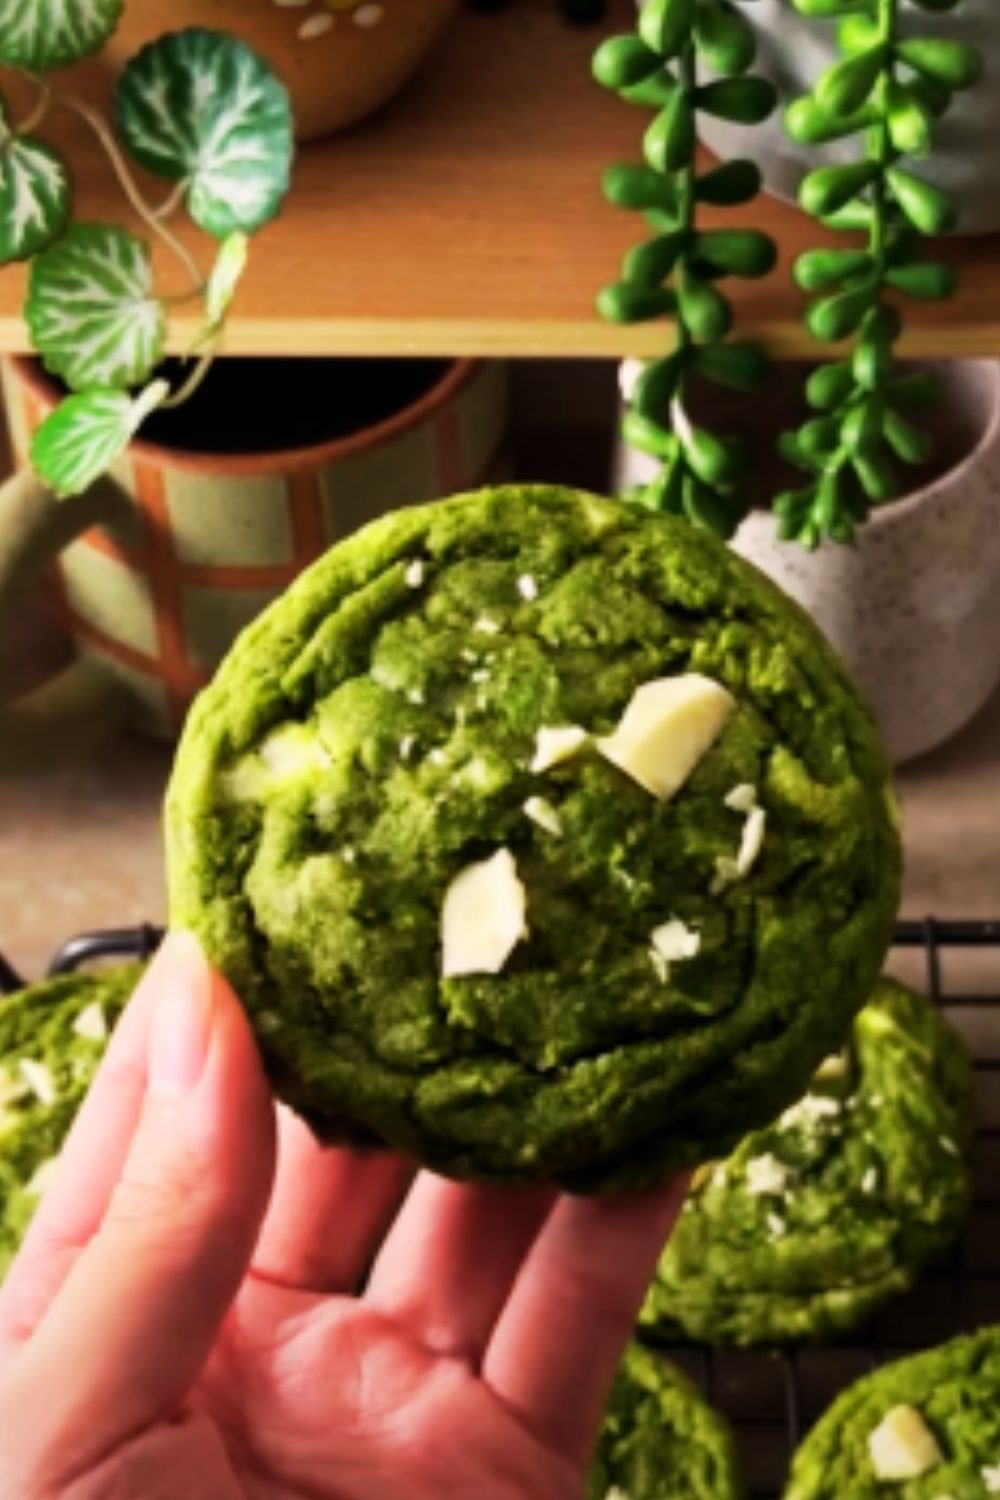
| Matcha | Add 1-2 tablespoons matcha powder to dough | Beautiful green color with subtle tea flavor |
| Sweet Potato | Replace 80g flour with sweet potato powder or puréed cooked sweet potato | Natural sweetness with vibrant purple color (if using purple sweet potato) |
Equipment You’ll Need
While kkwabaegi doesn’t require specialized baking equipment, having these tools ready will make the process smoother:
- Large mixing bowl: For preparing and proofing the dough
- Measuring tools: Digital kitchen scale (preferred for accuracy) or measuring cups/spoons
- Wooden spoon or spatula: For mixing ingredients
- Clean work surface: For kneading and shaping dough
- Heavy-bottomed pot: For frying (a Dutch oven works perfectly)
- Thermometer: To monitor oil temperature (ideally 350°F/175°C)
- Slotted spoon or spider strainer: For removing fried donuts from oil
- Paper towels: For draining excess oil
- Shallow bowl: For the cinnamon sugar coating

Step-by-Step Kkwabaegi Recipe
Now let’s dive into the process of making these delicious twisted treats. I’ve broken it down into manageable steps to ensure your success.
Step 1: Activate the Yeast
- Warm the milk to about 110°F (43°C) – it should feel warm but not hot to the touch
- Add 1 teaspoon of the sugar to the warm milk
- Sprinkle the yeast over the milk and let it sit for 5-10 minutes until foamy
- If the yeast doesn’t foam, it may be inactive – start over with fresh yeast
Step 2: Prepare the Dough
- In a large bowl, combine the flour, remaining sugar, and salt
- Make a well in the center and pour in the activated yeast mixture
- Begin mixing with a wooden spoon until roughly combined
- Add the softened butter and continue mixing until incorporated
- Transfer the dough to a lightly floured surface and knead for 8-10 minutes until smooth and elastic
- The dough should be slightly tacky but not sticky – add a tablespoon of flour if too wet or a teaspoon of milk if too dry
Step 3: First Proof
- Place the dough in a lightly oiled bowl and cover with plastic wrap or a damp cloth
- Let it rise in a warm place for 1-1.5 hours, or until doubled in size
- The ideal proofing temperature is around 75-80°F (24-27°C)
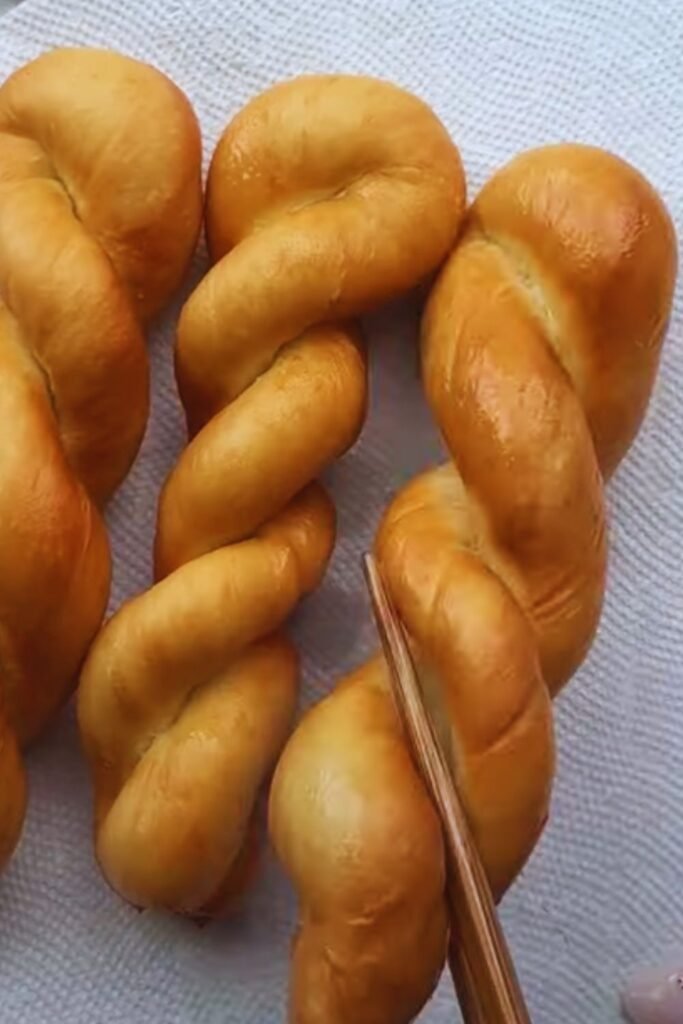
Step 4: Shape the Kkwabaegi
- Once doubled, punch down the dough to release air bubbles
- Transfer to a lightly floured surface and divide into 8 equal pieces (about 60-65g each)
- Roll each piece into a ball, then cover with a cloth and let rest for 10 minutes to relax the gluten
- Take one ball and roll it into a rope about 12 inches (30cm) long
- Fold the rope in half, then twist the two strands around each other 3-4 times
- Pinch the ends together firmly to seal and prevent unraveling during frying
- Place the twisted dough on a parchment-lined baking sheet and repeat with remaining dough
Step 5: Second Proof
- Cover the shaped kkwabaegi with a clean kitchen towel
- Let them rise for another 30-40 minutes until puffy
- They should increase in size by about 50% (not fully doubled)
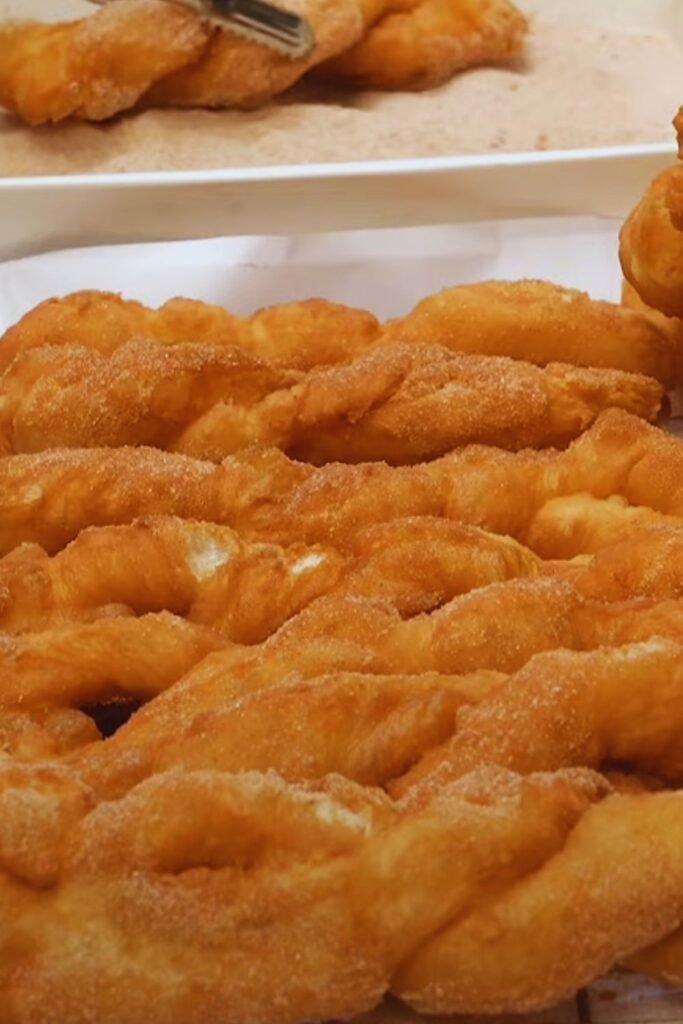
Step 6: Fry the Kkwabaegi
- While the donuts are on their second rise, prepare for frying
- Heat oil in a heavy-bottomed pot to 350°F (175°C)
- Prepare a plate lined with paper towels for draining
- Mix cinnamon and sugar in a shallow bowl for coating
- Carefully lower 2-3 kkwabaegi into the hot oil, being careful not to crowd the pot
- Fry for about 1-2 minutes per side until golden brown
- Use a slotted spoon to transfer to paper towels to drain excess oil
Step 7: Apply the Finish
- While still warm (but not too hot), roll each fried kkwabaegi in cinnamon sugar
- Coat evenly on all sides for the perfect sweet finish
- Serve immediately for the best texture and flavor
Troubleshooting Common Kkwabaegi Issues
Even experienced bakers encounter challenges when making kkwabaegi for the first time. Here’s how I’ve solved the most common problems:
| Problem | Possible Cause | Solution |
|---|---|---|
| Dough is too sticky | Too much liquid or not enough flour | Add flour, 1 tablespoon at a time, while kneading until it reaches a tacky but workable consistency |
| Dough is too dry | Too much flour or not enough liquid | Add milk, 1 teaspoon at a time, while kneading until dough is smooth and pliable |
| Dough won’t rise | Inactive yeast, too cold environment, or insufficient time | Use fresh yeast, find a warmer spot for proofing (top of refrigerator works well), or allow more time for rising |
| Kkwabaegi untwist during frying | Ends not pinched firmly enough | Pinch and roll ends together more securely before the second proof |
| Donuts too greasy | Oil not hot enough or improper draining | Make sure oil is at 350°F (175°C) and drain thoroughly on paper towels |
| Donuts too dark | Oil too hot | Lower heat and maintain temperature at 350°F (175°C), use a thermometer |
| Donuts raw in center | Fried too quickly at too high a temperature | Lower the heat slightly and fry for longer at a slightly lower temperature |
| Cinnamon sugar doesn’t stick | Surface too cool or too much oil | Coat while still warm and make sure to drain properly |
Creative Variations to Try
While traditional cinnamon sugar kkwabaegi are divine, don’t be afraid to experiment with these creative variations:
Sweet Variations
- Matcha Green Tea: Add 1-2 tablespoons of matcha powder to the dough and coat with vanilla sugar
- Chocolate Dipped: After cooling, dip one side in melted chocolate and sprinkle with chopped nuts
- Maple Glazed: Mix maple syrup with powdered sugar for a Canadian-inspired glaze
- Korean Injeolmi Style: Coat with sweet roasted soybean powder (kinako) instead of cinnamon sugar
- Cardamom Spice: Replace cinnamon with ground cardamom for a Scandinavian twist
Savory Variations
- Garlic Parmesan: Omit sugar in dough, add garlic powder, and coat with grated parmesan while warm
- Everything Bagel: Coat with everything bagel seasoning for a savory breakfast treat
- Korean Cheese: Mix in shredded mozzarella cheese to the dough for a sweet-savory combination
- Herbs & Sea Salt: Add chopped herbs to dough and finish with flaky sea salt
How to Store and Reheat Kkwabaegi
Like most fried treats, kkwabaegi are best enjoyed fresh. However, if you have leftovers or want to make them ahead:
| Storage Method | How to Do It | Maximum Freshness |
|---|---|---|
| Room Temperature | Store in airtight container lined with paper towels | 1-2 days |
| Refrigerator | Place in airtight container separated by parchment paper | 3-4 days |
| Freezer | Freeze individually on baking sheet, then transfer to freezer bag | 1-2 months |
For reheating, I’ve found these methods work best:
- Microwave: 10-15 seconds (quick but may become slightly chewy)
- Air Fryer: 2-3 minutes at 350°F (180°C) (best for restoring crispness)
- Conventional Oven: 5 minutes at 350°F (180°C) wrapped in foil
If frozen, thaw in the refrigerator overnight before reheating.
Serving Suggestions
Kkwabaegi are versatile treats that can be enjoyed in various ways:
- Serve warm with a hot cup of barley tea (boricha) for an authentic Korean pairing
- Dip in sweetened condensed milk for an extra indulgent treat
- Create an Asian-inspired donut board with kkwabaegi, mochi donuts, and Chinese youtiao
- Serve alongside fresh fruit for a balanced breakfast
- Crumble over vanilla ice cream for a creative dessert
- Pack in lunchboxes for a special midday surprise
Nutritional Information
While kkwabaegi are undeniably a treat, here’s an approximate nutritional breakdown per serving:
| Nutrient | Amount per Serving (1 donut) |
|---|---|
| Calories | 220-250 kcal |
| Total Fat | 10-12g |
| Saturated Fat | 2-3g |
| Cholesterol | 5-10mg |
| Sodium | 150-170mg |
| Total Carbohydrates | 30-32g |
| Dietary Fiber | 1g |
| Sugars | 8-10g |
| Protein | 3-4g |
*Values are approximate and may vary based on exact ingredients and portion sizes.
Cultural Context and Serving Occasions
In Korea, kkwabaegi are enjoyed in various settings:
- School Snack: Children often enjoy them as after-school treats from street vendors
- Market Food: A popular item at traditional markets (sijang)
- Coffee Pairing: Served alongside morning coffee in bakeries
- Holiday Treat: Made at home during special celebrations
- Nostalgic Comfort Food: Reminds many Koreans of their childhood
While Americans might reserve donuts primarily for breakfast, Koreans enjoy kkwabaegi throughout the day, demonstrating their versatility and beloved status in Korean food culture.
Q&A Section
Q: Can I make kkwabaegi dough ahead of time?
Yes! You can prepare the dough and let it rise in the refrigerator overnight (first proof). The cold temperature slows yeast activity. Remove from the refrigerator about 30 minutes before shaping, then proceed with the second proof and frying. Some bakers even prefer this method as it develops more flavor.
Q: Why do my kkwabaegi deflate after frying?
This typically happens when the dough is overproofed during the second rise. The gluten structure becomes too weak to support the expansion during frying, causing collapse. Try reducing your second proof time by 5-10 minutes, especially in warm kitchens.
Q: Can I air fry kkwabaegi instead of deep frying?
While traditional kkwabaegi are deep-fried, you can adapt the recipe for air frying. Brush the twisted dough with melted butter, air fry at 350°F (175°C) for about 8 minutes, then brush with more butter and roll in cinnamon sugar. The texture will be different—more bread-like than traditional—but still delicious.
Q: How can I make these donuts less sweet?
Korean kkwabaegi are traditionally less sweet than American donuts. You can reduce the sugar in the dough to as little as 2 tablespoons without affecting the structure. For the coating, use less sugar or try a light dusting of powdered sugar instead of cinnamon sugar.
Q: Are there any egg-free variations of kkwabaegi?
Good news! Traditional kkwabaegi recipes don’t use eggs at all, making them naturally egg-free. This is one of the characteristics that distinguishes them from many Western donut recipes.
Q: What’s the difference between kkwabaegi and churros?
While both are fried dough treats coated in sugar, they’re quite different. Kkwabaegi use a yeasted dough similar to bread, giving them a chewy texture, while churros use choux pastry, resulting in a crisp exterior and soft, sometimes slightly hollow interior. The twisting technique and flavor profile are also distinct.
Q: My kkwabaegi are tough instead of chewy. What went wrong?
Toughness usually comes from overworking the dough or using too much flour. Handle the dough gently after the first rise, and make sure to measure flour accurately, preferably using a kitchen scale for precision.
Q: Can I make mini kkwabaegi for a party?
Absolutely! Divide the dough into 16 equal portions instead of 8. The frying time will be shorter (about 1 minute per side), so watch them carefully. Mini kkwabaegi make perfect bite-sized treats for parties or gatherings.
Final Thoughts
Making kkwabaegi at home has become one of my favorite weekend traditions. There’s something deeply satisfying about transforming simple ingredients into these twisted delights that connect us to Korean culinary traditions. While they require some patience and practice to master, the results are well worth the effort.
I encourage you to embrace the process, from the meditative kneading of the dough to the exciting moment when the twisted ropes transform in hot oil. Even if your first batch isn’t perfect, they’ll still be delicious – and each time you make them, you’ll refine your technique.
What makes kkwabaegi special isn’t just their unique twisted shape or delicious taste – it’s the care that goes into making them and the joy they bring when shared with others. Whether you’re exploring Korean cuisine for the first time or looking to reconnect with familiar flavors, these twisted donuts offer a delicious entry point into a rich culinary tradition.
So gather your ingredients, clear your counter, and prepare for a baking adventure that engages all your senses. Your kitchen will soon be filled with the irresistible aroma of freshly fried dough and warm cinnamon – a sure sign that something wonderful is about to be enjoyed.