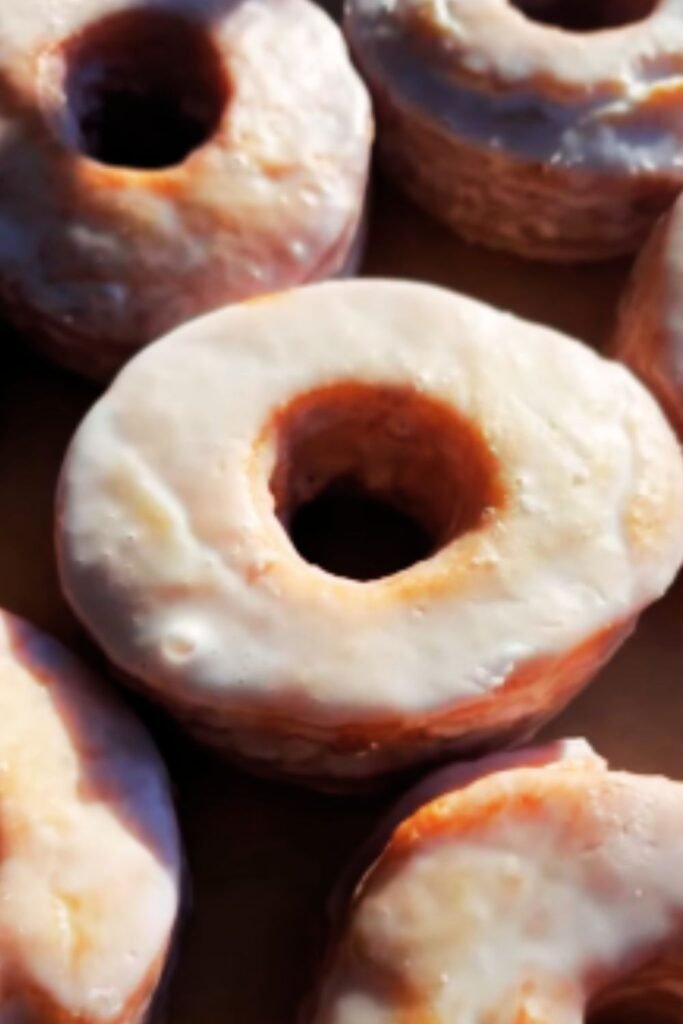
There’s something magical about biting into a freshly made old-fashioned sour cream doughnut. That characteristic cracked surface, tender cake-like interior, and sweet glaze that seeps into every crevice—it’s a nostalgic experience that brings me back to weekend mornings at my grandparents’ house. Today, I’m sharing my perfected recipe for these beloved treats that has taken years to develop to absolute perfection.
Unlike yeast doughnuts, these old-fashioned beauties rely on chemical leaveners (baking powder and baking soda) for their rise and their distinctive cracked exterior. The addition of sour cream creates an incomparably tender crumb and adds a subtle tanginess that balances the sweetness of the glaze. They’re crispy on the outside, moist on the inside, and absolutely irresistible when fresh.
What Makes These Doughnuts Special
These aren’t just any doughnuts. Old-fashioned sour cream doughnuts have stood the test of time for good reason:
- They’re easier to make than yeast doughnuts (no waiting for dough to rise)
- The cracked surface creates more area for glaze to cling to
- The tangy sour cream balances the sweetness perfectly
- They have an incredible shelf life compared to other homemade doughnuts
- The texture is simultaneously crisp on the outside and tender inside
Essential Ingredients for Perfect Old-Fashioned Doughnuts
The beauty of these doughnuts lies in their simplicity. You’ll need basic pantry staples, but each ingredient plays a crucial role:
| Ingredient | Amount | Purpose |
|---|---|---|
| All-purpose flour | 2¼ cups (280g) | Provides structure to the doughnuts |
| Granulated sugar | ¾ cup (150g) | Sweetens the dough and aids in browning |
| Baking powder | 1½ teaspoons | Primary leavening agent |
| Baking soda | ¼ teaspoon | Helps with rise and browning |
| Salt | ½ teaspoon | Enhances flavor |
| Freshly grated nutmeg | ¼ teaspoon | Adds traditional doughnut flavor |
| Full-fat sour cream | ¾ cup (180g) | Provides moisture, tenderness, and tang |
| Large eggs | 2 | Binds ingredients and adds structure |
| Unsalted butter, melted | 2 tablespoons (28g) | Adds richness and flavor |
| Vanilla extract | 1½ teaspoons | Provides aromatic flavor |
| Vegetable oil | 2 quarts (for frying) | Frying medium |
For the Classic Vanilla Glaze:
| Ingredient | Amount | Purpose |
|---|---|---|
| Powdered sugar | 3½ cups (420g) | Base of the glaze |
| Whole milk | ⅓ cup (80ml) | Creates the right consistency |
| Vanilla extract | 1 teaspoon | Adds flavor |
| Pinch of salt | Just a pinch | Balances sweetness |
Essential Equipment
Before you begin, make sure you have these tools ready:
- Stand mixer with paddle attachment (or hand mixer)
- Large Dutch oven or heavy-bottomed pot
- Deep-fry thermometer
- Baking sheets lined with parchment paper
- Rolling pin
- 3-inch doughnut cutter (or two round cutters: 3-inch and 1-inch)
- Wire cooling racks
- Slotted spoon or spider strainer
- Paper towels
Step-by-Step Instructions
I’ve perfected this method over countless batches, so follow these steps carefully for the best results.
Making the Dough
- Combine dry ingredients: In a medium bowl, whisk together the flour, baking powder, baking soda, salt, and nutmeg until well combined.
- Mix wet ingredients: In the bowl of a stand mixer fitted with the paddle attachment, beat the sugar and eggs on medium speed until light and thickened, about 2 minutes.
- Add fats: Reduce the speed to low and add the melted butter and vanilla extract. Mix until combined.
- Incorporate sour cream: Still on low speed, add the sour cream and mix until fully incorporated. The mixture will look slightly curdled, but don’t worry—this is normal!
- Add dry ingredients: Gradually add the dry ingredients, mixing just until a soft, sticky dough forms. Be careful not to overmix, as this can make your doughnuts tough.
- Chill the dough: Transfer the dough to a clean bowl, cover with plastic wrap, and refrigerate for at least 1 hour, or up to overnight. This chilling step is absolutely crucial—it firms up the dough and develops the flavors.
Rolling and Cutting
- Prepare your workspace: Generously flour your work surface, as this dough is sticky. Line two baking sheets with parchment paper.
- Roll the dough: Remove half the dough from the refrigerator (keeping the rest chilled). Roll it out on the floured surface to about ½-inch thickness. If at any point the dough becomes too soft to work with, return it to the refrigerator for 15 minutes.
- Cut the doughnuts: Using a floured 3-inch doughnut cutter, cut out as many doughnuts as possible. If you don’t have a doughnut cutter, use a 3-inch round cutter for the outer circle and a 1-inch cutter for the hole. Transfer the cut doughnuts and holes to the prepared baking sheets.
- Re-roll scraps: Gather the scraps, briefly knead them together, and re-roll. Cut additional doughnuts. Continue until all dough is used.
- Chill again: Place the cut doughnuts in the refrigerator for 15-30 minutes while you heat the oil. This helps them maintain their shape during frying.
Frying the Doughnuts
- Heat the oil: In a large Dutch oven or heavy-bottomed pot, heat vegetable oil to 325°F (165°C). Use a deep-fry thermometer to monitor the temperature. The oil should be at least 2 inches deep.
- Prepare for frying: Set up a cooling rack over a baking sheet near your frying station. Have paper towels nearby.
- Fry in batches: Carefully lower 2-3 doughnuts into the hot oil, being careful not to overcrowd the pot. The temperature will drop slightly when you add the doughnuts, so adjust the heat as needed to maintain around 325°F.
- Watch for cracks: Fry the doughnuts for about 2 minutes on the first side, until golden brown and cracks begin to form on the surface. This cracking is characteristic of old-fashioned doughnuts!
- Flip once: Using a slotted spoon or spider, carefully flip the doughnuts and fry for an additional 1-2 minutes, until both sides are golden brown.
- Drain: Remove the doughnuts with a slotted spoon and place them on paper towels briefly to absorb excess oil, then transfer to the wire rack.
- Fry the holes: Doughnut holes will cook much faster, requiring only about 1 minute total. Keep a close eye on them!
- Monitor oil temperature: Allow the oil to return to 325°F between batches, and continue frying the remaining doughnuts and holes.

Making the Glaze
- Prepare while doughnuts cool: In a medium bowl, whisk together the powdered sugar, milk, vanilla extract, and salt until smooth. The glaze should be thick but pourable. If it’s too thick, add a bit more milk, 1 teaspoon at a time. If it’s too thin, add more powdered sugar.
- Test consistency: The glaze should coat the back of a spoon and slowly drip off. This ensures it will adhere properly to the doughnuts.
Glazing the Doughnuts
- Time it right: Glaze the doughnuts while they’re still warm (but not hot)—about 5 minutes after frying. This helps the glaze penetrate those beautiful cracks.
- Dip method: Hold each doughnut by its sides and dip the top half into the glaze, allowing excess to drip back into the bowl.
- Set to dry: Place the glazed doughnuts back on the wire rack, glazed side up, and allow the glaze to set for at least 10 minutes.
- Double-dip option: For an extra sweet treat, you can double-dip the doughnuts in the glaze after the first layer has set for about 5 minutes.
- Glaze the holes: Toss the doughnut holes directly into the glaze and remove with a fork, allowing excess glaze to drip off before returning them to the rack.
Flavor Variations
While the classic vanilla glaze is traditional, you can easily customize these doughnuts:
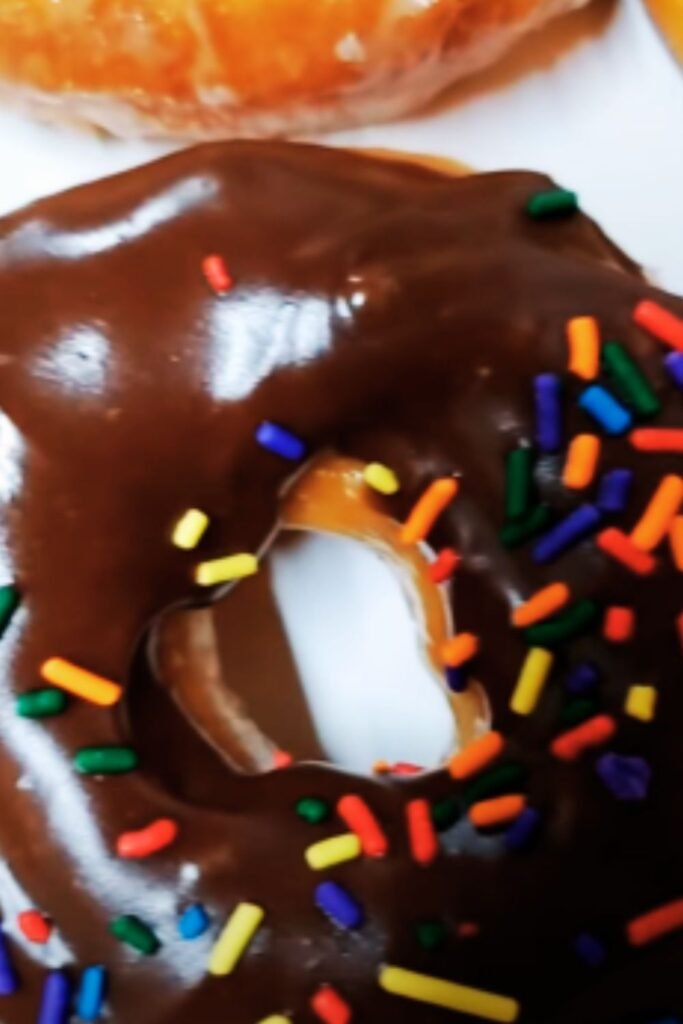
Chocolate Glaze
- 2 cups powdered sugar
- ¼ cup unsweetened cocoa powder
- ¼ cup milk
- 1 teaspoon vanilla extract
- Pinch of salt
Maple Glaze
- 3 cups powdered sugar
- ⅓ cup pure maple syrup (not pancake syrup)
- 2 tablespoons milk
- ¼ teaspoon maple extract (optional, for stronger flavor)
Cinnamon Sugar Coating
Instead of glazing, toss warm doughnuts in a mixture of:
- 1 cup granulated sugar
- 2 tablespoons ground cinnamon
Lemon Glaze
- 3 cups powdered sugar
- 3 tablespoons fresh lemon juice
- 1 tablespoon lemon zest
- 2 tablespoons milk
Storage and Serving Suggestions
Old-fashioned doughnuts are best enjoyed the day they’re made, but they do hold up better than yeast doughnuts. Here’s how to store them:
| Storage Method | Duration | Notes |
|---|---|---|
| Room temperature | Up to 2 days | Store in an airtight container |
| Refrigerator | Up to 5 days | Will firm up; bring to room temperature before eating |
| Freezer | Up to 3 months | Freeze unglazed, thaw and glaze before serving |
Perfect Pairings:
- Hot coffee (the bitterness complements the sweet doughnut perfectly)
- Cold milk (classic for a reason!)
- Hot chocolate (for an extra indulgent treat)
- Black tea or chai (the spices work wonderfully with the doughnut’s nutmeg notes)
- Fresh fruit (for balance)
Troubleshooting Tips
Even experienced bakers run into issues sometimes. Here are solutions to common problems:
Doughnuts absorbing too much oil:
- Oil temperature too low (maintain 325°F)
- Dough not chilled enough before frying
- Doughnuts fried too long
Doughnuts not cracking properly:
- Oil temperature too high
- Dough rolled too thin
- Not enough leavening agents
Tough, chewy texture:
- Dough overmixed
- Too much flour incorporated during rolling
- Fried at too high a temperature
Glaze not setting properly:
- Doughnuts were too hot when glazed
- Glaze too thin
- Humid environment (may need more powdered sugar)
Why This Recipe Works
After experimenting with countless variations, I’ve found that this specific combination of ingredients and techniques yields the perfect old-fashioned doughnut. Here’s why:
- The fat ratio: The combination of sour cream and butter provides the perfect amount of richness without making the doughnuts greasy.
- The temperature: Frying at 325°F rather than the typical 350-375°F gives the doughnuts time to develop those characteristic cracks while cooking through properly.
- Double chilling: Chilling both the mixed dough and the cut doughnuts ensures they hold their shape and develop the right texture during frying.
- The nutmeg: Just a quarter teaspoon of freshly grated nutmeg gives these doughnuts that authentic “doughnut shop” flavor that’s instantly recognizable.
- The acid balance: The combination of sour cream and baking soda creates the perfect environment for the doughnuts to rise and crack beautifully.
Q&A Section
Q: Can I make the dough ahead of time? A: Absolutely! The dough can be refrigerated for up to 24 hours before rolling and cutting. In fact, an overnight rest can enhance the flavor.
Q: Can I bake these instead of frying them? A: While you technically can bake them at 350°F for about 15 minutes, they won’t develop the characteristic cracks or texture that makes old-fashioned doughnuts special. The fried version is truly superior for this particular style.
Q: Why did my doughnuts puff up too much and lose their hole? A: This usually happens when the dough is too warm when it hits the oil. Make sure to chill the cut doughnuts before frying, and maintain the correct oil temperature.
Q: Can I use Greek yogurt instead of sour cream? A: Yes, full-fat Greek yogurt makes a good substitute, though the flavor will be slightly different. Avoid using low-fat alternatives as they’ll affect the texture.
Q: Why do we need to fry at a lower temperature than other doughnuts? A: The 325°F frying temperature allows the doughnuts to cook more slowly, giving them time to expand and create those beautiful cracks before the exterior browns too much.
Q: How can I tell when the oil is at the right temperature without a thermometer? A: Drop a small piece of dough into the oil. It should bubble around the edges and float to the surface within about 30 seconds. If it browns immediately, the oil is too hot. If it just sits there without much bubbling, the oil is too cool.
Q: Can I freeze the glazed doughnuts? A: It’s better to freeze them unglazed. After thawing at room temperature, warm them slightly in a 300°F oven for 3-5 minutes, then glaze them fresh.
Q: Why is my glaze too runny? A: You may need more powdered sugar. Add it 1/4 cup at a time until you reach the desired consistency. Remember that the glaze will set firmer than it appears when wet.
Q: Does the type of oil matter? A: Yes! Use a neutral oil with a high smoke point like vegetable, canola, or peanut oil. Olive oil or butter would impart too much flavor and aren’t suitable for deep frying.
Q: My doughnuts are oily inside. What went wrong? A: This usually indicates that the oil temperature was too low, causing the doughnuts to absorb oil rather than cook properly. Always verify your thermometer is accurate and maintain that 325°F temperature.
Final Thoughts
Making old-fashioned sour cream doughnuts at home might seem intimidating at first, but the process becomes quite straightforward once you’ve done it a few times. The results are well worth the effort—there’s simply nothing like a homemade doughnut fresh from the fryer, still warm and perfectly glazed.
What I love most about this recipe is how it connects me to baking traditions of the past. These aren’t trendy, Instagram-worthy confections with outlandish toppings and colors; they’re classic American doughnuts that have stood the test of time because they’re simply delicious.
So pull out your Dutch oven, grab some fresh sour cream, and prepare to create a batch of the most delectable old-fashioned doughnuts you’ve ever tasted. Your family will thank you, your friends will be impressed, and you’ll have mastered a classic that never goes out of style.
Happy frying!