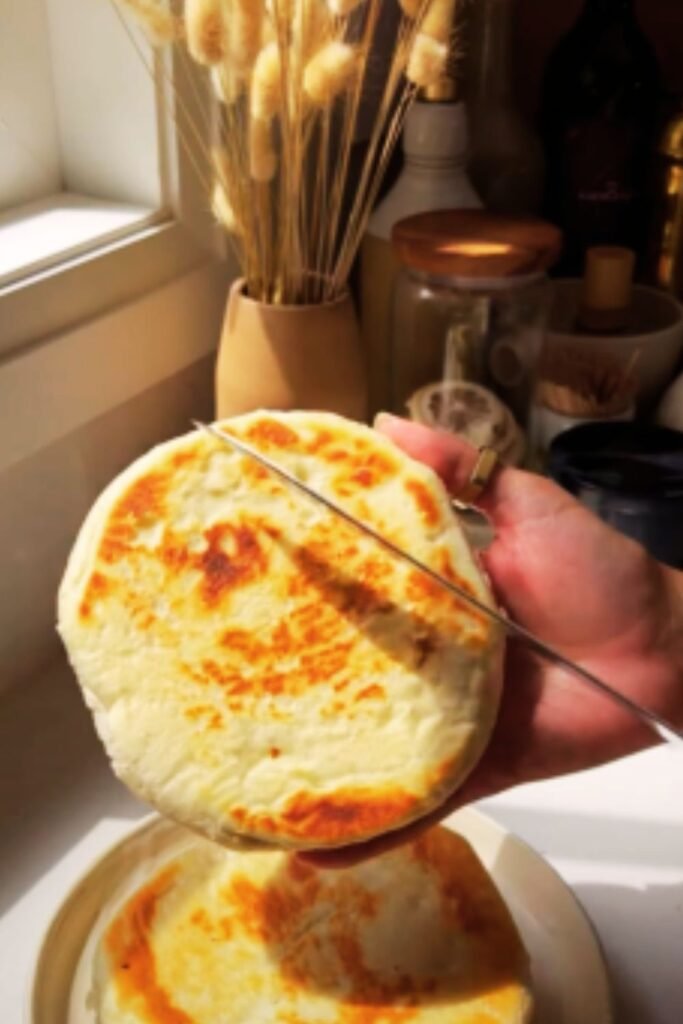
Have you ever bitten into a homemade pita bread that’s so fluffy and cloud-like it practically melts in your mouth? That magical pocket that forms during baking, ready to be stuffed with your favorite fillings? I’m about to share my foolproof method for creating the most delightful, pillowy pita bread you’ve ever tasted—right in your own kitchen.
After years of trial and error (and many flat, pocket-less attempts), I’ve perfected a technique that delivers consistently fluffy results. The secret lies in understanding the science behind the pocket formation and following a few crucial steps that many recipes overlook.
The Magic of Pita Bread
Pita bread isn’t just any flatbread. This ancient staple of Middle Eastern cuisine has been nourishing people for thousands of years, and for good reason. The distinctive pocket that forms during baking makes it incredibly versatile—perfect for sandwiches, dipping, or scooping up delicious mezze spreads.
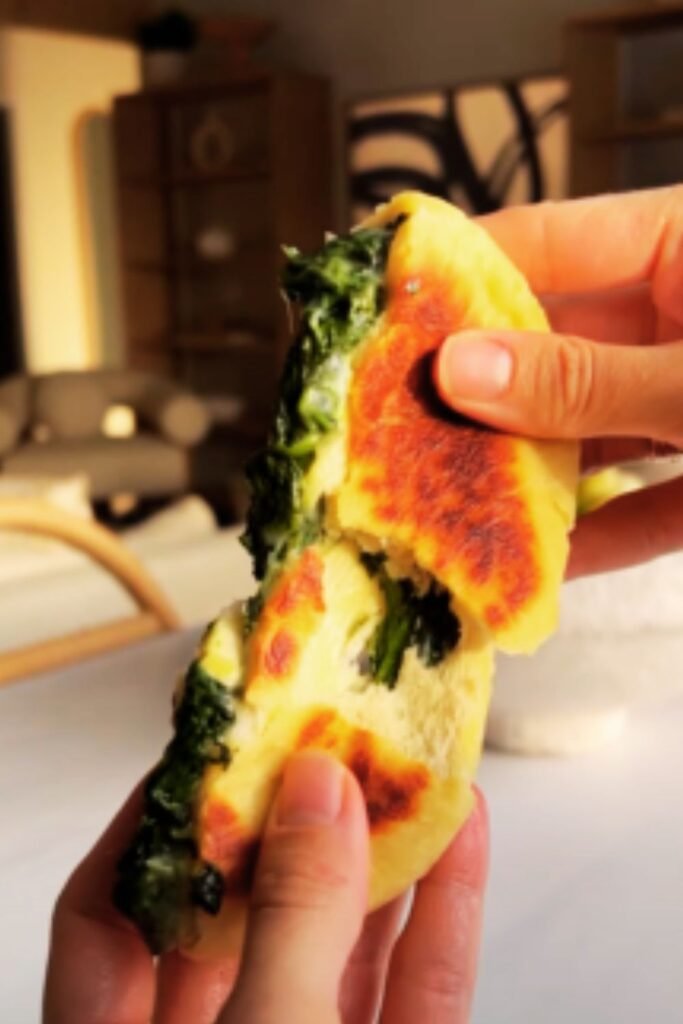
What makes pita truly special is its dual personality: crisp on the outside, tender and airy within. This contrast creates a sensory experience that few other breads can match. The pocket isn’t just functional—it’s a culinary marvel that happens when moisture in the dough rapidly turns to steam in a hot oven, causing the two layers to separate dramatically.
The Cultural Significance
Pita (also called khubz, Arabic bread, or Syrian bread depending on the region) holds an honored place at tables across the Middle East, Mediterranean, and beyond. In many cultures, breaking bread together is the ultimate symbol of hospitality and community. Pita serves as both utensil and food, bringing people together around shared meals.
In my kitchen, making pita connects me to this rich tradition. There’s something deeply satisfying about creating this ancient bread using methods that haven’t changed much in centuries.
Essential Ingredients for Perfect Pita
The beauty of pita bread lies in its simplicity. With just a handful of ingredients, you can create something truly extraordinary. However, understanding the role each ingredient plays will help you achieve that perfect pocket every time.
| Ingredient | Quantity | Role in Recipe | Notes |
|---|---|---|---|
| All-purpose flour | 3 cups (375g) | Forms the structure | You can substitute up to 1 cup with whole wheat for a nuttier flavor |
| Active dry yeast | 2¼ tsp (1 packet) | Provides leavening | Instant yeast works too (use same amount) |
| Sugar | 1 tsp | Feeds the yeast | Honey makes a nice alternative |
| Salt | 1½ tsp | Enhances flavor and controls fermentation | Kosher salt preferred |
| Warm water | 1¼ cups (295ml) | Activates yeast and forms dough | Temperature should be 105-110°F (40-43°C) |
| Olive oil | 2 tbsp | Adds tenderness and flavor | Extra virgin gives the best taste |
| Optional: Greek yogurt | 2 tbsp | Creates extra tenderness | Full-fat works best |
Flour Power
The type of flour you choose dramatically impacts your pita’s texture. All-purpose flour produces reliable results, but bread flour will give you a chewier texture with more gluten development. For softer, more tender pitas, I sometimes substitute a portion (up to 25%) with pastry flour.
The Yeast Factor
Fresh, active yeast is crucial for proper pocket formation. I always test my yeast by proofing it in warm water with a pinch of sugar before adding it to the main mixture. Those tiny bubbles are your first indication that pocket magic is in your future!
Essential Equipment
While pita bread has been made for millennia using simple tools, having the right equipment will make your baking experience much more enjoyable and successful.
- Kitchen scale – For precise measurements (especially important for flour)
- Stand mixer with dough hook – Not essential but helpful for thorough kneading
- Rolling pin – For even thickness when shaping
- Baking stone or heavy baking sheet – Provides intense bottom heat for proper puffing
- Pizza peel or thin cutting board – For transferring dough to hot surfaces
- Clean kitchen towels – For covering dough during rising and keeping pitas warm
The Step-by-Step Process
Now let’s dive into the complete process of creating perfectly fluffy pita bread with reliable pockets every single time.
1. Preparing the Dough
The foundation of great pita bread is a well-developed, properly hydrated dough. This first step sets the stage for everything that follows.
- Activate the yeast: In a large bowl, combine warm water (105-110°F/40-43°C), sugar, and yeast. Let it sit for 5-10 minutes until foamy and fragrant.
- Mix dry ingredients: In another bowl, whisk together flour and salt.
- Combine and form dough: Add the flour mixture to the yeast mixture along with olive oil (and yogurt if using). Stir until a shaggy dough forms.
- Knead thoroughly: Turn onto a floured surface and knead for 8-10 minutes until smooth and elastic. The dough should pass the “windowpane test” – when a small piece can be stretched thin enough to see light through without tearing.
- First rise: Place in an oiled bowl, cover with a damp towel, and let rise in a warm spot until doubled in size (about 1-1½ hours).
The Science of Gluten Development
What’s actually happening during kneading is fascinating. You’re developing gluten networks that will trap steam and create those magical pockets. Insufficient kneading leads to weak gluten structure and flat pitas. Over-kneading creates tough, chewy bread that won’t puff properly.
I’ve found that the perfect kneading time is when the dough transforms from sticky and shaggy to smooth and slightly tacky to the touch. It should feel like a living thing under your hands – responsive and elastic.
2. Shaping for Success
After the first rise, how you shape your pitas significantly impacts their puffing potential.
- Punch down and divide: Gently deflate the risen dough and divide into 8 equal pieces (about 85g each if using a scale).
- Form dough balls: Roll each piece into a tight ball by cupping your hand and rotating it against the countertop.
- Rest the dough: Cover the balls with a kitchen towel and let rest for 15-20 minutes. This relaxes the gluten and makes rolling easier.
- Roll evenly: Roll each ball into a circle about 6-7 inches (15-18cm) in diameter and ¼ inch (6mm) thick. Uniform thickness is crucial for even puffing.
- Final rest: Place rolled pitas on a floured surface, cover with towels, and rest for 10 minutes before baking.
Thickness Matters
Here’s something many recipes don’t mention: the thickness of your pita directly relates to pocket formation. Too thin (under 4mm) and the dough won’t have enough moisture to create sufficient steam. Too thick (over 8mm) and the heat won’t penetrate effectively to create separation.
I aim for a goldilocks zone of about 6mm (¼ inch), which consistently produces beautiful pockets.
3. The Baking Process: Where the Magic Happens
The actual baking is where science and culinary art converge to create that perfect pocket.
- Preheat thoroughly: Heat your oven to 475°F (245°C) with a baking stone or heavy baking sheet inside for at least 30 minutes.
- Bake in batches: Place 1-2 pitas directly on the hot surface (using a pizza peel helps).
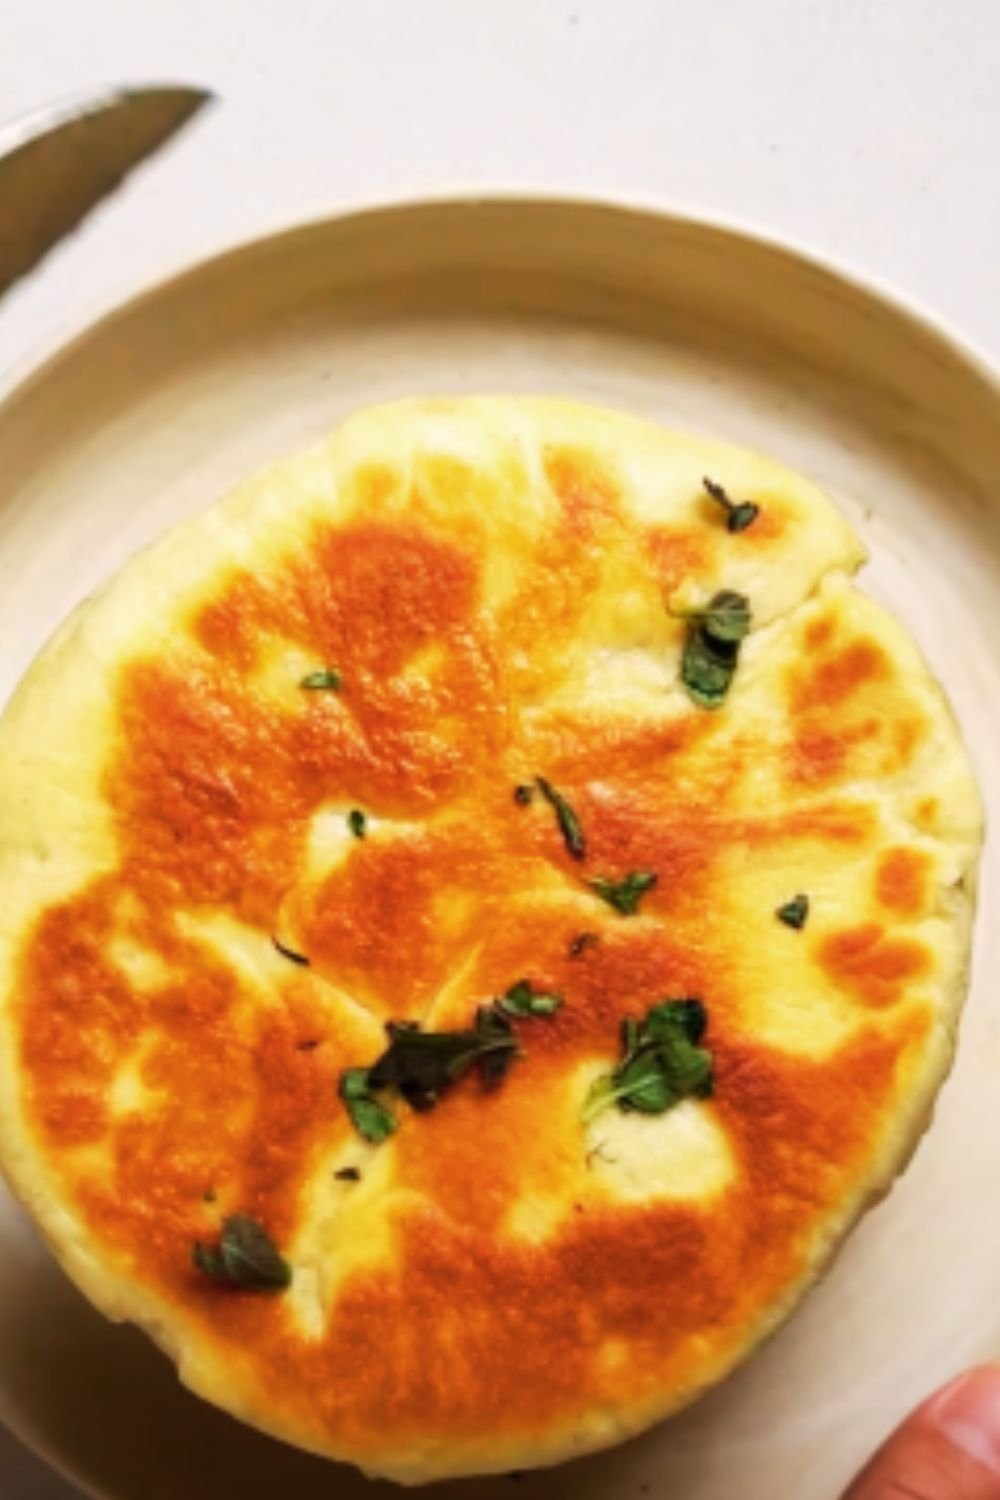
- Watch the puff: Within 1-2 minutes, the pitas should begin to puff dramatically. This moment never ceases to amaze me!
- Flip halfway: Once fully puffed (about 2-3 minutes), flip and bake for another 1-2 minutes until lightly golden.
- Keep warm: Transfer finished pitas to a towel-lined basket and cover to keep warm and soft.
The Temperature Secret
Temperature is absolutely critical. I’ve experimented extensively and found that 475°F (245°C) is the sweet spot. Lower temperatures don’t create explosive steam quickly enough, while higher temperatures can burn the outside before the pocket forms properly.
4. Cooling and Storing
How you handle your pitas after baking affects their texture and longevity.
- Cool properly: Stack warm pitas under a clean kitchen towel. The residual steam helps keep them soft.
- Store correctly: Once completely cool, store in a zip-top bag at room temperature for up to 2 days.
- Freeze for longevity: For longer storage, freeze in an airtight container with parchment between layers for up to 3 months.
- Refresh before serving: To revive slightly stale pitas, sprinkle with water and warm in a 350°F (175°C) oven for 5 minutes.
Troubleshooting Common Pita Problems
Even with the best recipe, sometimes things don’t go as planned. Here’s how to diagnose and fix the most common pita problems:
| Problem | Possible Causes | Solutions |
|---|---|---|
| No pocket forms | Dough too dry or not kneaded enough | Increase water slightly; knead longer until elastic |
| Oven not hot enough | Preheat longer; check oven temperature with separate thermometer | |
| Rolling too thin or thick | Aim for uniform ¼ inch (6mm) thickness | |
| Tough texture | Over-kneaded dough | Reduce kneading time; look for smooth but still slightly tacky texture |
| Too much flour added during kneading | Measure flour precisely; use minimal flour when kneading | |
| Burnt exterior, raw interior | Oven too hot | Reduce temperature to 450°F (230°C) |
| Rolled too thick | Roll thinner and more evenly | |
| Pitas deflate after baking | Underbaked | Increase baking time by 30-60 seconds |
| Stacked while too hot | Let cool slightly before stacking |
Serving Suggestions and Meal Ideas
The versatility of pita bread is truly one of its greatest attributes. Here are some of my favorite ways to enjoy these fluffy pockets:
Traditional Middle Eastern Pairings
- Hummus, baba ganoush, and muhammara dips
- Falafel with tahini sauce and cucumber-tomato salad
- Shawarma with pickled vegetables and garlic sauce
- Labneh (strained yogurt) with olive oil and za’atar
Modern Fusion Ideas
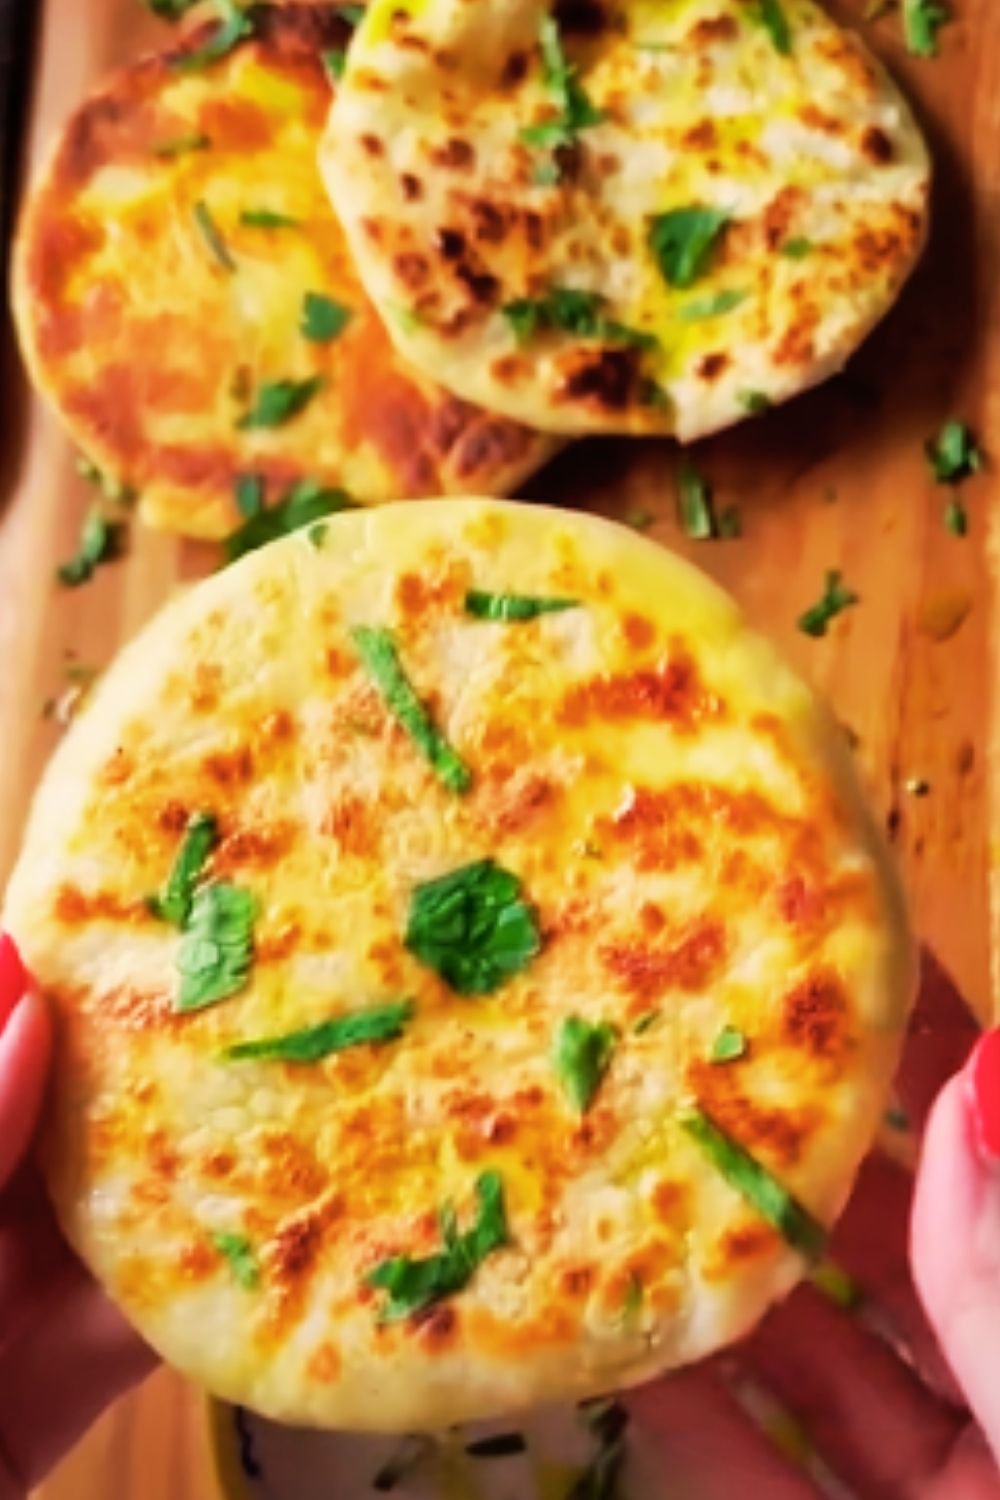
- Mediterranean breakfast pockets with scrambled eggs, feta, and spinach
- Pita pizzas topped with pesto, mozzarella, and cherry tomatoes
- Dessert pitas filled with Nutella and sliced strawberries
- Pita chips seasoned with cinnamon and sugar for fruit dips
Complete Meal Planning
For a spectacular Mediterranean feast, I recommend:
- Stuffed pita pockets with grilled chicken or falafel
- A vibrant Greek salad with cucumber, tomato, red onion, and feta
- Tzatziki sauce for dipping
- Fresh fruit like grapes or sliced watermelon
- Sparkling water with mint and lemon
Health Benefits of Homemade Pita
Making pita at home isn’t just about flavor—it’s about health too. Compared to store-bought versions, homemade pita typically contains:
- No preservatives or artificial ingredients
- Lower sodium content (you control the salt)
- No added sugars beyond what’s needed for yeast activation
- Optional whole grain incorporation for added fiber and nutrients
- No dough conditioners or texture enhancers
When made with partial whole wheat flour and minimal oil, pita becomes a relatively nutritious bread option that provides sustained energy without excessive calories.
Making Pita Bread with Children
One of my greatest joys is making pita bread with young helpers. Children are fascinated by the magical puffing process, and there are many child-friendly tasks throughout the recipe:
- Measuring ingredients (great for math skills)
- Feeling the dough change during kneading (sensory development)
- Shaping individual pitas (fine motor skills)
- Watching the dramatic puffing (scientific observation)
The relatively quick process keeps their attention, and the delicious reward at the end reinforces the value of creating food from scratch.
Variations on the Basic Recipe
Once you’ve mastered the basic technique, try these delicious variations:
Whole Wheat Pita
Replace 1-2 cups of all-purpose flour with whole wheat flour for a nuttier flavor and higher fiber content. You may need to add 1-2 extra tablespoons of water.
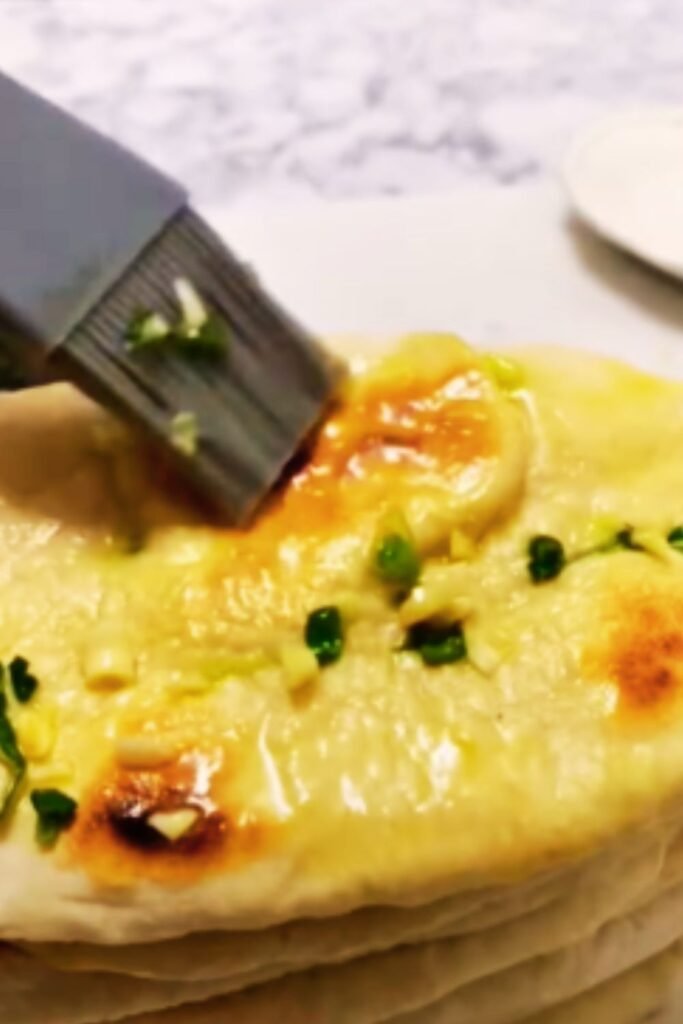
Herbed Pita
Add 2 tablespoons of finely chopped fresh herbs (rosemary, thyme, or za’atar) to the dry ingredients before mixing.
Garlic and Onion Pita
Mix in 2 teaspoons of garlic powder and 1 tablespoon of dried minced onion to the flour before combining with wet ingredients.
Multigrain Pita
Replace ½ cup of flour with a combination of oats, cornmeal, and flaxseed meal for added texture and nutrition.
Frequently Asked Questions
Q: Why didn’t my pitas form pockets?
A: This common issue usually stems from one of four causes: insufficient gluten development (knead longer), improper thickness (aim for ¼ inch), inadequate oven heat (preheat longer), or low dough hydration (add slightly more water next time).
Q: Can I make pita bread without a baking stone?
A: Absolutely! While a stone helps create intense bottom heat, you can use an inverted heavy baking sheet or cast iron skillet. The key is thorough preheating—at least 30 minutes at full temperature.
Q: How can I make my pitas softer and more flexible?
A: For extra-soft pitas, add 2 tablespoons of Greek yogurt to the dough, use bread flour instead of all-purpose, and be sure to store the fresh-baked pitas under a towel while still warm.
Q: Can I make pita bread ahead of time for a party?
A: Yes! Pita freezes beautifully. Make them up to a month ahead, cool completely, stack with parchment between each, and freeze in an airtight container. Thaw at room temperature and briefly warm in a 350°F oven before serving.
Q: Can I make whole grain pita that still has good pockets?
A: Yes, but don’t go 100% whole grain on your first attempt. Start with replacing 25% of the all-purpose flour with whole wheat, then gradually increase in future batches as you master the technique. Whole grain doughs typically need more water and gentler handling.
Q: How can I get my pitas to puff more dramatically?
A: The secret to spectacular puffing is threefold: proper gluten development through thorough kneading, adequate rest time after shaping, and intensely high heat during the first minute of baking.
Q: Is it possible to make gluten-free pita bread?
A: Traditional pocket pitas rely heavily on gluten for their structure. While you can make flatbreads with gluten-free flour blends, achieving the characteristic pocket is extremely challenging. If you need gluten-free options, consider alternatives like socca (chickpea flour flatbread).
The Joy of Homemade Pita
There’s a special satisfaction that comes from creating something as fundamentally nourishing as bread with your own hands. When I pull a batch of perfectly puffed pitas from the oven, I feel connected to thousands of years of baking tradition.
Beyond the practical benefits—tastier, healthier, fresher bread—there’s an intangible quality to homemade pita that no store-bought version can match. It’s the pride of creation, the sensory pleasure of working with dough, and the joy of sharing something made with care.
I encourage you to embrace the slight unpredictability of homemade bread. Each batch will have its own personality, its own subtle variations. This isn’t a flaw—it’s the beautiful signature of handcrafted food.
So heat up your oven, dust your countertop with flour, and prepare to experience the magic of pita bread in your own kitchen. Those perfect, fluffy pockets are waiting to be filled with whatever delicious ingredients inspire you today!