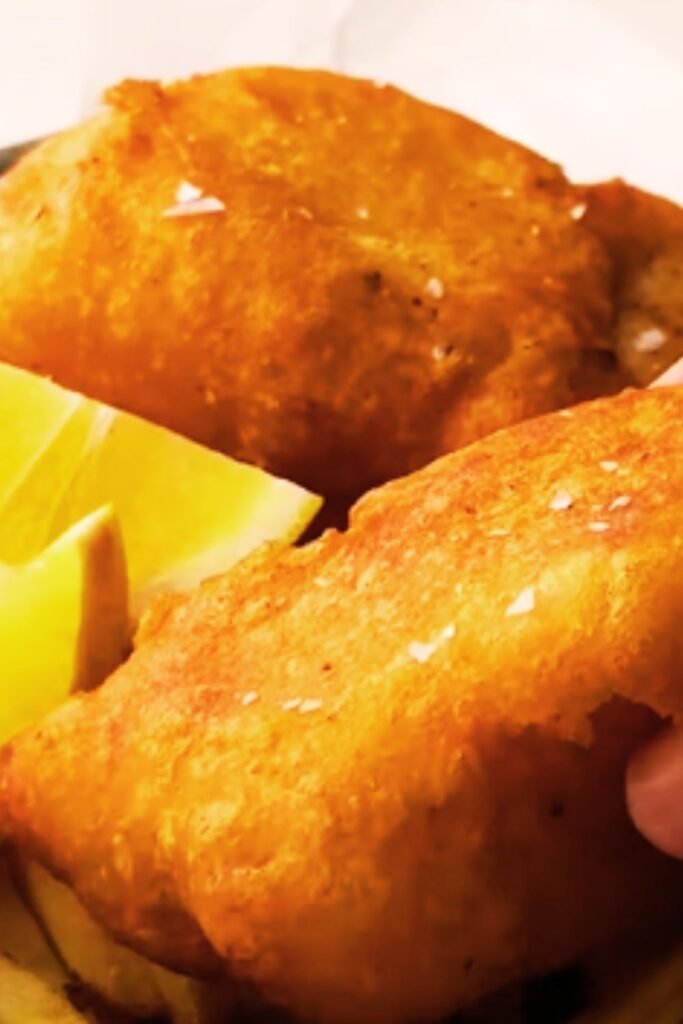
There’s something magical about biting into perfectly crispy beer battered fish. That satisfying crunch giving way to flaky, tender fish is one of life’s simple pleasures. I’ve spent years perfecting my technique, and today I’m sharing all my hard-won secrets for creating restaurant-quality beer battered fish right in your own kitchen.
Growing up in a coastal town, Friday fish fries were a sacred tradition in my household. My grandmother would transform the kitchen into a symphony of sizzling sounds and mouthwatering aromas. I’d watch in awe as she created the most delicious crispy fish with seemingly effortless precision. Years later, I realized just how much skill went into her perfect batter.
After countless experiments (and yes, some spectacular failures), I’ve finally cracked the code on truly exceptional beer battered fish. The trick isn’t just in the ingredients—it’s in understanding the science behind that perfect crisp texture and knowing exactly when and how to handle the fish throughout the process.
What Makes Beer Batter Special?
Beer batter isn’t just for flavor—though that’s definitely a bonus. The carbonation in beer creates tiny air bubbles that expand when they hit hot oil, resulting in that characteristically light, crispy texture we all crave. The alcohol also evaporates quickly, preventing the formation of too much gluten and keeping the batter delicate rather than tough.
But not all beer batters are created equal. Let’s break down the components of a truly exceptional beer batter:
- Type of Beer: Different beers yield different results
- Flour Mixture: The right proportions make all the difference
- Temperature Control: Critical for both batter and oil
- Resting Time: Often overlooked but absolutely essential
- Frying Technique: The final piece of the puzzle
I’ll walk you through each element to ensure you achieve fish fry perfection every time.
The Perfect Beer Battered Fish Recipe
Ingredients
For the Fish:
- 1½ pounds firm white fish fillets (cod, haddock, pollock, or halibut work beautifully)
- 1 cup all-purpose flour (for dredging)
- Salt and freshly ground black pepper
- Vegetable or peanut oil for frying (at least 3 inches deep)
For the Beer Batter:
- 1½ cups all-purpose flour
- ½ cup cornstarch
- 1 teaspoon baking powder
- 1 teaspoon salt
- ½ teaspoon garlic powder
- ½ teaspoon onion powder
- ¼ teaspoon cayenne pepper (optional)
- 12 ounces cold beer (I prefer a light lager or pilsner)
- 1 tablespoon vinegar (white or apple cider)
For Serving:
- Lemon wedges
- Homemade tartar sauce (recipe below)
- Malt vinegar
- Fresh herbs for garnish (parsley or dill)
Step-by-Step Instructions
Step 1: Prepare the Fish
- Pat the fish fillets completely dry with paper towels. This is crucial for proper batter adhesion.
- Cut fish into 4-5 inch portions if needed.
- Season both sides with salt and pepper.
- Place in the refrigerator while you prepare the batter. Cold fish helps the batter adhere better.
Step 2: Make the Batter
- In a large bowl, whisk together flour, cornstarch, baking powder, salt, garlic powder, onion powder, and cayenne (if using).
- Create a well in the center of your dry ingredients.
- Slowly pour in the cold beer while whisking. The temperature of the beer matters—it should be straight from the refrigerator.
- Add the vinegar and stir just until combined. Tiny lumps are actually good!
- Let the batter rest for 15-20 minutes in the refrigerator. This relaxes the gluten and allows the carbonation to work its magic.
Step 3: Prepare for Frying
- Place about 1 cup of flour in a shallow dish for dredging.
- Heat oil in a heavy-bottomed pot or deep fryer to 350-360°F (175-182°C). Use a thermometer for accuracy.
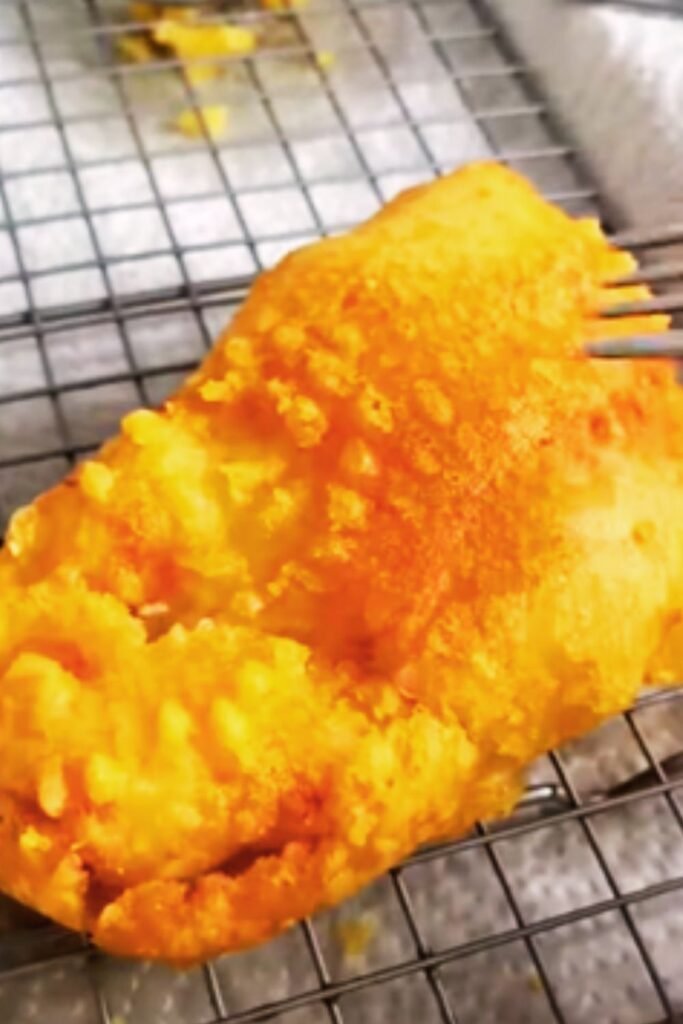
- Set up a cooling rack over a baking sheet, or line a plate with paper towels.
Step 4: Batter and Fry the Fish
- Take your fish out of the refrigerator.
- Working with one piece at a time, dredge the fish in flour, shaking off any excess.
- Dip into the beer batter, allowing extra batter to drip off for a few seconds.
- Carefully lower the battered fish into the hot oil. Don’t drop it—this causes splattering and uneven cooking.
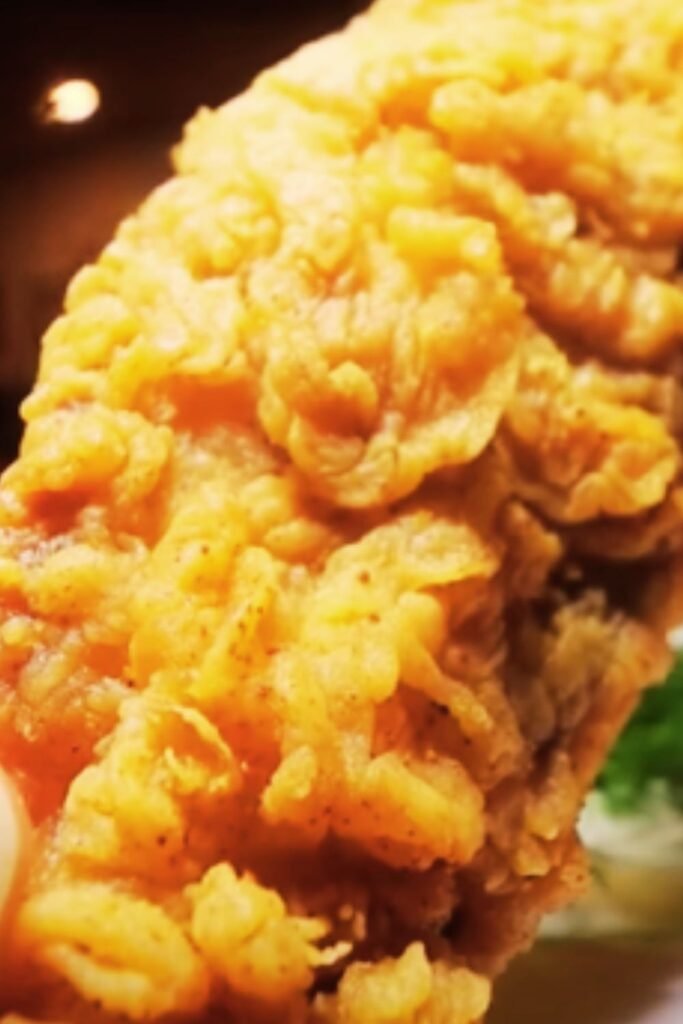
- Fry 2-3 pieces at a time (don’t overcrowd) for 3-4 minutes until golden brown and crispy.
- Use a slotted spoon or spider to remove fish from oil and place on prepared rack or paper towels.
- Immediately sprinkle with a little salt while hot.
Step 5: Keep Warm (If Needed)
If cooking multiple batches, keep finished pieces warm in a 200°F (95°C) oven on a wire rack over a baking sheet to maintain crispiness.
The Science Behind Perfect Beer Batter
What separates good beer batter from great beer batter often comes down to understanding a few scientific principles. Let me explain why each element matters:
Beer Selection Breakdown
Different beers create distinctly different batters. Here’s a comparison of how various types perform:
| Beer Type | Flavor Profile | Batter Texture | Best Fish Pairings |
|---|---|---|---|
| Light Lager | Mild, clean | Extra crispy, light-colored | Delicate white fish (cod, haddock) |
| Pilsner | Slightly hoppy, crisp | Light, very crispy | All-purpose, works with most fish |
| Pale Ale | Hoppy, more pronounced | Medium-bodied, amber color | Stronger fish (salmon, trout) |
| Stout/Porter | Rich, malty | Darker, more robust | Hearty fish (monkfish, shark) |
| Non-alcoholic Beer | Mild | Moderately crispy | All-purpose option |
| Seltzer Water | Neutral | Very light, less flavor | When you want the fish to shine |
I typically reach for a basic pilsner or light lager. Their carbonation levels are perfect, and they don’t overpower the delicate flavor of the fish.
The Role of Cornstarch
Adding cornstarch to your flour mixture isn’t just a random addition—it serves several critical purposes:
- Creates a crispier texture that stays crispy longer
- Prevents the batter from absorbing too much oil
- Produces a lighter, less doughy coating
- Helps the batter brown more evenly
The ideal ratio is about 3:1 flour to cornstarch for the perfect balance of structure and crispness.
Temperature Control Matters
One common mistake in beer battering is overlooking temperature. For ideal results:
- Keep the beer cold until right before mixing
- Refrigerate the batter for 15-20 minutes before using
- Make sure fish is cold (but not frozen) when dipped
- Maintain consistent oil temperature (350-360°F)
If your oil temperature is too low, the batter absorbs oil and becomes soggy. Too high, and the outside burns before the fish cooks through.
Common Mistakes to Avoid
Through years of trial and error, I’ve made every possible mistake when making beer battered fish. Learn from my failures to achieve success on your first try:
- Wet fish: Always thoroughly pat your fish dry before dredging in flour.
- Overmixing the batter: This develops gluten and makes for a tough coating. A few lumps are good!
- Skipping the flour dredge: The initial flour coating helps the batter stick to the fish.
- Inconsistent oil temperature: An oil thermometer is worth the investment.
- Overcrowding the fryer: This drops the oil temperature and leads to soggy results.
- Not letting batter rest: Those 15-20 minutes in the refrigerator make a significant difference.
- Using old oil: If you’re making multiple batches, strain out loose bits between frying sessions.
Homemade Tartar Sauce Recipe
No fish fry is complete without an excellent tartar sauce. Skip the store-bought versions and try this simple but delicious recipe:
Ingredients:
- 1 cup mayonnaise
- 2 tablespoons finely chopped dill pickles
- 1 tablespoon minced shallot or red onion
- 1 tablespoon capers, rinsed and chopped
- 1 tablespoon fresh lemon juice
- 1 tablespoon chopped fresh dill or 1 teaspoon dried dill
- 1 teaspoon Dijon mustard
- Salt and freshly ground black pepper to taste
Instructions:
- Combine all ingredients in a small bowl.
- Stir well until thoroughly mixed.
- Refrigerate for at least 30 minutes before serving to allow flavors to meld.
- Can be stored in an airtight container in the refrigerator for up to one week.
Fish Selection Guide
While almost any fish can be beer battered, some varieties perform better than others. Here’s my breakdown of the best options:
| Fish Type | Texture | Flavor | Best Batter | Cooking Notes |
|---|---|---|---|---|
| Cod | Firm, flaky | Mild, sweet | Light beer batter | Most versatile, forgiving for beginners |
| Haddock | Medium-firm, tender | Slightly sweet | Standard beer batter | Cooks quickly, watch carefully |
| Pollock | Moderately firm | Mild | Light, crispy batter | Budget-friendly alternative to cod |
| Halibut | Very firm | Clean, mild | Robust batter | Premium option, don’t overcook |
| Tilapia | Delicate | Very mild | Very light batter | Requires gentle handling |
| Catfish | Dense, moist | Distinctive | Seasoned batter | Southern favorite, holds up well |
| Mahi-Mahi | Firm, lean | Moderately sweet | Robust batter | Great tropical option |
For beginners, I highly recommend starting with cod. It’s forgiving, widely available, and has the perfect texture for beer battering.
Serving Suggestions
The perfect beer battered fish deserves complementary sides that enhance without overshadowing. Here are some ideal pairings:
- Classic chips (French fries): Traditional and perfect. Try double-frying for extra crispiness.
- Coleslaw: The acidity cuts through the richness of the fried fish.
- Mushy peas: A British classic that adds color and nutrients.
- Grilled corn on the cob: Sweet corn provides a nice contrast.
- Cucumber salad: Light and refreshing, dressed simply with vinegar and dill.
- Pickled vegetables: Add brightness and acidity to balance the meal.
- Hush puppies: For a Southern-inspired fish fry.
For a complete meal, I like to serve a small green salad on the side as well—something with a vinaigrette rather than a creamy dressing keeps the meal from feeling too heavy.
Make-Ahead and Storage Tips
While beer battered fish is best enjoyed immediately after frying, here are some tips if you need to work ahead:
- Batter preparation: The dry ingredients can be mixed and stored in an airtight container for up to 3 months. Only add beer when ready to fry.
- Tartar sauce: Can be made up to one week ahead and stored in the refrigerator.
- Partial frying: You can partially fry the fish (about 2 minutes), drain and cool completely, then freeze. When ready to serve, fry frozen pieces at 350°F until golden and heated through.
- Leftover fish: If you have leftover fried fish, reheat in a 350°F oven on a wire rack for 10-15 minutes. Never microwave—it ruins the texture.
Adapting for Dietary Restrictions
Beer battered fish can be adapted for various dietary needs with a few simple substitutions:
Gluten-Free Version:
- Replace all-purpose flour with a gluten-free all-purpose blend
- Use gluten-free beer or seltzer water
- Ensure your baking powder is gluten-free certified
Alcohol-Free Version:
- Substitute non-alcoholic beer (it still has the carbonation)
- Or use seltzer water mixed with 1 tablespoon of honey or sugar
Lower-Carb Option:
- Use almond flour and whey protein isolate in place of all-purpose flour
- Replace beer with seltzer water
- Note: This won’t be quite as crispy but still delicious
The Perfect Crisp: A Matter of Timing
The window between “perfectly crispy” and “overdone” can be narrow. Here’s my timing guide for different fish varieties:
| Fish Type | Thickness | Approximate Frying Time | Internal Temp When Done |
|---|---|---|---|
| Cod | 1 inch | 3-4 minutes | 145°F (63°C) |
| Haddock | ¾ inch | 2-3 minutes | 145°F (63°C) |
| Pollock | 1 inch | 3-4 minutes | 145°F (63°C) |
| Halibut | 1 inch | 3-4 minutes | 145°F (63°C) |
| Tilapia | ½ inch | 2 minutes | 145°F (63°C) |
| Catfish | 1 inch | 4-5 minutes | 145°F (63°C) |
| Thick cuts | 1½+ inches | 5-6 minutes | 145°F (63°C) |
Remember that carryover cooking will continue to raise the internal temperature slightly after removing from oil. For the absolute best results, use an instant-read thermometer.

Questions & Answers
Q: Why does my batter fall off the fish when I put it in the oil? The most common causes are: fish not dried properly before dredging, oil not hot enough, or moving the fish too soon after adding it to the oil. Make sure your fish is completely dry, your oil is between 350-360°F, and let the fish float undisturbed for at least 30 seconds before gently turning.
Q: Can I reuse the oil after frying fish? Yes, you can reuse oil 3-4 times if properly strained after each use. Let the oil cool completely, then strain through a fine-mesh sieve lined with cheesecloth to remove all particles. Store in an airtight container away from light. Discard if it smells off or appears dark and cloudy.
Q: My batter is too thick. What should I do? If your batter is too thick, gradually add more cold beer, a tablespoon at a time, until you reach the right consistency. The batter should be the consistency of pancake batter—it should coat the back of a spoon but drip off slowly.
Q: What’s the best way to keep beer battered fish warm while frying multiple batches? Place fried pieces on a wire rack set over a baking sheet in a 200°F oven. The rack is crucial—it allows air to circulate around the fish, preventing the bottom from getting soggy.
Q: Can I make beer battered fish without deep frying? While traditional beer battered fish requires deep frying for that characteristic texture, you can make a modified version by:
- Using the same batter but making it slightly thicker
- Heat 1/2 inch of oil in a heavy skillet
- Pan-fry the fish, turning once, until golden and cooked through The result won’t be identical, but it will use less oil.
Q: My batter doesn’t get crispy enough. What am I doing wrong? The most likely culprits are: oil not hot enough, batter too thick, or too much moisture in the fish. Make sure your oil stays at 350-360°F, your batter is the consistency of thick pancake batter, and your fish is thoroughly patted dry before dredging in flour.
Q: Can I prepare the fish ahead of time? You can prepare the fish up to the point of battering a few hours ahead. Keep the dried, seasoned, flour-dredged fish covered in the refrigerator. Only dip in batter right before frying for best results.
Q: Why add vinegar to the batter? Vinegar helps the batter become crispier by strengthening the gluten network while simultaneously preventing it from becoming too tough. The acidity also enhances the leavening power of the baking powder for a lighter texture.
Final Thoughts
Mastering crispy beer battered fish is worth the effort. While it might seem like a simple dish, the attention to detail makes all the difference between mediocre and magnificent results. Don’t be discouraged if your first attempt isn’t perfect—each batch teaches you something new.
What I love most about this recipe is its versatility. Once you understand the basic principles, you can customize the seasonings, experiment with different beers, and try various fish varieties to make it uniquely yours.
Remember that practice makes perfect, and even “imperfect” beer battered fish is usually still delicious. So heat up that oil, pour yourself a cold one (some for you, some for the batter), and enjoy the process of creating this classic comfort food. Your friends and family will be impressed, and you’ll have a skill worth sharing for generations to come—just like my grandmother did with me.