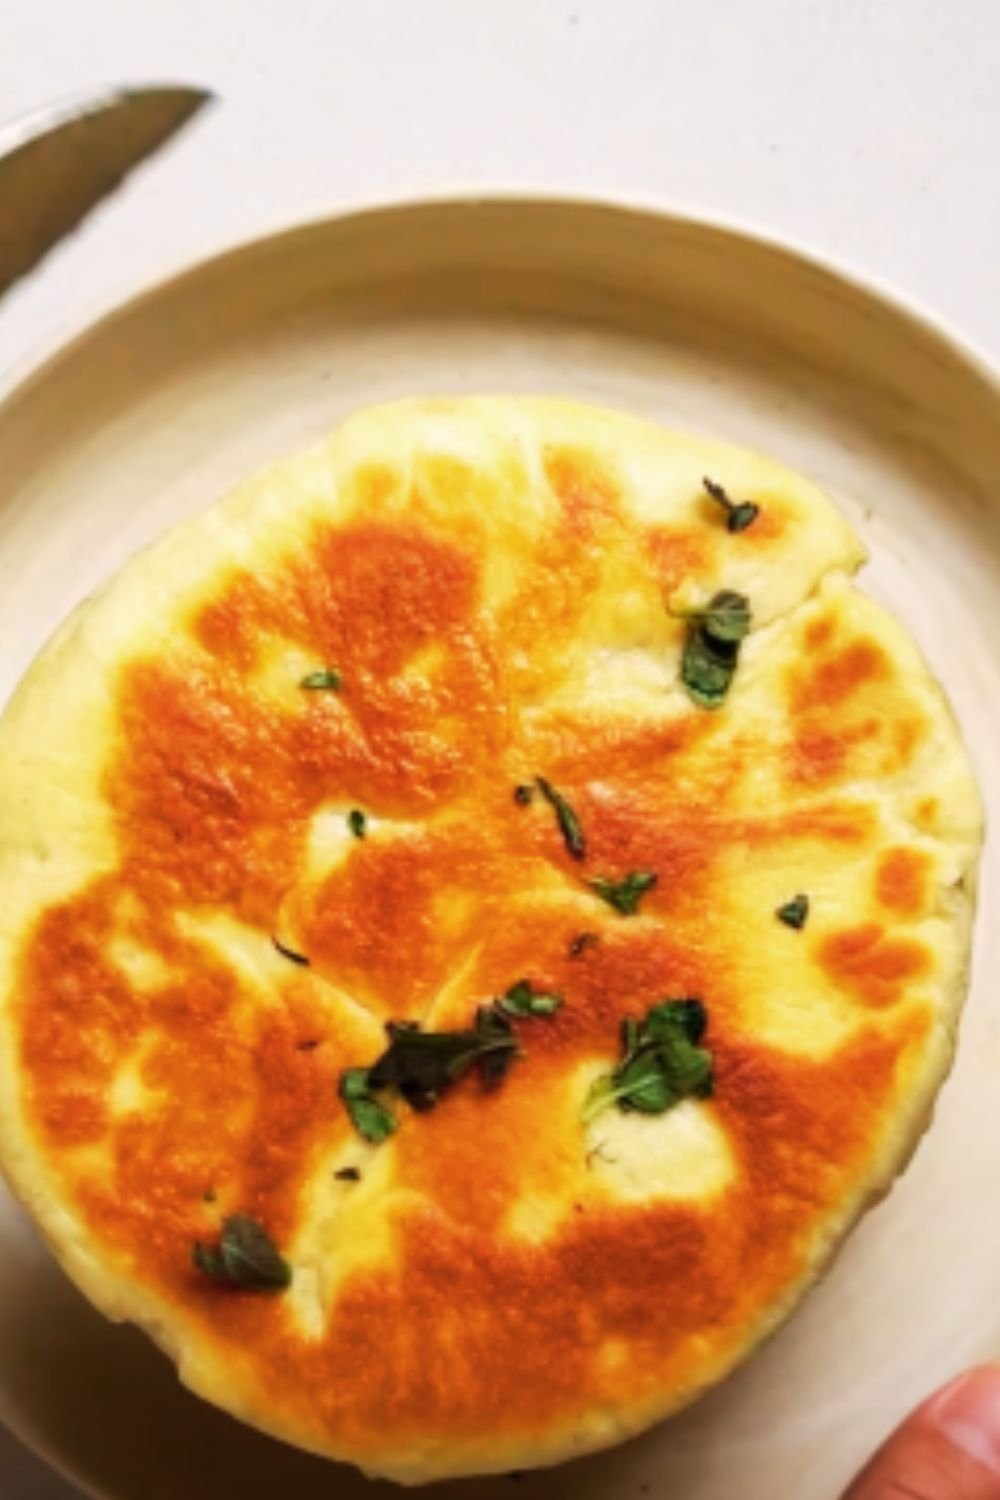
There’s something magical about homemade pita bread that just can’t be matched by store-bought versions. I’ve spent years perfecting my pita recipe, and I’m thrilled to finally share what I consider to be the absolute best pita bread recipe you’ll ever try. The pillowy softness, perfect pocket, and incredible flavor will transform your Mediterranean meals forever.
Why This Pita Bread Recipe Stands Above the Rest
I remember the first time I tried to make pita bread at home. The flat, pocket-less discs I produced barely resembled pita, and I nearly gave up. But after countless batches and meticulous tweaking of ingredients and techniques, I’ve developed a foolproof method that creates that elusive pocket every single time.
What makes this pita bread special isn’t just one thing—it’s the combination of several critical factors:
- The perfect hydration ratio that creates steam for pocket formation
- A unique double-rise method that develops exceptional flavor
- The ideal baking temperature that ensures proper puffing
- A blend of flours that creates the perfect texture and taste
I’ve tested this recipe in various home ovens, with different types of equipment, and it consistently delivers outstanding results. Whether you’re serving it with hummus, using it for gyros, or simply enjoying it warm with a drizzle of olive oil, this pita bread will elevate your meal to restaurant quality.
Essential Ingredients for Perfect Pita Bread
The beauty of pita bread lies in its simplicity. You don’t need a pantry full of exotic ingredients—just a few quality basics:
| Ingredient | Amount | Notes |
|---|---|---|
| All-purpose flour | 2½ cups (315g) | Provides structure while maintaining tenderness |
| Whole wheat flour | ½ cup (60g) | Adds depth of flavor and nutritional value |
| Active dry yeast | 2¼ teaspoons (1 packet) | Creates the perfect rise |
| Sugar | 1 teaspoon | Feeds the yeast for proper activation |
| Salt | 1½ teaspoons | Enhances flavor and controls yeast activity |
| Warm water | 1 cup + 2 tablespoons (255ml) | Temperature should be 105-110°F (40-43°C) |
| Extra virgin olive oil | 2 tablespoons | Creates supple texture and adds flavor |
| Semolina or cornmeal | For dusting | Prevents sticking during baking |
Choosing the Right Flour
I’ve experimented with countless flour combinations, and the blend of all-purpose and whole wheat creates the ideal balance. The all-purpose flour provides the necessary gluten structure for proper pocket formation, while the whole wheat flour adds a nutty depth that elevates the flavor profile.
If you prefer a more traditional pita, you can use bread flour instead of all-purpose for an even chewier texture. For a more rustic version, increase the whole wheat flour to 1 cup and reduce the all-purpose flour accordingly.
The Role of Hydration
The hydration level (ratio of water to flour) is critical for successful pita bread. Too little water and your pitas won’t form pockets; too much and they’ll be difficult to handle. The 255ml of water in this recipe creates approximately 68% hydration—the sweet spot for pocket formation.
In drier climates, you might need to add an extra tablespoon of water. The dough should feel tacky but not sticky when properly hydrated.
Step-by-Step Instructions
Preparing the Dough
- Activate the yeast: In a large bowl, combine the warm water (105-110°F/40-43°C) with sugar and yeast. Let it sit for 5-10 minutes until foamy. If your mixture doesn’t foam, your yeast might be dead, and you should start over with fresh yeast.
- Mix the dry ingredients: In a separate bowl, whisk together the all-purpose flour, whole wheat flour, and salt.
- Combine and form the dough: Add the olive oil to the yeast mixture, then gradually add the flour mixture. Stir until a shaggy dough forms.
- Knead the dough: Turn the dough onto a floured surface and knead for 8-10 minutes until smooth and elastic. The dough should pass the “windowpane test”—when a small piece is stretched, it should become thin enough to see light through without tearing.
- First rise: Place the dough in an oiled bowl, cover with plastic wrap or a damp towel, and let rise in a warm place for 1-1.5 hours, until doubled in size.
The Critical Double-Rise Method
Here’s where my recipe differs from most: after the first rise, I use a technique that dramatically improves flavor development.
- Deflate and second rise: Gently punch down the dough to release air bubbles. Reshape into a ball, place back in the bowl, cover, and let rise for another 45 minutes. This second rise develops a more complex flavor and improves the texture.
Shaping and Baking
- Preheat your oven: Place a baking stone or inverted baking sheet in the oven and preheat to 500°F (260°C) for at least 30 minutes. The extremely hot surface is crucial for proper puffing.
- Divide the dough: After the second rise, turn the dough onto a lightly floured surface and divide into 8 equal portions (about 80g each). Shape each portion into a ball by folding the edges toward the center and pinching to seal.
- Rest the dough balls: Cover the dough balls with a kitchen towel and let rest for 15 minutes. This relaxes the gluten and makes the dough easier to roll out.
- Roll out the pitas: Using a rolling pin, roll each ball into a circle about 6-7 inches (15-18cm) in diameter and ¼ inch (6mm) thick. Maintain an even thickness throughout for proper puffing.
- Transfer and bake: Sprinkle semolina or cornmeal on a pizza peel or the back of a baking sheet. Place 1-2 pitas on the peel and carefully slide them onto the hot baking stone or baking sheet in the oven.
- Watch the magic happen: Bake for 3-4 minutes. The pitas should puff up dramatically within the first 2 minutes. Once puffed and very lightly browned, remove from the oven.
- Keep them soft: Immediately place the baked pitas in a clean kitchen towel and cover to keep them soft and warm while you bake the remaining pitas.
Troubleshooting Guide: Common Pita Problems Solved
| Issue | Possible Cause | Solution |
|---|---|---|
| Pitas don’t puff | Oven not hot enough | Ensure oven is fully preheated to 500°F (260°C) with baking stone inside |
| Dough too dry | Increase water slightly in your next batch | |
| Uneven thickness | Roll pitas to uniform thickness | |
| Pitas too tough | Overworked dough | Knead just until smooth and elastic |
| Baked too long | Remove pitas as soon as they’re puffed and lightly colored | |
| Pitas deflate quickly | Normal behavior | Cover with towel immediately after baking to trap steam |
| Pitas stick to surface | Insufficient dusting | Use more semolina/cornmeal on your peel or baking sheet |
| Pale, soft pitas | Oven temperature too low | Check oven temperature with an oven thermometer |
| Burnt pitas | Oven too hot | Adjust temperature down slightly |
| Baked too long | Reduce baking time by 30-60 seconds |
Variations to Try
Once you’ve mastered the basic recipe, try these exciting variations:
Garlic & Herb Pita
Add 2 minced garlic cloves and 1 tablespoon of fresh herbs (rosemary, thyme, or oregano) to the dough during mixing.
Whole Grain Pita
Replace all the all-purpose flour with whole wheat flour for a heartier, more nutritious pita. You’ll need to increase the water by about 2 tablespoons.
Za’atar Pita
Brush the rolled-out dough with olive oil and sprinkle with za’atar spice before baking.
Multigrain Pita
Add 2 tablespoons each of flaxseeds, sunflower seeds, and oats to the dough for a more textured, nutritious bread.
Gluten-Free Option
While traditional pita relies on gluten for its pocket, you can create a decent gluten-free version using:
| Ingredient | Amount | Notes |
|---|---|---|
| Gluten-free flour blend | 3 cups (420g) | Look for one with xanthan gum included |
| Psyllium husk powder | 2 tablespoons | Helps create structure |
| Active dry yeast | 2¼ teaspoons | Same as regular recipe |
| Sugar | 2 teaspoons | Slightly more to help with rise |
| Salt | 1½ teaspoons | Same as regular recipe |
| Warm water | 1¼ cups (295ml) | More water needed for GF flours |
| Olive oil | 3 tablespoons | Extra to improve texture |
| Apple cider vinegar | 1 teaspoon | Helps with rise |
Follow the same general process, but expect a slightly different texture and less dramatic puffing.
Storing and Freezing
Fresh pita bread is best eaten the day it’s made, but proper storage can extend its life:
| Storage Method | Duration | Instructions |
|---|---|---|
| Room temperature | 1-2 days | Cool completely, then store in a zip-top bag with air squeezed out |
| Refrigerator | 3-4 days | Wrap in foil, then place in a zip-top bag |
| Freezer | Up to 3 months | Wrap individually in plastic wrap, then foil, place in freezer bag |
To reheat:
- Room temperature pitas: Warm in a 350°F (175°C) oven for 5 minutes or on a dry skillet
- Refrigerated pitas: Sprinkle with water and warm in a 350°F (175°C) oven for 7-8 minutes
- Frozen pitas: Thaw at room temperature, then reheat as above
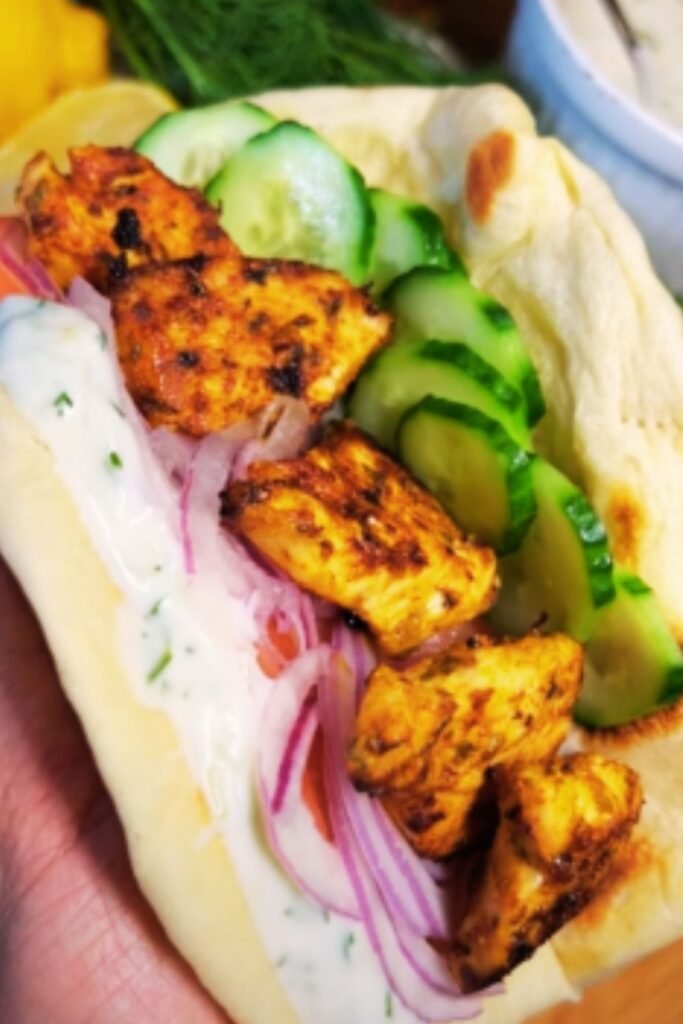
Serving Suggestions
Pita bread is incredibly versatile. Here are my favorite ways to enjoy it:
Mediterranean Feast
- Serve with classic hummus, baba ganoush, and muhammara
- Add falafel, tabbouleh, and a simple cucumber-tomato salad
- Finish with a drizzle of high-quality olive oil and a sprinkle of sumac
Breakfast Pita Pockets
- Split open and fill with scrambled eggs, feta cheese, and sautéed spinach
- Try with yogurt, honey, and fresh berries for a sweet option
Lunch Options
- Create sandwiches with grilled vegetables, chickpeas, and tahini sauce
- Fill with roasted chicken, cucumber, and tzatziki
Dinner Ideas
- Use as a base for personal pita pizzas
- Serve alongside soups and stews as a dipping bread
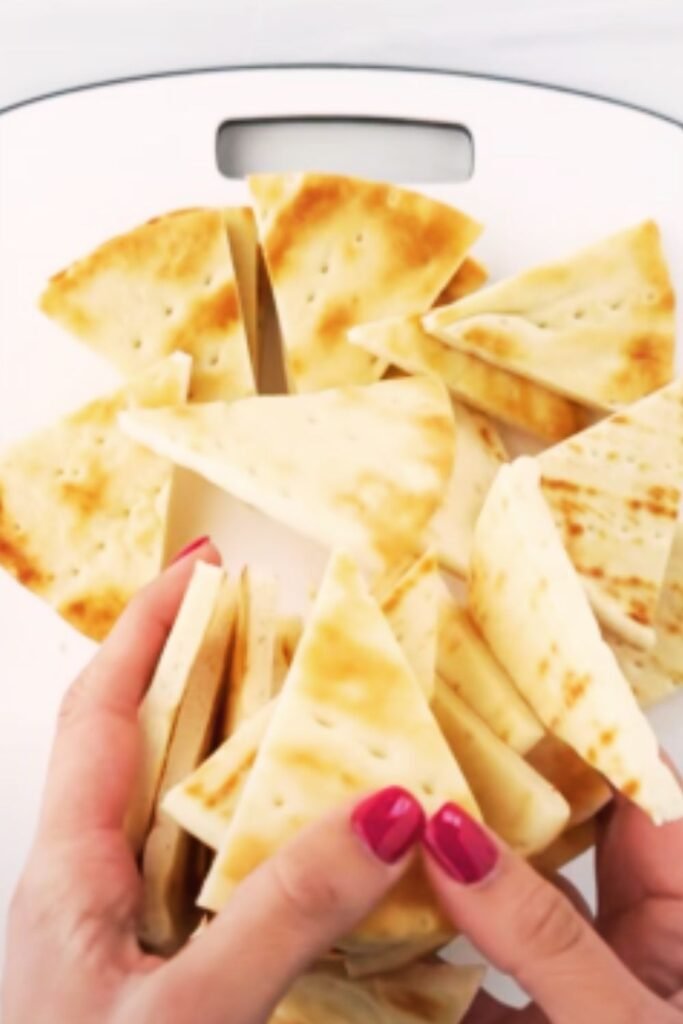
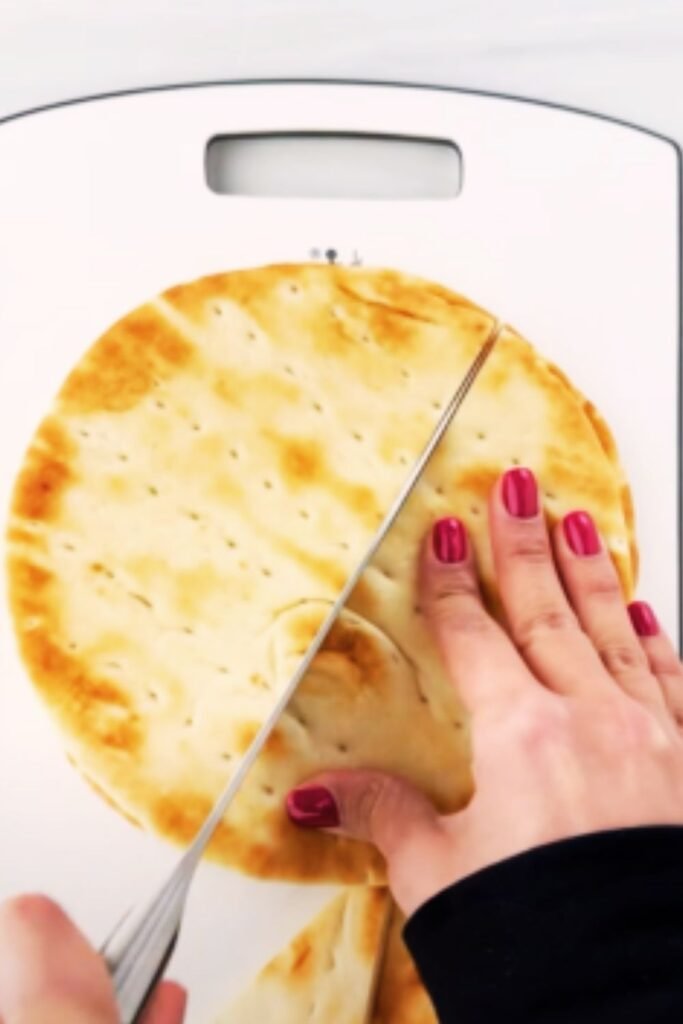
- Tear into pieces and bake into crispy pita chips for fattoush salad
For Entertaining
- Cut into triangles and serve with a mezze platter
- Make mini pita pockets filled with various dips for appetizers
Nutritional Profile
One pita (based on 8 per recipe) contains approximately:
| Nutrient | Amount | % Daily Value* |
|---|---|---|
| Calories | 210 | – |
| Total Fat | 4g | 5% |
| Saturated Fat | 0.5g | 3% |
| Sodium | 440mg | 19% |
| Total Carbohydrates | 38g | 14% |
| Dietary Fiber | 2g | 7% |
| Sugars | <1g | – |
| Protein | 6g | 12% |
| Calcium | 10mg | 1% |
| Iron | 2mg | 11% |
*Percent Daily Values based on a 2,000 calorie diet
Frequently Asked Questions
Q: Why don’t my pitas form pockets?
A: The pocket forms when moisture inside the dough turns to steam during baking. Make sure your oven is properly preheated to 500°F (260°C), your dough has the right hydration level, and you’re rolling the pitas to an even thickness.
Q: Can I make this recipe with a stand mixer?
A: Absolutely! Use the dough hook and mix on low speed for 1-2 minutes to combine ingredients, then increase to medium-low and knead for 5-6 minutes until smooth and elastic.
Q: How can I tell if my pitas are done baking?
A: They should fully puff up and show just a hint of golden color. Over-baking will make them crisp rather than soft and pliable.
Q: Can I grill pita bread instead of baking it?
A: Yes! Preheat your grill to high (500°F/260°C), clean and oil the grates, and grill each pita for about 2 minutes per side until puffed and lightly charred.
Q: My pitas deflate after baking. Is this normal?
A: Yes, pitas naturally deflate as they cool. The pocket remains inside, even when the bread flattens. Keeping them covered with a towel as they cool helps maintain moisture and pliability.
Q: Can I use this dough to make flatbreads without pockets?
A: Absolutely! Simply prick the rolled dough all over with a fork before baking to prevent pocket formation.
Q: Why do you recommend a baking stone?
A: A baking stone retains and distributes heat evenly, creating the intense initial heat needed for proper puffing. An inverted heavy baking sheet works as an alternative.
Q: My first few pitas turned out perfect, but the later ones didn’t puff. What happened?
A: Your oven might have lost heat after opening the door multiple times. Leave the door closed for a few minutes between batches to allow the temperature to recover.
Final Thoughts
Making your own pita bread might seem intimidating at first, but it’s truly one of the most rewarding baking projects you can undertake. There’s nothing quite like watching your first perfectly puffed pita emerge from the oven—it feels like culinary magic every single time.
The techniques I’ve shared here have been refined through years of trial and error, resulting in what I genuinely believe is the best pita bread recipe possible. The double-rise method and precise hydration ratio are game-changers that transform good pita into exceptional pita.
Even if your first batch isn’t perfect, keep practicing. Each attempt will teach you something new about the dough, your oven, and the process. Before long, you’ll be producing pita bread that puts store-bought versions to shame.
So heat up that oven, dust off your rolling pin, and prepare to experience pita bread as it was meant to be: fresh, warm, and absolutely perfect.