When life gets hectic and I need a dinner that’s both satisfying and quick, my ground beef burrito bowls never disappoint. I’ve spent years perfecting this recipe, finding the perfect balance of protein, veggies, and zesty flavors that come together in one delicious bowl. What I love most about this meal is its versatility—it’s endlessly customizable, budget-friendly, and appeals to everyone from picky eaters to culinary enthusiasts.
In my household, these bowls have become such a staple that my family starts hovering around the kitchen the moment they smell the seasoned beef sizzling. Today, I’m sharing all my secrets for creating the ultimate burrito bowl that rivals your favorite restaurant version but costs a fraction of the price.
What Makes a Perfect Burrito Bowl?
Before diving into the recipe, let’s talk about what makes a truly exceptional burrito bowl. In my experience, the perfect burrito bowl balances these key elements:
- A flavorful protein base – seasoned to perfection
- Fresh, colorful vegetables – for texture and nutrition
- The right grain foundation – typically rice with proper seasoning
- Creamy elements – to bring richness and bind flavors together
- Punchy condiments – to add brightness and acidity
- Thoughtful toppings – for that final texture and flavor boost
My recipe focuses on ground beef as the star protein, but I’ll share variations throughout for those who might prefer chicken, plant-based options, or other alternatives.
Ingredients You’ll Need
For this recipe that serves 4 hungry people, gather these ingredients:
For the Seasoned Ground Beef
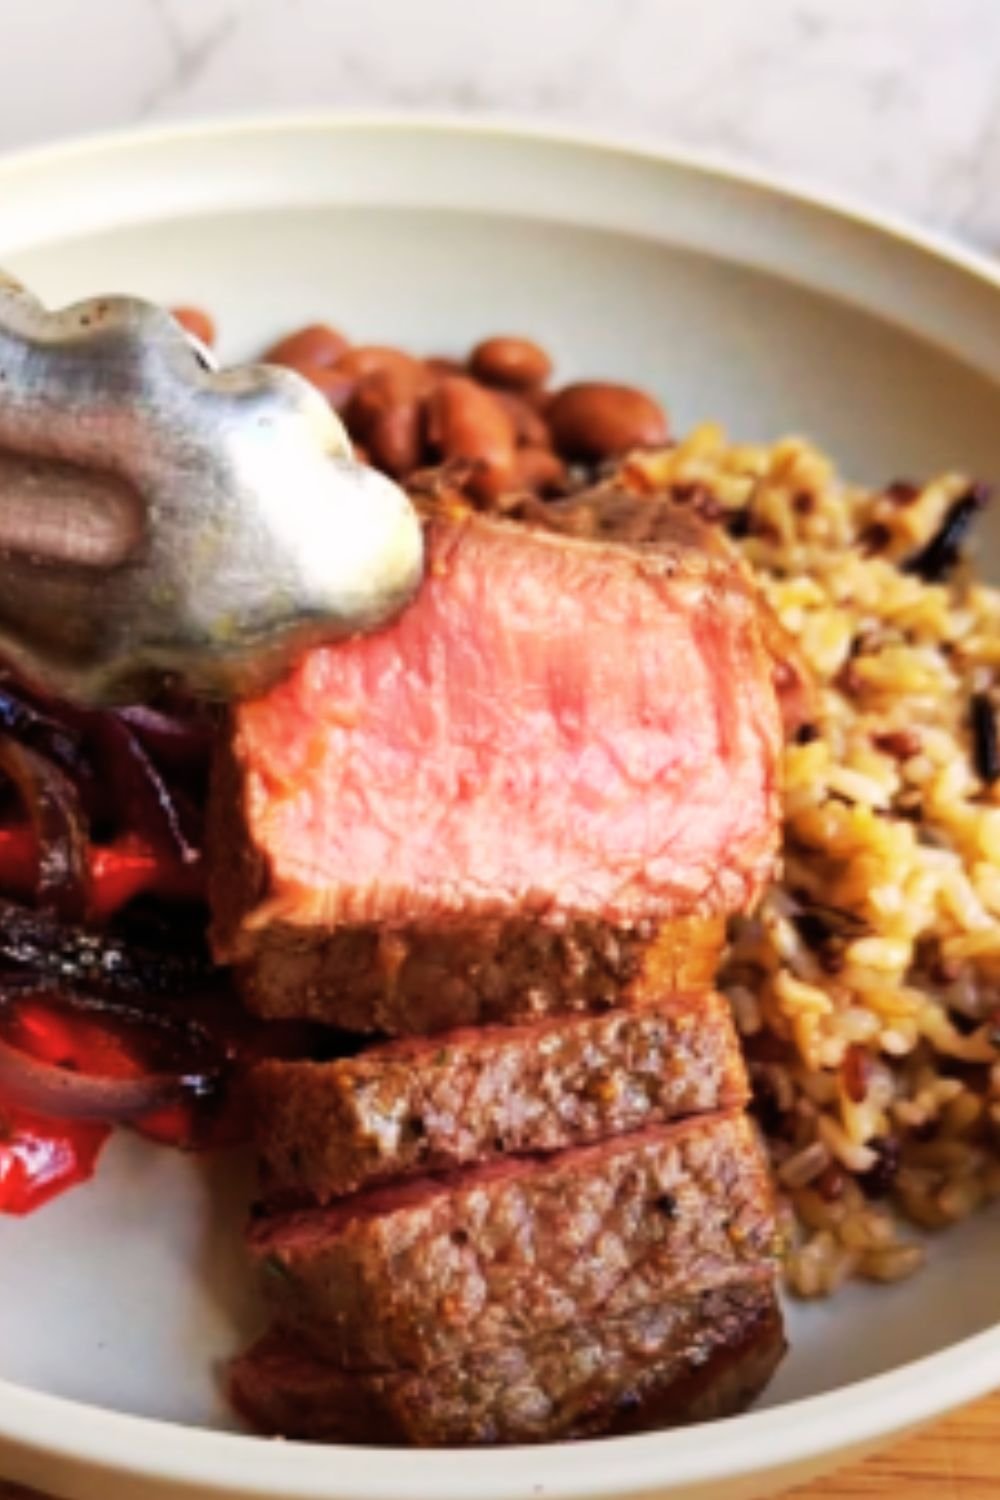
- 1 pound lean ground beef (85/15 works best)
- 1 tablespoon olive oil
- 1 medium onion, finely diced
- 3 cloves garlic, minced
- 1 tablespoon chili powder
- 2 teaspoons ground cumin
- 1 teaspoon paprika (smoked paprika adds wonderful depth)
- 1 teaspoon dried oregano
- ½ teaspoon salt (adjust to taste)
- ¼ teaspoon black pepper
- ¼ teaspoon cayenne pepper (optional, for heat)
- ¼ cup tomato sauce or 2 tablespoons tomato paste mixed with 2 tablespoons water
- 2 tablespoons lime juice
For the Cilantro Lime Rice
- 1½ cups long-grain white rice
- 2¾ cups chicken or vegetable broth
- 1 tablespoon butter or oil
- ½ teaspoon salt
- Zest of 1 lime
- 3 tablespoons lime juice
- ⅓ cup chopped fresh cilantro
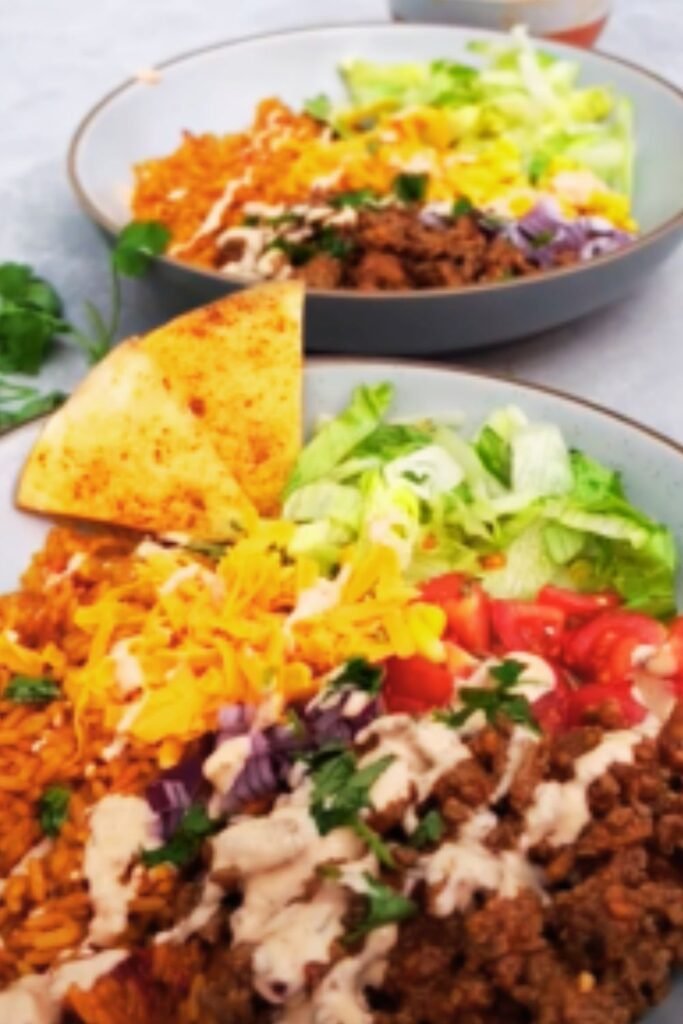
For the Bowl Assembly
- 1 can (15 oz) black beans, drained and rinsed
- 1 cup corn kernels (fresh, canned, or frozen)
- 1 large bell pepper, sliced (any color, I prefer a mix)
- 1 cup cherry tomatoes, halved
- 1 large avocado, sliced or diced
- ½ cup red onion, thinly sliced
- 1 jalapeño, thinly sliced (optional)
For the Toppings
- 1 cup shredded cheese (Mexican blend, Monterey Jack, or cheddar)
- ½ cup sour cream
- ¼ cup chopped fresh cilantro
- Lime wedges
- Hot sauce to taste
Time-Saving Prep Work
One trick I’ve learned over the years is that a little prep work goes a long way in making this meal come together quickly. Here’s my prep strategy:
- Chop all vegetables first and arrange them in bowls.
- Mix all beef seasonings together in a small bowl before cooking.
- Start the rice cooking before preparing the beef, as rice takes the longest.
- Prepare any cold components while the hot ingredients cook.
This organization makes the cooking process smooth and ensures everything finishes around the same time.
Step-by-Step Cooking Instructions
Cilantro Lime Rice
- Rinse the rice under cold water until the water runs clear.
- In a medium saucepan, add the broth, butter, and salt. Bring to a boil.
- Add the rinsed rice, stir once, and reduce heat to low.
- Cover and simmer for 15-18 minutes until liquid is absorbed.
- Remove from heat and let stand, covered, for 5 minutes.
- Fluff with a fork, then gently stir in lime zest, lime juice, and cilantro.
Perfectly Seasoned Ground Beef
- Heat olive oil in a large skillet over medium-high heat.
- Add diced onion and cook for 3-4 minutes until softened.
- Add minced garlic and cook for another 30 seconds until fragrant.
- Add ground beef and break it apart with a wooden spoon.
- When beef is about halfway cooked (still some pink showing), add all the seasonings: chili powder, cumin, paprika, oregano, salt, pepper, and cayenne if using.
- Continue cooking until beef is no longer pink, about 3-4 more minutes.
- Stir in tomato sauce or paste mixture and cook for 2 minutes.
- Remove from heat and stir in lime juice.
Quick Black Beans
I like to add extra flavor to canned black beans:
- In a small saucepan over medium heat, add drained and rinsed beans.
- Add ¼ teaspoon each of cumin, garlic powder, and salt.
- Add 2 tablespoons of water or broth.
- Heat through for about 5 minutes, stirring occasionally.
Bowl Assembly Strategies
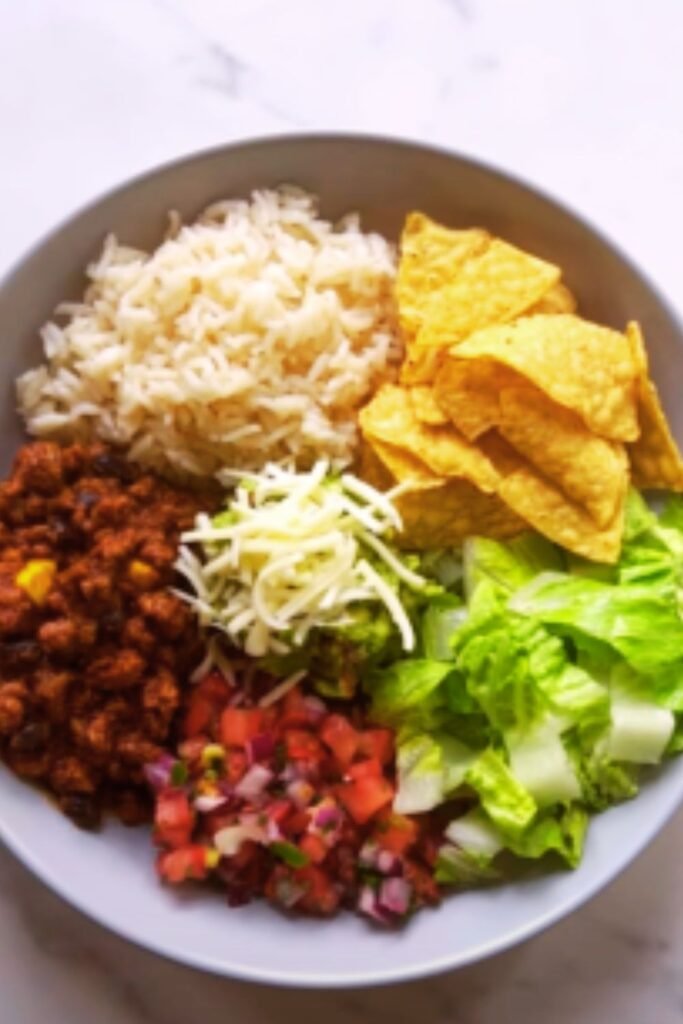
The beauty of burrito bowls is the presentation and customization. I find these assembly strategies work best:
Layer Method (Restaurant Style)
- Start with rice as the foundation
- Add beef and beans side by side (not mixed)
- Arrange colorful vegetables in separate sections
- Add cold toppings last
Mixed Method (Family Style)
- Place all components in separate serving bowls
- Let everyone build their own custom bowl
- Great for families with different preferences
Nutrient Breakdown
For those watching their nutrition, here’s a detailed breakdown of my ground beef burrito bowl (per serving, with standard portions):
| Component | Calories | Protein | Carbs | Fat | Fiber |
|---|---|---|---|---|---|
| Ground beef (4 oz) | 290 | 23g | 0g | 21g | 0g |
| Cilantro lime rice (¾ cup) | 180 | 4g | 36g | 2g | 1g |
| Black beans (¼ cup) | 55 | 3.5g | 10g | 0g | 3g |
| Bell pepper (¼ cup) | 12 | 0.5g | 3g | 0g | 1g |
| Corn (¼ cup) | 30 | 1g | 7g | 0g | 1g |
| Avocado (¼) | 80 | 1g | 4g | 7g | 3g |
| Cheese (¼ cup) | 110 | 7g | 1g | 9g | 0g |
| Sour cream (2 Tbsp) | 60 | 1g | 2g | 5g | 0g |
| Other veggies/toppings | 25 | 1g | 5g | 0g | 2g |
| TOTAL | 842 | 42g | 68g | 44g | 11g |
Flavor Variations: Taking Your Burrito Bowl to the Next Level
Over the years, I’ve experimented with countless variations. Here are my favorite ways to switch things up:
Protein Alternatives
- Ground Turkey: Use the same seasonings but add 1 tablespoon more oil since turkey is leaner
- Chicken: Dice boneless chicken thighs and use the same seasonings
- Shrimp: Marinate in lime, garlic, and chili powder before a quick sauté
- Plant-Based: Try seasoned lentils or crumbled firm tofu with 1 teaspoon extra cumin
Rice Variations
- Cauliflower Rice: For low-carb option (sauté with same seasonings)
- Brown Rice: Increase cooking time to 35-40 minutes
- Quinoa: For a protein boost (cook in broth with same lime/cilantro finish)
- Mexican Red Rice: Add 2 tablespoons tomato paste and ¼ teaspoon paprika
Regional Flavor Twists
I love adapting this basic recipe to explore different regional flavors:
| Style | Key Seasonings | Special Ingredients | Finishing Touch |
|---|---|---|---|
| Tex-Mex | Chili powder, cumin | Roasted corn, jalapeños | Lime crema |
| Baja | Citrus, mild chili | Cabbage slaw, pickled onions | Chipotle sauce |
| Puebla | Cinnamon, clove | Roasted sweet potato | Mole drizzle |
| Caribbean | Allspice, thyme | Plantains, pineapple | Coconut flakes |
| Southwest | Coriander, oregano | Fire-roasted chiles | Adobo sauce |
Make-Ahead and Storage Tips
One of the greatest advantages of burrito bowls is how well they work for meal prep. Here’s my system:
Meal Prep Strategy
- Prepare rice, beef, and beans on Sunday
- Store in separate containers in refrigerator
- Chop hardy vegetables (bell peppers, onions) and store separately
- Wait to cut avocados, tomatoes until ready to serve
Storage Guidelines
| Component | Refrigerator | Freezer | Notes |
|---|---|---|---|
| Cooked beef | 3-4 days | 2-3 months | Reheat with splash of water |
| Cilantro lime rice | 4-5 days | 1-2 months | Reheat with 1 tsp water per cup |
| Black beans | 3-4 days | 3 months | Store in liquid |
| Prepped vegetables | 2-3 days | Not recommended | Keep in sealed container |
| Assembled bowl | 2 days | Not recommended | Store without cold toppings |
| Sauces/toppings | 5-7 days | Not recommended | Store separately |
Reheating Tips
- Microwave beef and rice separately, covered with a damp paper towel
- Add a sprinkle of water before reheating to prevent drying
- Add fresh toppings after reheating the base ingredients
Money-Saving Tips
As someone who watches the grocery budget, I’ve found these burrito bowls to be remarkably economical. Here are my tips for maximizing value:
- Buy meat on sale and freeze in 1-pound portions
- Use dried beans instead of canned (soak overnight, then simmer for 1 hour)
- Buy rice in bulk from international markets
- Grow your own herbs (cilantro is incredibly easy to grow)
- Freeze leftover tomato paste in tablespoon portions
- Use seasonal vegetables that are at peak freshness and lowest price
- Make your own taco seasoning in bulk rather than buying packets
I’ve calculated that a homemade burrito bowl costs approximately $3.50 per serving, compared to $10-12 at restaurants.
Serving Suggestions

To make this a complete meal experience, try these additional serving ideas:
- Fresh salsa bar with pico de gallo, corn salsa, and tomatillo salsa
- Homemade tortilla chips (cut corn tortillas into triangles and bake until crisp)
- Cucumber-jicama slaw dressed with lime and chili powder
- Grilled vegetables to add as premium toppings
- Sparkling water with lime for a refreshing beverage
- Aguas frescas like watermelon or hibiscus for an authentic touch
- Fresh fruit platter with tropical fruits for dessert
Common Problems and Solutions
Even experienced cooks can run into issues. Here are solutions to common burrito bowl problems:
Beef Issues
- Too greasy: Use leaner beef (90/10) or drain excess fat after browning
- Bland flavor: Bloom spices in oil before adding meat; add more salt
- Too dry: Add 2-3 tablespoons water or broth at the end of cooking
Rice Problems
- Mushy rice: Use less liquid (reduce by ¼ cup)
- Undercooked rice: Add 2 tablespoons water and cook 5 minutes longer
- Bland rice: Add broth instead of water and double the lime zest
Assembly Issues
- Soggy bowl: Place wet ingredients (like tomatoes) separate from dry
- Cold components: Slightly warm rice and beans before adding cold toppings
- Dry texture: Include at least one sauce element (sour cream, guacamole, or salsa)
Health Adaptations
I believe in making recipes work for different dietary needs. Here are my tried-and-true adaptations:
Lower Carb Option
- Replace rice with cauliflower rice
- Increase non-starchy vegetables
- Add extra avocado for satiety
Lower Calorie Version
- Use extra-lean ground beef (93/7) or ground turkey breast
- Reduce rice portion to ½ cup
- Use Greek yogurt instead of sour cream
- Limit cheese to 2 tablespoons per serving
Higher Protein Adaptation
- Increase meat to 6 oz per serving
- Add a sprinkle of black beans
- Mix in ¼ cup cottage cheese
- Top with pepitas or sunflower seeds
Questions and Answers
Q: Can I make this vegetarian or vegan?
Absolutely! For a vegetarian version, replace the ground beef with a mix of sautéed mushrooms and walnuts (pulsed together in a food processor) or with crumbled extra-firm tofu. Season exactly the same way, but add 1 tablespoon of soy sauce for umami depth. For vegan, also omit the cheese and sour cream, replacing with avocado slices and a cashew-based crema.
Q: How do I avoid my rice becoming sticky or mushy?
The key is rinsing your rice thoroughly before cooking. This removes excess starch that causes stickiness. Also, make sure you’re using the correct rice-to-liquid ratio (1:1.75 for white rice), and avoid stirring while it cooks. Let the rice rest off-heat for 5-10 minutes before fluffing with a fork.
Q: What’s the best way to meal prep these bowls for the week?
I recommend preparing the beef, rice, and beans in advance and storing them separately. Chop hardy vegetables like bell peppers and onions, but leave delicate items like avocados and tomatoes until serving day. When ready to eat, heat the rice and beef separately, then assemble your bowl and add fresh components. This approach maintains optimal texture and flavor throughout the week.
Q: My kids don’t like spicy food. How can I adapt this recipe?
For a kid-friendly version, omit the cayenne pepper and reduce the chili powder to 1 teaspoon. Instead, add a bit more paprika (not smoked) for color and mild flavor. Serve hot sauce on the side for adults. Consider a “build-your-own” approach at the table where kids can choose their preferred components.
Q: How do I keep the avocado from turning brown if I want leftovers?
My best trick is to save the avocado for when you’re ready to eat. If you must prep in advance, slice the avocado and sprinkle generously with lime juice, then place in an airtight container with the pit (this helps prevent browning). Another option is to make a quick guacamole with lime juice, which preserves the color better than plain avocado.
Q: Can I prepare the entire dish in advance for a party?
Yes! For gatherings, I set up a burrito bowl bar. Prepare all hot components (meat, rice, beans) and keep them warm in slow cookers or chafing dishes. Arrange cold components in bowls surrounded by ice. Let guests build their own bowls, which creates an interactive dining experience while ensuring everything stays at the proper temperature.
Why This Recipe Works
After countless iterations and family feedback, I’ve discovered why this particular approach creates the perfect burrito bowl:
- Layering of seasonings: Adding spices to the oil before the meat blooms their flavors
- Acid balance: The lime juice in both the rice and beef brightens all the flavors
- Textural contrast: The combination of creamy, crunchy, and tender elements creates interest
- Temperature variance: The warm base with cool toppings creates a pleasant eating experience
- Visual appeal: The colorful arrangement stimulates appetite before the first bite
The ground beef burrito bowl has become my signature weeknight recipe because it strikes that perfect balance between convenience and satisfaction. It’s a meal that feels special enough for company but simple enough for a Tuesday night dinner.
With this comprehensive guide, you’re equipped to create your own perfect burrito bowls at home. Remember that the beauty of this dish lies in its adaptability—make it your own by adjusting to your family’s preferences and what’s available in your pantry. Happy cooking!

