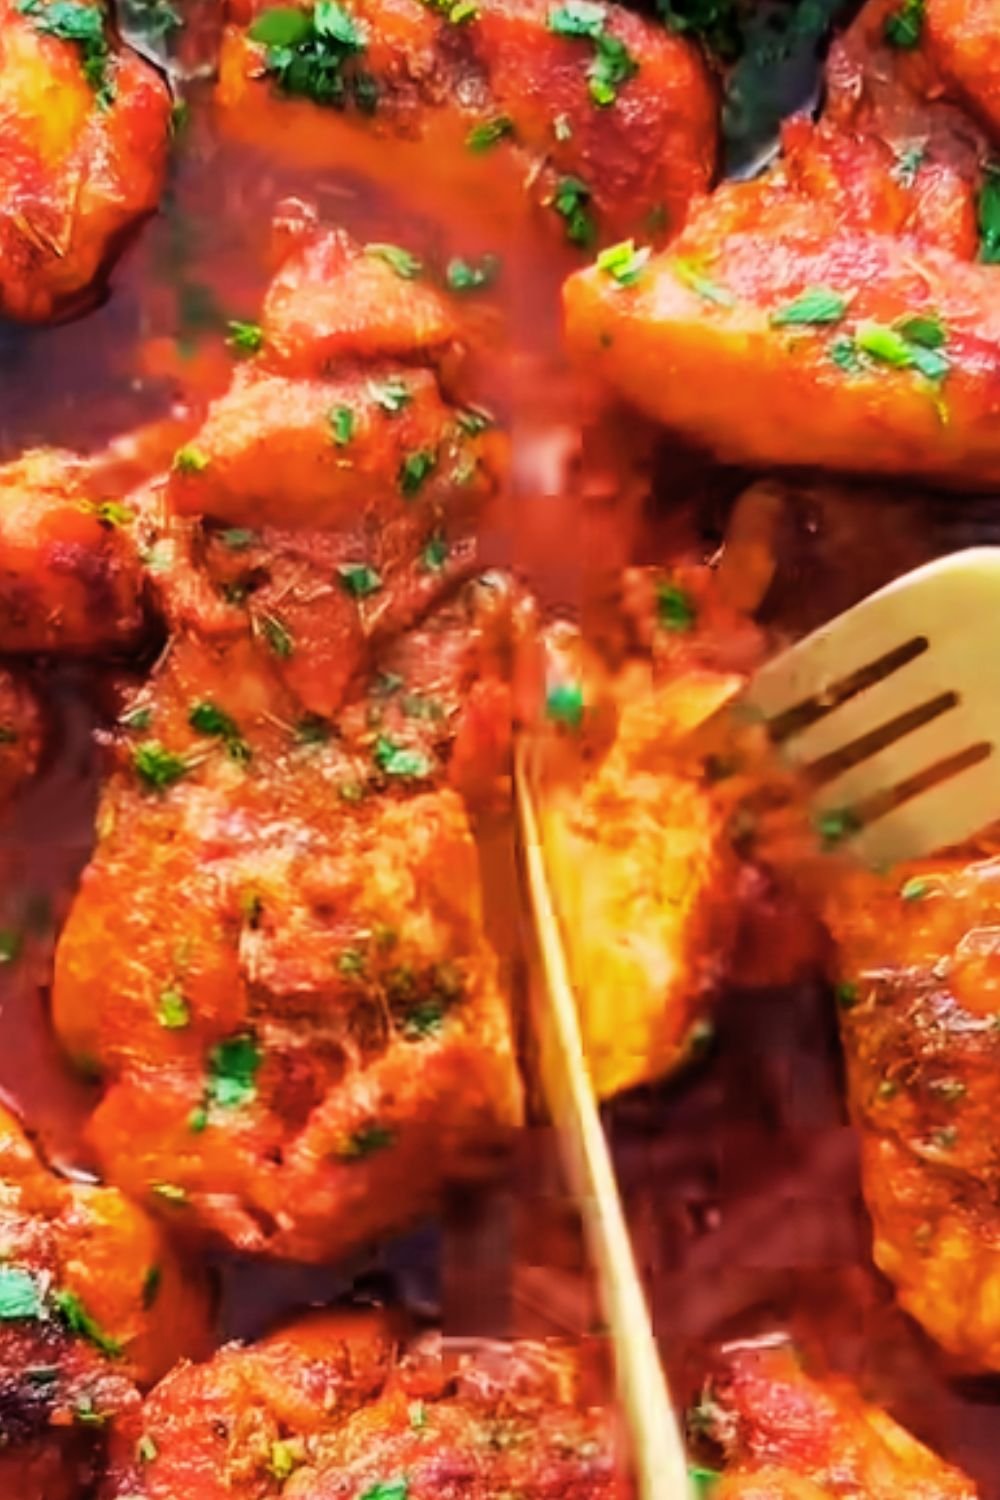
I’ve been cooking for over fifteen years, and if there’s one recipe that never fails to impress while keeping things simple, it’s sheet pan chicken thighs. This method has revolutionized my weeknight dinners and become my go-to when I want something delicious without the fuss of multiple pots and pans.
Sheet pan chicken thighs represent the perfect marriage of convenience and flavor. Unlike their breast counterparts, chicken thighs remain juicy and tender even when slightly overcooked, making them incredibly forgiving for home cooks. The skin crisps beautifully in the oven’s dry heat, while the dark meat stays succulent and flavorful.
What makes this cooking method so appealing is its versatility. I can throw together a complete meal on one pan, combining protein and vegetables that cook at similar rates. The cleanup is minimal, the flavors meld together beautifully, and the results are consistently restaurant-quality.
Why I Choose Chicken Thighs Over Breasts
After years of cooking both cuts, I’ve developed a strong preference for thighs in sheet pan cooking. The higher fat content means they stay moist during the longer cooking time required for vegetables to become tender. The skin, when properly prepared, becomes golden and crispy – something that’s harder to achieve with boneless, skinless breasts.
Fat Content and Flavor Profile : Chicken thighs contain approximately 5-7 grams more fat per serving than breasts, contributing to their rich, savory taste and moisture retention during cooking.
Cooking Temperature Tolerance : Thighs remain juicy even when cooked to 180°F internal temperature, while breasts become dry if cooked beyond 165°F.
Cost Effectiveness : Typically 30-40% less expensive than chicken breasts, making them budget-friendly for families.
Skin-On Benefits : The skin acts as a natural barrier, protecting the meat from drying out while providing textural contrast.
Essential Equipment and Preparation
My sheet pan chicken thigh success starts with having the right tools and understanding proper preparation techniques. Over the years, I’ve learned that small details make enormous differences in the final result.
Required Equipment
The foundation of great sheet pan cooking lies in using appropriate equipment. I always reach for my heavy-duty aluminum sheet pans – they conduct heat evenly and won’t warp under high temperatures. A good meat thermometer is non-negotiable for food safety and optimal texture.
Sheet Pan Specifications : Use 18″ x 13″ half-sheet pans with 1-inch sides for optimal heat circulation and capacity.
Rack Usage : Wire cooling racks elevate chicken above rendered fat, promoting even browning and preventing soggy bottoms.
Parchment vs. Foil : Parchment paper allows better browning than foil but may brown at temperatures above 425°F.
Chicken Selection and Preparation
I always choose bone-in, skin-on thighs weighing 6-8 ounces each. This size ensures even cooking and provides the best meat-to-bone ratio. When I bring them home, I immediately pat them dry with paper towels – moisture is the enemy of crispy skin.
The key preparation step that many home cooks skip is seasoning well in advance. I season my thighs at least 30 minutes before cooking, though overnight is even better. This allows the salt to penetrate the meat, enhancing flavor throughout rather than just on the surface.
My Foolproof Sheet Pan Chicken Thigh Recipe
This recipe has evolved through countless iterations in my kitchen. I’ve tested different temperatures, timing, and vegetable combinations to create what I consider the perfect balance of crispy skin, juicy meat, and perfectly cooked vegetables.
Ingredients
For the Chicken:
- 8 bone-in, skin-on chicken thighs (6-8 oz each)
- 2 tablespoons olive oil
- 2 teaspoons kosher salt
- 1 teaspoon black pepper
- 1 teaspoon garlic powder
- 1 teaspoon paprika
- 1/2 teaspoon dried thyme
- 1/2 teaspoon onion powder
For the Vegetables:
- 1.5 pounds baby potatoes, halved
- 1 large red onion, cut into wedges
- 2 bell peppers, cut into strips
- 1 zucchini, sliced into rounds
- 3 tablespoons olive oil
- 1 teaspoon salt
- 1/2 teaspoon pepper
Step-by-Step Instructions
My method ensures every component cooks to perfection simultaneously. The secret lies in understanding how different vegetables cook at different rates and arranging them accordingly on the pan.
- Preheat and Prepare: Set oven to 425°F. Line a large sheet pan with parchment paper.
- Season the Chicken: Pat thighs completely dry. Mix all spices in a small bowl. Rub chicken with olive oil, then coat evenly with spice mixture. Let sit at room temperature for 30 minutes.
- Prepare Vegetables: Toss all vegetables with olive oil, salt, and pepper in a large bowl. Arrange on sheet pan, leaving space for chicken.
- Arrange and Cook: Place seasoned thighs skin-side up on the pan among vegetables. Roast for 35-45 minutes until internal temperature reaches 165°F.
- Rest and Serve: Let rest 5 minutes before serving to allow juices to redistribute.

Mastering Different Flavor Profiles
One reason I never tire of sheet pan chicken thighs is the endless flavor possibilities. By changing the seasoning blend and vegetable selection, I can create completely different meals that keep my family excited about dinner.
Mediterranean Inspiration
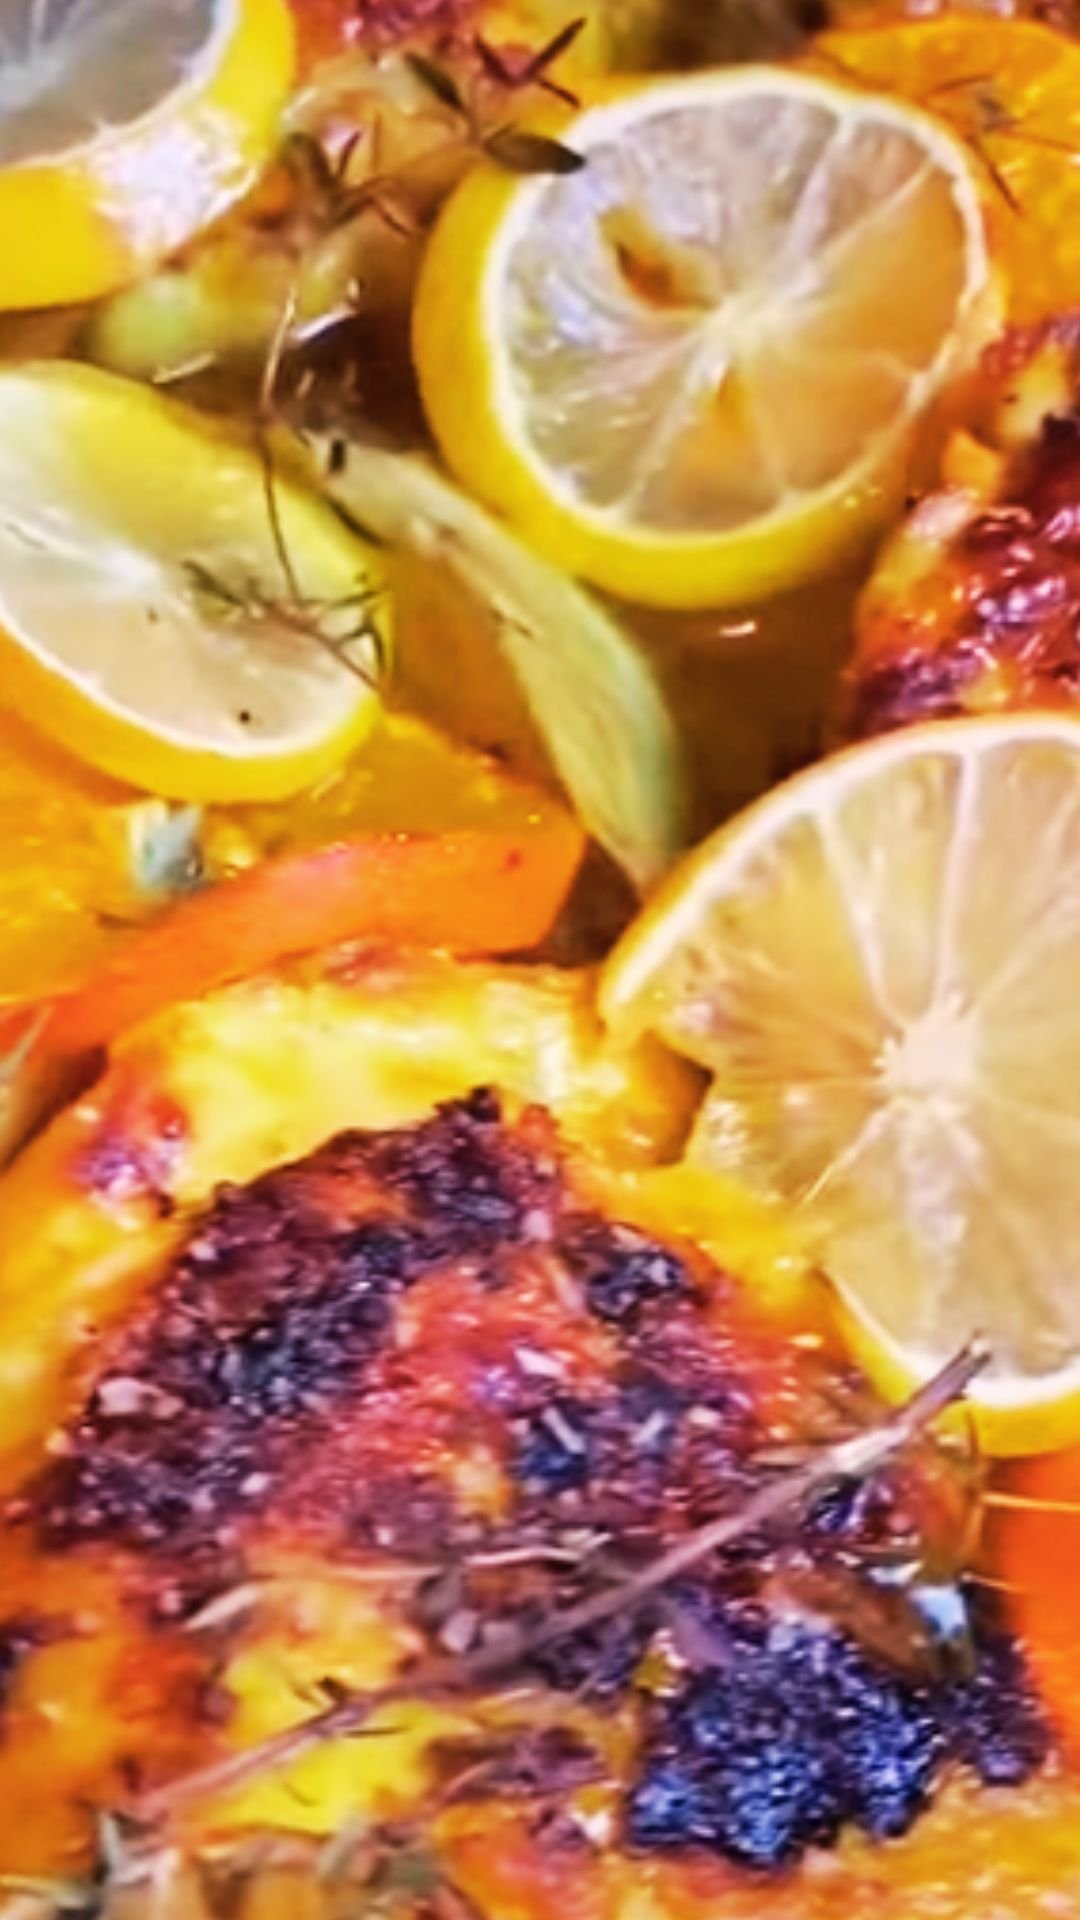
My Mediterranean version incorporates olives, cherry tomatoes, and fresh herbs. I use a blend of oregano, basil, and rosemary with lemon zest. The vegetables include red onions, bell peppers, and zucchini, with Kalamata olives added in the final 10 minutes of cooking.
Asian-Inspired Variations
For Asian flavors, I create a glaze using soy sauce, honey, rice vinegar, and fresh ginger. The vegetables shift to include snap peas, baby corn, and sliced mushrooms. I finish with sesame seeds and chopped green onions.
Mexican-Style Preparation
My Mexican-inspired version uses cumin, chili powder, and smoked paprika. I pair the chicken with bell peppers, red onions, and poblano peppers, serving with fresh cilantro and lime wedges.
Vegetable Selection and Timing Guide
Understanding which vegetables work best together requires considering their cooking times and moisture content. I’ve developed a system that ensures everything finishes simultaneously.
| Vegetable Type | Prep Method | Cooking Time | Placement Strategy |
|---|---|---|---|
| Root Vegetables | Cut into 1-inch pieces | 35-45 minutes | Edges of pan for maximum heat |
| Potatoes (Baby) | Halved | 35-40 minutes | Single layer, cut-side down |
| Bell Peppers | 1-inch strips | 25-30 minutes | Add after 10 minutes |
| Onions | Thick wedges | 30-35 minutes | Throughout pan |
| Zucchini/Squash | 1/2-inch rounds | 20-25 minutes | Add after 15 minutes |
| Cherry Tomatoes | Whole | 15-20 minutes | Add after 20 minutes |
| Asparagus | Trimmed spears | 12-15 minutes | Add after 25 minutes |
| Brussels Sprouts | Halved | 25-30 minutes | Cut-side down |
Quick-Cooking Vegetables
Some vegetables cook much faster than chicken thighs. I add these during the final stages of cooking to prevent overcooking while still allowing them to absorb the rendered chicken fat and seasonings.
Green Vegetables : Broccoli, asparagus, and green beans should be added in the final 15 minutes to maintain their vibrant color and slight crunch.
Delicate Vegetables : Cherry tomatoes, snap peas, and fresh corn kernels need only 10-12 minutes of cooking time.
Leafy Greens : Spinach, kale, and chard can be stirred in during the final 5 minutes, using residual heat to wilt them perfectly.
Temperature Control and Timing Mastery
Achieving perfectly cooked sheet pan chicken thighs requires understanding how oven temperature affects both the protein and vegetables. Through extensive testing, I’ve found that 425°F provides the optimal balance of crispy skin and properly cooked vegetables.
Internal Temperature Guidelines
Food safety requires chicken to reach 165°F internal temperature, but I’ve learned that thighs actually benefit from slightly higher temperatures. I target 170-175°F for the juiciest, most tender results.
| Temperature Range | Texture Result | Recommended Use |
|---|---|---|
| 165°F | Safe, slightly firm | Minimum safe temperature |
| 170°F | Tender, juicy | Optimal for most preparations |
| 175°F | Very tender, falling off bone | Best for longer cooking methods |
| 180°F+ | Overcooked, dry | Avoid for best results |
Oven Positioning Strategy
I always place my sheet pan on the middle rack to ensure even heat distribution. The top rack can cause excessive browning before the chicken cooks through, while the bottom rack may result in burnt vegetables before the skin crisps properly.
Convection vs. Conventional : Convection ovens cook 25°F lower and 25% faster. I reduce temperature to 400°F and check doneness 5-8 minutes earlier.
Hot Spots Awareness : Every oven has hot spots. I rotate my pan halfway through cooking to ensure even browning and cooking.
Troubleshooting Common Issues
Even experienced cooks encounter challenges with sheet pan cooking. I’ve compiled solutions to the most frequent problems I’ve encountered over the years.
Soggy Skin Solutions
Nothing disappoints me more than soggy chicken skin after anticipating that perfect crispy texture. The culprit is usually excess moisture or overcrowding the pan.
Prevention Strategies:
- Always pat chicken completely dry before seasoning
- Use a wire rack to elevate chicken above rendered fat
- Avoid covering the pan during cooking
- Don’t overcrowd – leave space between pieces
- Start with room temperature chicken for even cooking
Overcooked Vegetables
Vegetables that turn mushy or burnt while chicken reaches proper temperature indicate timing or temperature issues. The solution lies in understanding cooking rates and proper pan arrangement.
Vegetable Rescue Methods:
- Cut root vegetables larger to slow cooking
- Add quick-cooking vegetables in stages
- Use higher oven rack position for faster browning
- Toss vegetables with less oil to prevent burning
Uneven Cooking Results
When some pieces cook faster than others, it usually indicates size inconsistency or poor pan arrangement. I always aim for uniform sizing and strategic placement.
Meal Planning and Storage Solutions
Sheet pan chicken thighs excel in meal prep scenarios. I often double recipes on Sunday afternoons, creating ready-to-reheat meals for busy weeknights.
Storage Guidelines
Properly stored sheet pan meals maintain quality for 3-4 days in the refrigerator. I separate the chicken and vegetables into different containers to prevent the vegetables from becoming soggy.
Refrigeration Best Practices:
- Cool completely before refrigerating
- Store in airtight containers
- Keep chicken and vegetables separate
- Use within 3-4 days for best quality
Freezing Considerations:
- Freeze for up to 3 months
- Thaw overnight in refrigerator
- Expect some texture changes in vegetables
- Best results with hearty root vegetables
Reheating Techniques
I’ve tested various reheating methods and found that the oven produces the best results for maintaining texture and flavor. The microwave works for convenience but sacrifices the crispy skin texture.
| Reheating Method | Time Required | Texture Result | Energy Efficiency |
|---|---|---|---|
| Oven (350°F) | 15-20 minutes | Excellent, crispy skin | Low |
| Toaster Oven | 12-15 minutes | Good, some crispness | Medium |
| Microwave | 2-3 minutes | Fast, soft skin | High |
| Stovetop | 8-10 minutes | Good, requires attention | Medium |
Serving Suggestions and Accompaniments
While sheet pan chicken thighs create a complete meal, I sometimes add simple sides or sauces to round out the dining experience. The key is choosing accompaniments that complement rather than compete with the main dish.
Grain-Based Sides
I often serve my sheet pan chicken over or alongside grains that absorb the delicious pan juices. Rice pilaf, quinoa, or farro work beautifully, adding substance and soaking up the rendered chicken fat and vegetable juices.
Rice Variations:
- Coconut rice for Asian-inspired preparations
- Lemon herb rice for Mediterranean flavors
- Spanish rice for Mexican-style chicken
- Wild rice pilaf for heartier autumn meals
Fresh Element Additions
Adding fresh elements after cooking brightens the entire dish. I frequently finish with fresh herbs, a squeeze of citrus, or a drizzle of good olive oil.
Finishing Touches:
- Fresh parsley or cilantro for color and freshness
- Lemon or lime wedges for acidity
- Grated Parmesan cheese for richness
- Toasted nuts or seeds for textural contrast
Sauce Pairings
While the chicken and vegetables develop tremendous flavor during cooking, sometimes I serve simple sauces on the side for those who want extra richness or different flavor profiles.
Nutritional Benefits and Considerations
Sheet pan chicken thighs provide excellent nutritional value, combining high-quality protein with a variety of vegetables. I appreciate that this cooking method requires minimal added fats while maximizing nutrient retention.
Protein Content Analysis
Chicken thighs offer complete protein with all essential amino acids. A typical 6-ounce serving provides approximately 35-40 grams of protein, supporting muscle maintenance and satiety.
| Nutrient | Amount per 6oz Thigh | Daily Value % |
|---|---|---|
| Protein | 38g | 76% |
| Iron | 2.1mg | 12% |
| Zinc | 3.8mg | 35% |
| Selenium | 32mcg | 58% |
| Niacin | 12mg | 75% |
| Vitamin B6 | 0.8mg | 47% |
Vegetable Nutrient Retention
The sheet pan cooking method helps retain water-soluble vitamins better than boiling or steaming. The moderate heat and shorter cooking time preserve more nutrients compared to longer braising methods.
Nutrient Preservation Benefits:
- Vitamin C retention in peppers and tomatoes
- Carotenoid availability in colorful vegetables
- Fiber content remains intact
- Mineral content concentrated through moisture loss
Seasonal Adaptations
I adapt my sheet pan chicken thigh recipes throughout the year, incorporating seasonal vegetables and adjusting cooking methods for changing weather patterns.
Spring Preparations
Spring vegetables like asparagus, peas, and baby carrots bring fresh flavors after winter’s heartier fare. I use lighter seasonings with fresh herbs and citrus to complement the delicate vegetable flavors.
Summer Variations
During hot summer months, I sometimes finish the dish on the grill for added smokiness without heating up the kitchen. Zucchini, bell peppers, and cherry tomatoes work particularly well for summer versions.
Fall Comfort Foods
Autumn calls for heartier vegetables like butternut squash, Brussels sprouts, and sweet potatoes. I incorporate warming spices like sage, rosemary, and thyme to complement the season’s bounty.
Winter Heartiness
Winter sheet pan meals feature storage vegetables like carrots, parsnips, and cabbage. I use bolder seasonings and sometimes add dried fruits or nuts for extra richness during cold months.
Advanced Techniques and Variations
After mastering the basic method, I’ve developed several advanced techniques that elevate sheet pan chicken thighs from simple weeknight dinner to impressive entertaining fare.
Brining for Extra Flavor
I sometimes brine chicken thighs for 2-4 hours before cooking, especially when entertaining. The salt solution penetrates the meat, ensuring seasoning throughout while maintaining moisture during cooking.
Basic Brine Recipe:
- 4 cups water
- 1/4 cup kosher salt
- 2 tablespoons sugar
- Bay leaves and peppercorns for flavor
Compound Butter Finishing
Adding compound butter during the final minutes of cooking creates restaurant-quality richness. I prepare herb butter in advance, then dollop it over the chicken during the last 5 minutes of cooking.
Two-Stage Cooking Method
For extra-crispy skin, I sometimes use a two-stage cooking method. I start at 450°F for 15 minutes to crisp the skin, then reduce to 375°F and add vegetables for the remaining cooking time.
Questions and Answers
Q: How do I prevent my chicken skin from becoming soggy during sheet pan cooking?
The key to crispy skin lies in removing moisture before cooking. I always pat the chicken completely dry with paper towels, then let it sit uncovered in the refrigerator for at least 30 minutes. Using a wire rack elevates the chicken above rendered fat, and avoiding overcrowding ensures proper air circulation around each piece.
Q: Can I use boneless chicken thighs instead of bone-in for sheet pan cooking?
Absolutely! Boneless thighs cook faster, typically requiring 25-30 minutes at 425°F. I adjust my vegetable timing accordingly, often starting the vegetables first and adding the chicken after 10-15 minutes. The bone-in variety stays juicier, but boneless works well when you need quicker cooking times.
Q: What vegetables should I avoid using in sheet pan cooking with chicken thighs?
I avoid vegetables with very high water content like cucumbers or lettuce, as they become mushy and release too much moisture. Delicate greens like spinach work better added in the final minutes. Also, avoid vegetables that require very different cooking temperatures – corn on the cob, for example, needs much longer cooking than the chicken.
Q: How do I know when my sheet pan chicken thighs are perfectly done?
I always use a meat thermometer inserted into the thickest part of the thigh, avoiding the bone. The internal temperature should reach 165°F for food safety, though I prefer 170-175°F for optimal texture. The juices should run clear, and the skin should be golden brown and crispy.
Q: Can I prepare sheet pan chicken thighs ahead of time for meal prep?
Yes! I often season the chicken and prep the vegetables the night before, storing them separately in the refrigerator. On cooking day, I bring everything to room temperature for 30 minutes before arranging on the pan. This saves significant time on busy weeknights while ensuring even cooking.
Q: What’s the best way to reheat leftover sheet pan chicken thighs?
For the best results, I reheat in a 350°F oven for 15-20 minutes, which helps restore some crispiness to the skin. I place the chicken on a wire rack over a baking sheet to prevent steaming. The microwave works for convenience but results in softer skin. Adding a few drops of water to the vegetables helps prevent them from drying out during reheating.
Q: How do I adjust cooking times for different sized chicken thighs?
Smaller thighs (4-5 ounces) typically cook in 30-35 minutes, while larger ones (8-10 ounces) may need 45-50 minutes. I always rely on internal temperature rather than time alone. Starting all pieces at room temperature helps ensure even cooking regardless of size variations.
Q: Can I use frozen chicken thighs for sheet pan cooking?
While possible, I don’t recommend it for best results. Frozen thighs release excess moisture during cooking, preventing proper browning and potentially creating food safety issues if not thoroughly thawed. If you must use frozen thighs, thaw them completely overnight in the refrigerator and pat them extra dry before seasoning.