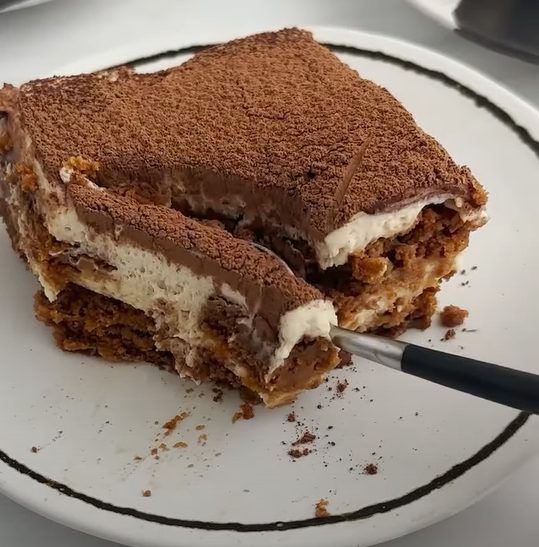
I’ve been obsessed with red velvet desserts for years, and when I discovered the magic of combining red velvet cake with cinnamon rolls, my breakfast game changed forever. These stunning red velvet cinnamon rolls bring together the best of both worlds – the tangy, cocoa-kissed flavor of red velvet with the comforting, gooey texture of traditional cinnamon rolls.
What makes these rolls so special isn’t just their gorgeous crimson color that practically screams “special occasion.” It’s the way the subtle chocolate flavor pairs with warm cinnamon, creating a breakfast treat that’s elegant enough for holidays yet simple enough for weekend mornings. I’ve perfected this recipe through countless batches, and I’m excited to share every secret I’ve learned along the way.
Understanding Red Velvet: More Than Just Food Coloring
Before diving into the recipe, let me explain what makes red velvet truly special. Many people think it’s just vanilla cake with red food coloring, but that’s not quite right. Traditional red velvet has a unique flavor profile that comes from the reaction between cocoa powder and acidic ingredients like buttermilk and vinegar.
Key Red Velvet Components:
- Cocoa Powder: Provides subtle chocolate flavor without overwhelming sweetness
- Buttermilk: Adds tanginess and creates tender crumb structure
- White Vinegar: Reacts with cocoa to enhance flavor and color
- Food Coloring: Enhances the natural reddish hue from the cocoa reaction
- Vanilla Extract: Rounds out the flavor profile
The magic happens when these ingredients work together. The acid in buttermilk and vinegar reacts with the cocoa powder, creating that distinctive taste that’s not quite chocolate, not quite vanilla, but something wonderfully unique.
Essential Ingredients for Perfect Red Velvet Cinnamon Rolls
For the Dough:
- 3½ cups all-purpose flour (420g) – I prefer unbleached for better texture
- ¼ cup granulated sugar (50g) – Just enough to feed the yeast
- 1 packet active dry yeast (2¼ teaspoons) – Fresh yeast works best
- 1 teaspoon salt – Enhances all other flavors
- ¾ cup warm buttermilk (180ml) – Should feel like a warm bath
- ⅓ cup unsalted butter, melted (75g) – European-style butter preferred
- 1 large egg, room temperature – Helps create rich, tender dough
- 2 tablespoons unsweetened cocoa powder – Dutch-processed works well
- 1 tablespoon red food coloring – Gel coloring gives better results
- 1 teaspoon vanilla extract – Pure vanilla, never imitation
- 1 teaspoon white vinegar – Essential for authentic red velvet flavor
For the Filling:
- ½ cup unsalted butter, softened (115g) – Must be spreadable
- ⅔ cup brown sugar, packed (135g) – Dark brown for deeper flavor
- 2 tablespoons ground cinnamon – Ceylon cinnamon preferred
- 1 tablespoon cocoa powder – Reinforces the chocolate notes
- Pinch of salt – Balances sweetness
For the Cream Cheese Glaze:
- 4 oz cream cheese, softened (115g) – Full-fat only
- ¼ cup unsalted butter, softened (55g) – Room temperature
- 1½ cups powdered sugar (190g) – Sifted for smoothness
- 2-3 tablespoons milk – Adjust for desired consistency
- 1 teaspoon vanilla extract – Complements cream cheese beautifully
Step-by-Step Instructions: Creating Bakery-Quality Results
Preparing the Dough
I always start by activating my yeast because there’s nothing worse than flat cinnamon rolls. In a small bowl, I combine the warm buttermilk (it should feel like a comfortable bath temperature) with a pinch of the sugar from my recipe. I sprinkle the yeast over the surface and let it sit for 5-10 minutes until it becomes foamy and fragrant.
While the yeast activates, I prepare my dry ingredients. In a large mixing bowl, I whisk together the flour, remaining sugar, salt, and cocoa powder. This ensures even distribution of the cocoa, which is crucial for consistent color throughout the rolls.
Once my yeast mixture is ready, I create a well in the center of my flour mixture and add the foamy yeast, melted butter, egg, red food coloring, vanilla, and vinegar. Using a wooden spoon, I stir until the mixture comes together into a shaggy dough.
Kneading Technique: I turn the dough onto a lightly floured surface and knead for 8-10 minutes until it becomes smooth and elastic. The dough should feel slightly tacky but not sticky. If it’s too wet, I add flour one tablespoon at a time. If it’s too dry, I add buttermilk one teaspoon at a time.
First Rise
I place the kneaded dough in a greased bowl, turning it once to coat all surfaces with oil. Cover with a damp kitchen towel and let it rise in a warm, draft-free location for 1-2 hours, or until doubled in size. My favorite rising spot is my oven with just the light turned on.
Preparing the Filling
While the dough rises, I prepare my filling by combining softened butter, brown sugar, cinnamon, cocoa powder, and salt in a medium bowl. I mix until the mixture resembles a spreadable paste. The consistency should be similar to thick frosting.
Rolling and Shaping
Once my dough has doubled, I punch it down gently and turn it onto a lightly floured surface. Using a rolling pin, I roll it into a rectangle approximately 16×12 inches. The thickness should be about ¼ inch – not too thin that it tears, but not so thick that the rolls become heavy.
I spread the filling mixture evenly over the dough, leaving about a ½-inch border on one long side. This border helps seal the roll when I’m finished rolling it up.
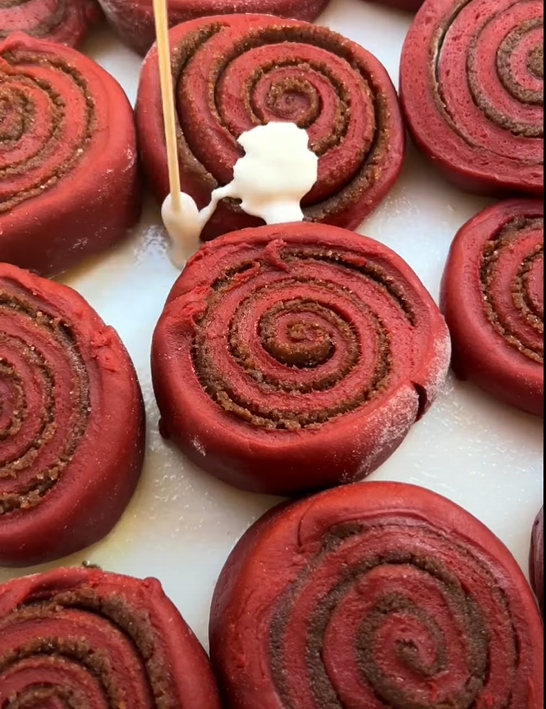
Rolling Technique: Starting from the long side opposite the border, I roll the dough tightly but gently. I try to keep the roll even and compact without squeezing out the filling. Once I reach the border, I pinch the seam to seal it.
Using a sharp knife or unflavored dental floss, I cut the log into 12 equal pieces. Dental floss actually works better because it cuts cleanly without compressing the rolls.
Second Rise and Baking
I arrange the cut rolls in a greased 9×13-inch baking dish, leaving small gaps between each roll for expansion. Cover with a damp towel and let rise for another 30-45 minutes until puffy.
While the rolls complete their second rise, I preheat my oven to 350°F (175°C).
I bake the rolls for 25-30 minutes, or until the tops are set and lightly golden. The internal temperature should reach 190°F (88°C) when measured with an instant-read thermometer.
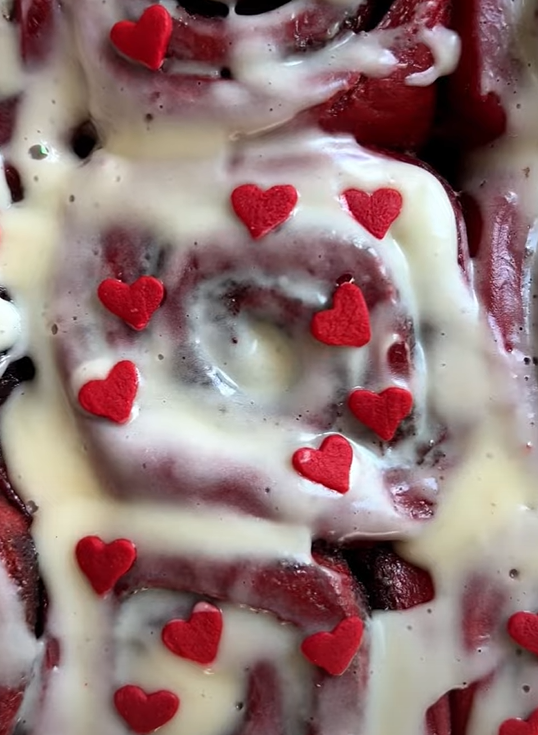
Cream Cheese Glaze: The Perfect Finishing Touch
While the rolls cool slightly, I prepare the cream cheese glaze. In a medium bowl, I beat the softened cream cheese and butter until light and fluffy, about 3-4 minutes with an electric mixer.
Gradually, I add the powdered sugar, beating until smooth. Then I incorporate the milk one tablespoon at a time until I reach my desired consistency – thick enough to stay on the rolls but thin enough to drizzle beautifully.
I always add the vanilla last because it can sometimes thin the glaze more than expected.
Nutritional Information and Serving Details
| Nutritional Facts | Per Roll (1 of 12) |
|---|---|
| Calories | 385 |
| Total Fat | 12g |
| Saturated Fat | 7g |
| Cholesterol | 45mg |
| Sodium | 290mg |
| Total Carbohydrates | 68g |
| Dietary Fiber | 2g |
| Sugars | 35g |
| Protein | 6g |
| Vitamin A | 8% DV |
| Calcium | 12% DV |
| Iron | 15% DV |
Timing and Preparation Schedule
| Activity | Time Required | Best Practice |
|---|---|---|
| Dough Preparation | 20 minutes | Room temperature ingredients mix easier |
| First Rise | 1-2 hours | Warm, draft-free environment |
| Rolling and Filling | 15 minutes | Keep dough slightly cool for easier handling |
| Second Rise | 30-45 minutes | Don’t over-rise or rolls become dense |
| Baking | 25-30 minutes | Rotate pan halfway through for even browning |
| Cooling | 10 minutes | Glaze while slightly warm for best absorption |
| Total Time | 3-4 hours | Plan accordingly for fresh serving |
Troubleshooting Common Issues
Dense or Heavy Rolls
This usually happens when the dough is over-kneaded or contains too much flour. Red velvet dough should feel slightly tacky, not completely smooth like regular bread dough. The cocoa powder can make the dough seem drier than it actually is.
Uneven Color Distribution
If your rolls have streaky or uneven coloring, the red food coloring wasn’t properly incorporated into the dough. I always add the coloring with the wet ingredients and ensure thorough mixing before kneading.
Filling Leaks Out
When the filling oozes out during baking, it’s usually because the dough was rolled too tightly or the filling was too soft. Make sure your butter is softened but not melted, and roll with gentle, even pressure.
Glaze Too Thick or Thin
Cream cheese glaze consistency depends heavily on the temperature of your ingredients and humidity. If it’s too thick, add milk one teaspoon at a time. If too thin, add more powdered sugar gradually.
Storage and Make-Ahead Tips
These red velvet cinnamon rolls are best enjoyed fresh, but I’ve developed several strategies for preparing them ahead of time.
Overnight Method: After cutting the rolls and placing them in the baking dish, cover tightly with plastic wrap and refrigerate overnight. In the morning, let them come to room temperature and complete their second rise before baking. This actually improves the flavor as the dough develops more complexity.
Freezing Unbaked Rolls: I can freeze the shaped rolls before the second rise. Place them on a baking sheet and freeze until solid, then transfer to freezer bags. When ready to bake, thaw overnight in the refrigerator, then proceed with the second rise and baking.
Storing Baked Rolls: Leftover rolls stay fresh for up to 3 days at room temperature in an airtight container. I recommend warming them slightly in the microwave before serving – about 15-20 seconds per roll.
Serving Suggestions and Occasions
Red velvet cinnamon rolls are incredibly versatile and work beautifully for various occasions:
Special Occasions:
- Valentine’s Day breakfast
- Christmas morning tradition
- Anniversary celebrations
- Birthday brunches
- Mother’s Day treats
Everyday Enjoyment:
- Weekend family breakfasts
- Afternoon coffee treats
- Potluck contributions
- Bake sale items
- Welcome gifts for new neighbors
Pairing Suggestions: I love serving these with fresh berries to cut through the richness. A hot cup of coffee or black tea complements the flavors perfectly. For something lighter, try them with fresh orange juice or a fruit smoothie.
Variations and Customizations
Flavor Variations
Orange Red Velvet: Add 1 tablespoon orange zest to the dough and replace vanilla with orange extract in both the rolls and glaze.
Espresso Red Velvet: Dissolve 1 tablespoon instant espresso in the warm buttermilk before adding to the dough.
Spiced Red Velvet: Add ¼ teaspoon each of nutmeg and cardamom to the filling mixture.
Dietary Modifications
Reduced Sugar: Replace half the brown sugar in the filling with sugar-free brown sugar substitute.
Dairy-Free Option: Use plant-based buttermilk and vegan butter, though the texture will be slightly different.
Professional Baking Tips I’ve Learned
Through years of making these rolls, I’ve discovered several tricks that separate good results from bakery-quality perfection:
Temperature Matters: I always use an instant-read thermometer to check my buttermilk temperature. Too hot kills the yeast; too cool slows fermentation dramatically.
Flour Measurement: I weigh my flour when possible because cup measurements can vary significantly. Too much flour creates dense rolls.
Humidity Awareness: On humid days, I reduce the liquid slightly. On dry days, I might need to add a bit more buttermilk to achieve the right dough consistency.
Oven Calibration: Most home ovens run hot or cool. I use an oven thermometer to ensure accuracy, especially important for proper rise and browning.
The Science Behind Perfect Red Velvet
Understanding the chemistry helps create better results. The reaction between cocoa powder and acidic ingredients (buttermilk and vinegar) creates compounds that enhance both flavor and color. This is why traditional red velvet recipes always include these acidic components – they’re not just for tang, they’re essential for authentic flavor development.
The yeast in cinnamon roll dough works differently than in regular bread because of the sugar and fat content. These ingredients slow yeast activity, which is why red velvet cinnamon rolls need longer rise times than plain versions.
Questions & Answers
Q: Can I make these without food coloring? I understand some people prefer to avoid artificial coloring. You can make these without food coloring – they’ll taste exactly the same but will be more brown than red. Natural alternatives like beet juice powder work but affect the flavor slightly.
Q: Why do my rolls always turn out dense? Dense rolls usually result from over-kneading, too much flour, or insufficient rising time. Red velvet dough should feel slightly tacky, and patience during rising is crucial. The cocoa powder can make the dough seem ready before it actually is.
Q: Can I use buttermilk powder instead of liquid buttermilk? Absolutely! Mix the buttermilk powder with your dry ingredients and use warm water in place of the liquid buttermilk. The flavor will be nearly identical, though the texture might be slightly less tender.
Q: How do I know when the dough has risen enough? The dough should double in size and pass the “poke test” – when you gently poke it with your finger, the indentation should slowly spring back halfway. If it springs back completely, it needs more time. If it doesn’t spring back at all, it’s over-proofed.
Q: Why does my cream cheese glaze turn out lumpy? Lumpy glaze happens when the cream cheese or butter is too cold. Both ingredients must be at room temperature for smooth mixing. If you’re in a hurry, cut the cream cheese into small cubes and microwave for 10-15 seconds.
Q: Can I use gel food coloring instead of liquid? Gel coloring actually works better! It’s more concentrated, so you’ll need less (start with 1 teaspoon), and it won’t thin your dough like liquid coloring can.
Q: How long do these stay fresh? These rolls are best within 24 hours but stay good for up to 3 days covered at room temperature. I don’t recommend refrigerating them as it makes the texture go stale faster.
Q: Can I freeze the finished rolls? You can freeze baked rolls for up to 3 months. Wrap individually in plastic wrap, then place in freezer bags. Thaw at room temperature and warm gently in the microwave before serving.
Q: What if I don’t have white vinegar? Apple cider vinegar works as a substitute, though it will add a very subtle fruity note. Lemon juice also works in a pinch. The acid is important for the red velvet flavor development.
Q: Why did my filling leak out during baking? This usually happens when the filling is too soft (butter was too warm) or the dough was rolled too tightly. The filling should be spreadable but not runny, and roll with gentle, even pressure.