When it comes to iconic Japanese snacks, few have captured hearts worldwide quite like Pocky. Those slender biscuit sticks dipped in chocolate (or countless other flavors) have been a staple treat since the 1960s. But why limit yourself to store-bought options when making them at home opens up a world of creative possibilities? I’ve spent years perfecting my homemade Pocky recipe, and today I’m sharing all my secrets for creating these addictive treats in your own kitchen.
What Is Pocky?
Pocky (ポッキー) consists of thin, crisp biscuit sticks partially coated in chocolate or flavored cream. Created by Glico in 1966, these treats became famous for their “no mess” design – the uncoated portion serves as a handle, keeping fingers clean while enjoying the sweet coating. The name “Pocky” comes from the Japanese onomatopoeic word “pokkin,” which mimics the snapping sound the sticks make when broken.
Why Make Homemade Pocky?
I started making Pocky at home for several compelling reasons:
- Customizable flavors: Create combinations unavailable in stores
- Control over ingredients: Avoid preservatives and choose quality chocolate
- Fun activity: Perfect for kids’ parties or rainy day projects
- Freshness factor: Nothing beats the taste of freshly made treats
- Cost-effective: Make larger batches for less than premium import prices
- Dietary needs: Easily adapt for allergies or dietary restrictions
Essential Equipment
Before diving into the recipe, let’s review the tools that will make your Pocky-making experience smooth and enjoyable:
| Equipment | Purpose | Recommendation |
|---|---|---|
| Stand mixer (or hand mixer) | Creating smooth, well-incorporated dough | KitchenAid or similar with paddle attachment |
| Rolling pin | Rolling dough to precise thickness | French-style wooden pin for even pressure |
| Ruler | Ensuring consistent stick width | Metal ruler with clear markings |
| Sharp knife or pizza cutter | Cutting dough into uniform sticks | Ceramic blade for clean cuts |
| Baking sheets | Baking the biscuit sticks | Heavy-duty aluminum sheets that won’t warp |
| Parchment paper | Preventing sticking and easy cleanup | Unbleached if possible |
| Tall glass | Dipping container for chocolate | Narrow, tall drinking glass |
| Cooling rack | Proper cooling of dipped sticks | Wire rack with tight grid pattern |
Ingredients for Pocky Biscuit Sticks
For approximately 60-70 Pocky sticks:
| Ingredient | Amount | Notes |
|---|---|---|
| All-purpose flour | 2 cups (250g) | Unbleached preferred for best flavor |
| Unsalted butter | 6 tablespoons (85g) | Room temperature for proper creaming |
| Granulated sugar | ¼ cup (50g) | Fine white sugar for smooth incorporation |
| Egg | 1 large | Room temperature |
| Whole milk | 2 tablespoons (30ml) | Can substitute plant-based milk |
| Salt | ¼ teaspoon | Fine sea salt recommended |
| Vanilla extract | 1 teaspoon | Pure extract, not imitation |
| Baking powder | ½ teaspoon | Aluminum-free preferred |
For Classic Chocolate Coating
| Ingredient | Amount | Notes |
|---|---|---|
| Semi-sweet chocolate | 8 oz (225g) | 60-70% cacao content ideal |
| Coconut oil or shortening | 1 tablespoon | Helps create smooth coating |
Step-by-Step Biscuit Preparation
- Prepare your workspace: Line two baking sheets with parchment paper and preheat your oven to 325°F (165°C).
- Mix dry ingredients: In a medium bowl, whisk together flour, salt, and baking powder.
- Cream butter and sugar: In your stand mixer fitted with the paddle attachment, beat butter and sugar on medium speed until light and fluffy, about 3 minutes. I find this step crucial for achieving the right texture.
- Add wet ingredients: Beat in the egg until fully incorporated, then add vanilla extract and milk. Mix until smooth.
- Incorporate dry ingredients: Gradually add the flour mixture on low speed until just combined. Avoid overmixing, which can make the biscuits tough.
- Rest the dough: Form the dough into a disk, wrap in plastic wrap, and refrigerate for at least 30 minutes. This makes it easier to roll and cut.
- Roll the dough: On a lightly floured surface, roll the dough to 1/8 inch (3mm) thickness. Precision matters here – too thick and they won’t be crisp; too thin and they’ll break easily.
- Cut into sticks: Using a ruler as a guide, cut the dough into strips measuring approximately 5 inches long and ¼ inch wide. A pizza cutter makes this job much easier.
- Transfer to baking sheets: Carefully place the sticks on the prepared baking sheets, leaving about ½ inch between each stick.
- Bake to perfection: Bake for 10-12 minutes, or until the edges just begin to turn golden. Keep a close eye on them as they can quickly overbake.
- Cool completely: Allow the biscuit sticks to cool completely on a wire rack before dipping. This typically takes about 30 minutes.
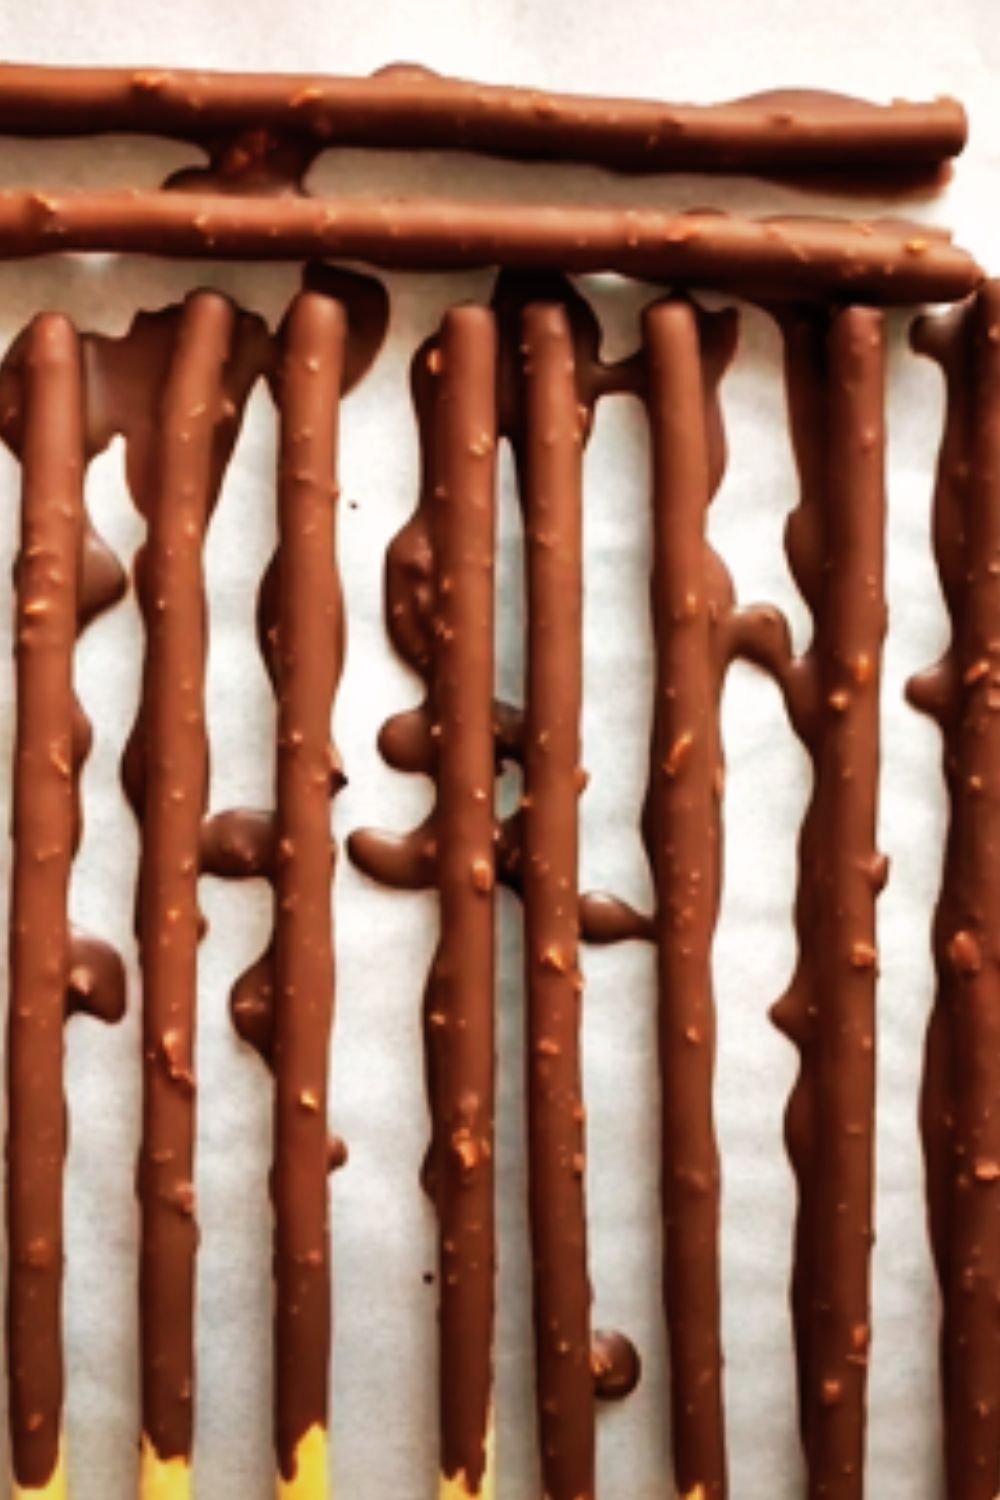
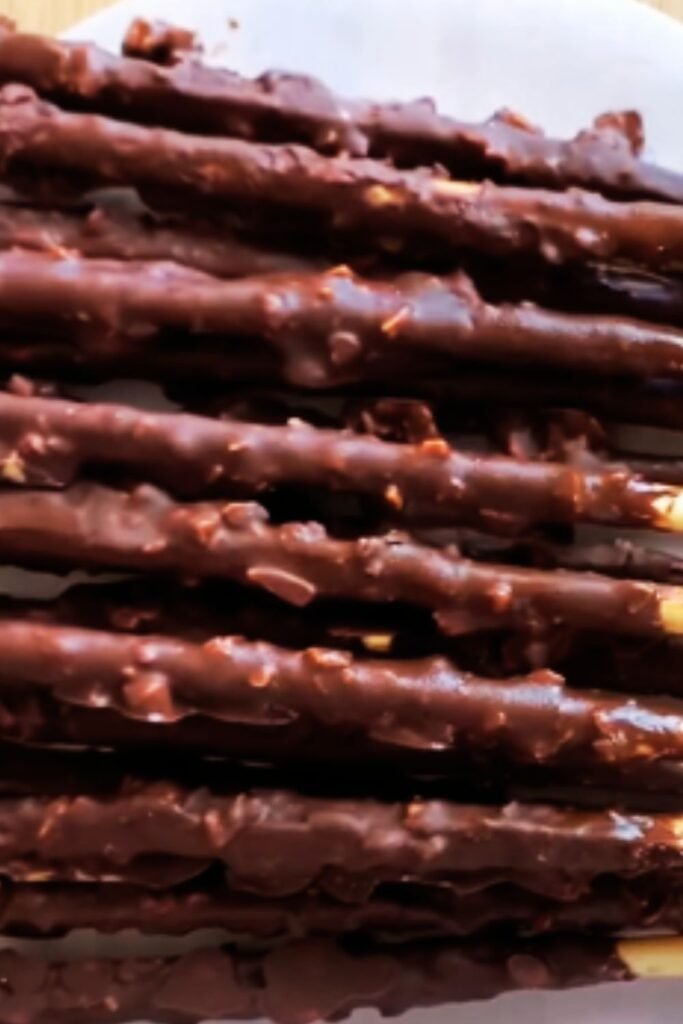
The Art of Chocolate Dipping
The chocolate coating is what transforms simple biscuit sticks into proper Pocky. Here’s my foolproof method:
- Melt the chocolate: Place chopped chocolate and coconut oil in a microwave-safe bowl. Microwave in 30-second intervals, stirring between each, until completely melted and smooth.
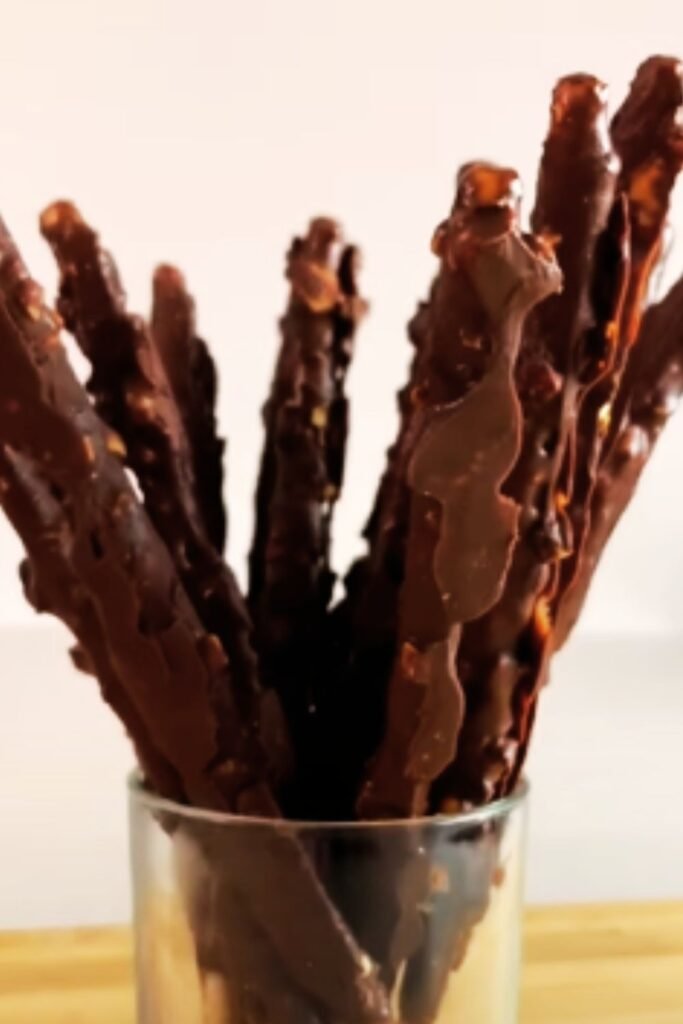
- Transfer to dipping vessel: Pour the melted chocolate into a tall, narrow glass. The height of the glass will determine how much of your stick gets coated.
- Dip with precision: Hold each biscuit stick by one end and dip about ⅔ of it into the chocolate. Gently tap against the side of the glass to remove excess.
- Remove air bubbles: Twirl the stick gently to ensure even coating and remove any air bubbles.
- Place for setting: Lay dipped sticks on a parchment-lined baking sheet or stick them into a block of styrofoam to set upright (my preferred method).
- Allow to set: Let the chocolate set completely at room temperature (about 1 hour) or speed up the process in the refrigerator (about 15 minutes).
Creating Flavor Variations
Once you’ve mastered the basic chocolate Pocky, it’s time to get creative! Here are some of my favorite variations:
Coating Options
| Flavor | Base | Add-Ins |
|---|---|---|
| Matcha Green Tea | White chocolate + 2 tbsp matcha powder | Crushed pistachios |
| Strawberry | White chocolate + freeze-dried strawberry powder | Pink food coloring (optional) |
| Cookies & Cream | White chocolate | Crushed Oreo cookies |
| Milk Tea | White chocolate + 1 tbsp instant milk tea powder | Brown food coloring (optional) |
| Dark Chocolate Orange | Dark chocolate | 1 tsp orange extract, orange zest |
| Almond | Milk chocolate | Finely chopped toasted almonds |
| Coconut | White chocolate | Toasted coconut flakes |
| Coffee | Dark chocolate | 1 tbsp instant espresso powder |
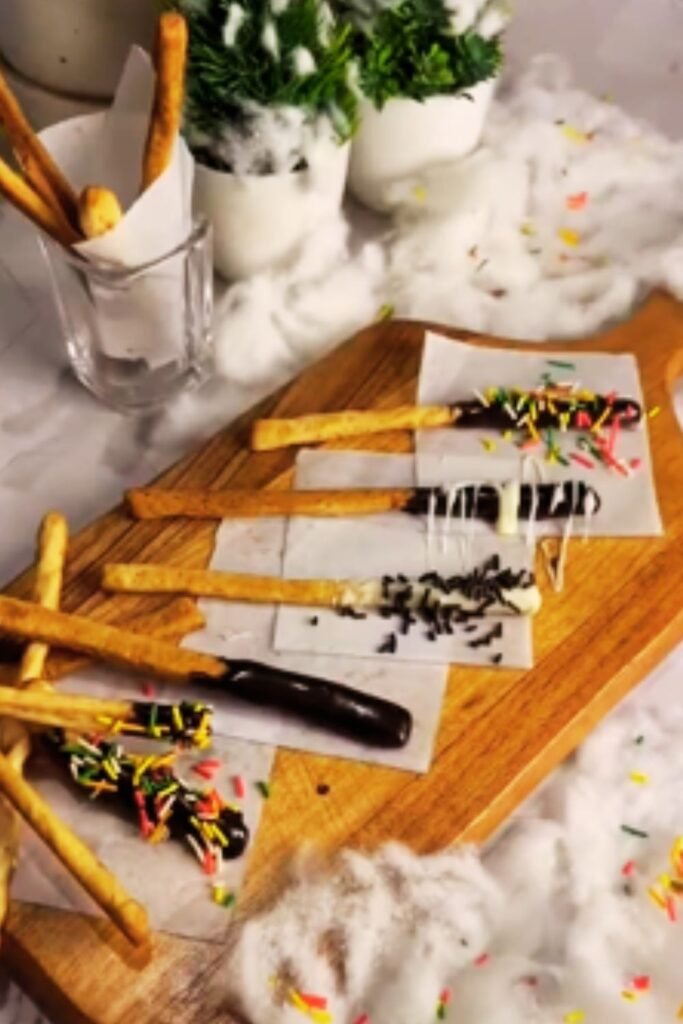
Decorating Techniques
Take your homemade Pocky to the next level with these finishing touches:
- Drizzle: After the base coating has set, drizzle contrasting chocolate in thin lines
- Double dip: Allow first coating to set, then dip again in a different flavor
- Sprinkles: Roll freshly dipped sticks in colorful sprinkles or nonpareils
- Crushed nuts: Toast nuts, crush finely, and roll dipped sticks in them
- Freeze-dried fruit: Crush freeze-dried berries into powder for rolling
- Cookie crumbs: Crush graham crackers, Oreos, or other cookies for coating
- Sea salt: Sprinkle a tiny amount on chocolate coating before it sets
- Edible gold dust: For special occasions, dust with edible gold for luxury
Troubleshooting Common Issues
Even experienced Pocky makers encounter challenges. Here are solutions to common problems:
| Problem | Cause | Solution |
|---|---|---|
| Biscuits too soft | Underbaked | Increase baking time by 1-2 minutes |
| Biscuits too hard | Overbaked or too much flour | Reduce baking time; measure flour carefully |
| Chocolate too thick | Temperature too low | Add more coconut oil; ensure chocolate is warm |
| Chocolate won’t set | Too much oil added | Refrigerate to help setting; adjust ratio next time |
| Biscuits breaking when dipped | Too thin or too fresh | Make thicker sticks; cool completely before dipping |
| Uneven coating | Improper dipping technique | Use tall, narrow container; twirl while removing |
| Chocolate blooming (white streaks) | Temperature fluctuations | Store at consistent temperature; temper chocolate |
Storage and Shelf Life
Proper storage is crucial for maintaining the crisp texture and fresh taste of your homemade Pocky:
- Short term: Store in an airtight container at room temperature for up to 1 week.
- Medium term: Refrigerate in an airtight container for up to 2 weeks.
- Long term: Freeze undipped biscuit sticks for up to 3 months; thaw and dip when ready to enjoy.
I’ve found that adding a small silica gel packet (saved from other food products) helps maintain crispness in humid environments.
Serving Suggestions
Homemade Pocky elevates any occasion. Here are my favorite ways to serve them:
- Dessert charcuterie boards: Arrange different Pocky flavors with fruits, cheeses, and other sweets
- Ice cream topping: Use as decorative and tasty garnishes for ice cream sundaes
- Hot chocolate stirrers: Use chocolate-end as a stirrer that melts into the drink
- Gifting: Package in clear cellophane bags tied with ribbon for homemade gifts
- Party display: Stand upright in colorful glasses sorted by flavor
- Afternoon tea: Serve alongside matcha or black tea for authentic Japanese pairing
- Yogurt companion: Use as dippers for thick Greek yogurt or fruit dips
Nutritional Information
While homemade Pocky is still a treat, it generally contains fewer preservatives and artificial ingredients than store-bought versions. Here’s an approximate nutritional breakdown per serving (5 sticks):
| Nutrient | Amount |
|---|---|
| Calories | ~150-180 |
| Total Fat | 8-10g |
| Saturated Fat | 5-6g |
| Carbohydrates | 18-20g |
| Sugar | 10-12g |
| Protein | 2g |
| Sodium | 75mg |
Making Pocky with Dietary Restrictions
One of the greatest advantages of homemade Pocky is the ability to accommodate various dietary needs:
Gluten-Free Version
Substitute all-purpose flour with a 1:1 gluten-free baking blend. I’ve had excellent results with Bob’s Red Mill 1:1 Baking Flour or King Arthur Measure for Measure Flour.
Vegan Version
- Replace butter with vegan butter (same amount)
- Substitute egg with 3 tablespoons aquafaba (chickpea water)
- Use plant-based milk instead of dairy milk
- Choose dairy-free chocolate for coating
Reduced Sugar Option
- Reduce sugar in biscuit dough to 2 tablespoons
- Use stevia-sweetened or dark chocolate (85% cacao) for coating
Questions & Answers
Q: Can I make Pocky without special equipment?
While a stand mixer makes the process easier, you can absolutely make Pocky with basic kitchen tools. Mix the dough by hand using a wooden spoon and some elbow grease. For precise cutting, use a pizza cutter or sharp knife with a ruler. The results may be slightly less uniform but equally delicious!
Q: Why did my biscuit sticks puff up during baking?
This usually happens when the dough isn’t chilled enough before baking or when the oven temperature is too high. Make sure to refrigerate the dough thoroughly, and consider checking your oven temperature with an oven thermometer to ensure accuracy.
Q: My chocolate keeps seizing when I melt it. What am I doing wrong?
Chocolate seizes when it comes into contact with even tiny amounts of water. Make sure your bowl and utensils are completely dry before melting chocolate. Also, avoid overheating – melting in 30-second intervals and stirring between each is crucial.
Q: How can I get my Pocky coating to look as smooth as store-bought?
The secret is in the temperature and consistency of your chocolate. Adding a bit of coconut oil or shortening helps create that smooth finish. For truly professional results, properly temper your chocolate by following specific temperature guidelines for dark, milk, or white varieties.
Q: My homemade Pocky doesn’t stay crisp as long as store-bought. Why?
Commercial Pocky contains preservatives and is packaged in moisture-resistant materials. To extend the crisp life of your homemade version, make sure they’re completely cool before storing, use airtight containers, and consider adding a desiccant packet if you live in a humid climate.
Q: Can I make a whole grain version of Pocky?
Yes! Substitute up to half of the all-purpose flour with whole wheat pastry flour for a nuttier flavor and added nutrition. You may need to adjust the liquid slightly as whole grain flours tend to absorb more moisture.
The Joy of Sharing
I’ve found that homemade Pocky makes for wonderful gifts and party favors. When packaging for gifts, consider these presentation ideas:
- Stand them upright in decorative jars with colorful ribbons
- Layer different flavors in clear cellophane bags tied with washi tape
- Create custom labels with flavor names and ingredients
- Pack in Japanese-inspired bento boxes for an authentic touch
The personal touch of homemade treats always makes them special, and unique Pocky flavors show thoughtfulness and creativity that store-bought versions simply can’t match.
Whether you’re recreating classic flavors or inventing new combinations, homemade Pocky brings the joy of this iconic Japanese snack into your kitchen while allowing for personal expression through flavors and decorations. The process itself becomes a creative outlet and a way to share culture and craftsmanship with friends and family.
The next time you reach for a box of Pocky at the store, consider setting aside some time to make your own instead. The results are worth every minute spent, and the possibilities for customization are limited only by your imagination. Happy Pocky making!