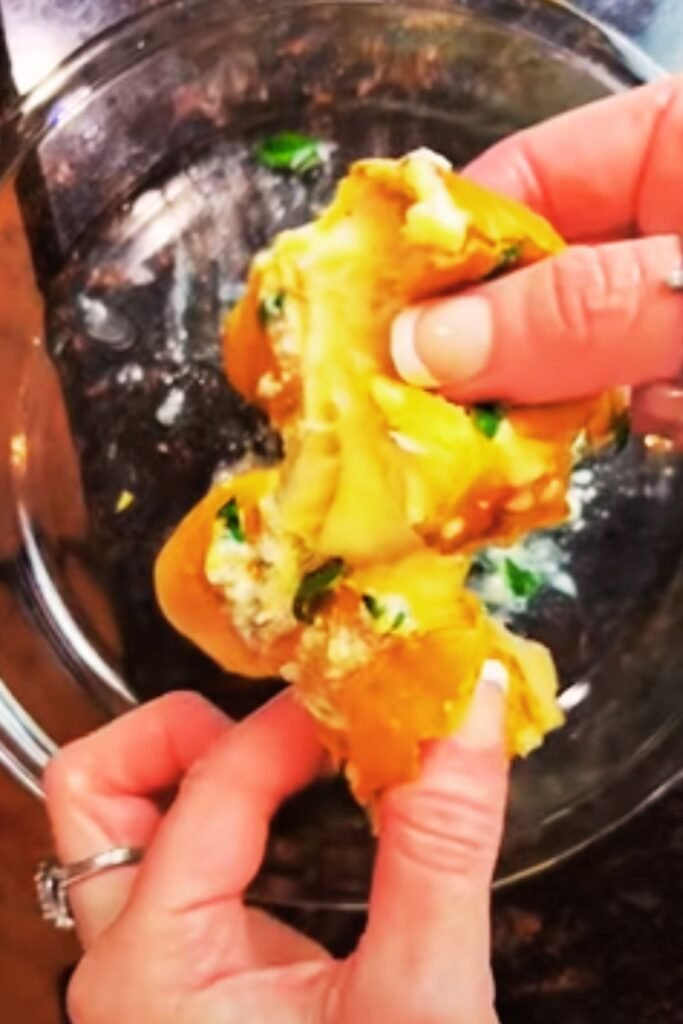
There’s something magical about that first bite into a warm, freshly baked biscuit bomb, when stretchy mozzarella cheese pulls away in long, gooey strands. I’ve been making these delicious treats for years, and they never fail to impress friends and family at gatherings. Whether you’re hosting a game day party or simply craving a savory snack, these Gooey Mozzarella Biscuit Bombs are guaranteed to hit the spot.
What Are Biscuit Bombs?
Biscuit bombs are essentially biscuit dough wrapped around a filling – in this case, mozzarella cheese – and baked until golden. The name “bomb” comes from the explosive flavor experience when you bite into one. They’re similar to stuffed biscuits but with a more dramatic presentation and eating experience.
The beauty of these mozzarella biscuit bombs lies in their versatility and simplicity. With just a handful of ingredients and about 30 minutes, you can create a crowd-pleasing appetizer or side dish that disappears faster than you can say “cheese pull.”
Why You’ll Love This Recipe
When I first discovered biscuit bombs, I was skeptical about whether they could live up to the hype. Now, after countless batches and many happy eaters, I can confidently say they exceed expectations every time. Here’s why you’ll fall in love with this recipe:
- Quick and Easy: Ready in just 30 minutes from start to finish
- Budget-Friendly: Uses simple ingredients you might already have
- Customizable: Easy to adapt with different cheeses or add-ins
- Kid-Approved: A hit with children and adults alike
- Impressive Presentation: Looks like you spent hours in the kitchen
- Perfect for Sharing: Ideal for parties, game days, or family gatherings
Ingredients You’ll Need
For these mozzarella biscuit bombs, I’ve kept the ingredient list simple yet effective. Here’s what you’ll need to gather:
For the Biscuit Bombs:
- 1 can (16.3 oz) refrigerated biscuit dough (8 count)
- 8 mozzarella cheese sticks, cut in half (or 16 mozzarella cheese cubes)
- 2 tablespoons butter, melted
- 1 teaspoon garlic powder
- 1 teaspoon dried Italian herbs
- 1/2 teaspoon salt
For the Garlic Butter Topping:
- 3 tablespoons butter, melted
- 2 cloves garlic, minced
- 1 tablespoon fresh parsley, finely chopped
- 1/4 teaspoon salt
For the Optional Marinara Dipping Sauce:
- 1 cup marinara sauce
- 1/2 teaspoon dried oregano
- 1/4 teaspoon red pepper flakes (adjust to taste)
- 1 clove garlic, minced
Equipment Needed
One of the reasons I love making these biscuit bombs is that they don’t require any specialized equipment. Here’s what you’ll need:
- Baking sheet
- Parchment paper or silicone baking mat
- Small mixing bowl
- Pastry brush
- Microwave-safe bowl (for melting butter)
- Small saucepan (for warming marinara sauce)
Step-by-Step Instructions
Follow these simple steps to create perfect mozzarella biscuit bombs every time:
Step 1: Prepare Your Workspace
Preheat your oven to 375°F (190°C). Line a baking sheet with parchment paper or a silicone baking mat. This prevents sticking and makes cleanup easier.
Step 2: Prepare the Cheese
If using string cheese, cut each stick in half to create 16 pieces. If using mozzarella block cheese, cut into 16 equal-sized cubes. I find that string cheese works particularly well because it melts beautifully while maintaining that signature stretchy quality.
Step 3: Prepare the Biscuit Dough
Open the can of refrigerated biscuit dough and separate into 8 biscuits. Cut each biscuit in half to make 16 pieces. Flatten each piece into a 3-inch circle using your fingers. Don’t worry about making perfect circles – a rustic look adds character!
Step 4: Fill and Seal the Biscuits
Place a piece of mozzarella in the center of each flattened biscuit dough. Carefully fold the edges of the dough up and around the cheese, pinching firmly to seal completely. This is crucial – if not sealed properly, the cheese will leak out during baking.
Roll each filled dough between your palms to form a smooth ball, ensuring the cheese is completely enclosed. Place seam-side down on the prepared baking sheet, spacing them about 2 inches apart.
Step 5: Add First Layer of Flavor
In a small bowl, combine the 2 tablespoons melted butter with garlic powder, dried Italian herbs, and salt. Using a pastry brush, gently brush this mixture over the tops of the biscuit bombs.
Step 6: Bake to Golden Perfection
Bake in the preheated oven for 11-14 minutes, or until the biscuit bombs are golden brown. The exact time may vary depending on your oven, so I recommend checking them at the 10-minute mark.
Step 7: Prepare the Garlic Butter Topping
While the biscuit bombs are baking, prepare the garlic butter topping. In a small bowl, combine the 3 tablespoons melted butter with minced garlic, chopped parsley, and salt.
Step 8: Apply Final Flavor Boost
When the biscuit bombs come out of the oven, immediately brush them with the garlic butter topping. This adds another layer of flavor and gives them a beautiful shine.
Step 9: Prepare Dipping Sauce (Optional)
If serving with marinara sauce, combine marinara sauce, dried oregano, red pepper flakes, and minced garlic in a small saucepan. Warm over low heat, stirring occasionally.

Pro Tips for Perfect Biscuit Bombs
Over the years, I’ve learned a few tricks that make these mozzarella biscuit bombs truly exceptional:
- Cold Cheese: Keep your mozzarella refrigerated until ready to use. Cold cheese is easier to handle and less likely to leak during baking.
- Double Seal: After wrapping the cheese in dough, give it an extra pinch and roll between your palms to ensure a tight seal.
- Even Sizing: Try to make your biscuit bombs approximately the same size so they bake evenly.
- Rest Before Serving: Allow the biscuit bombs to cool for 2-3 minutes before serving. This prevents mouth burns but still keeps that perfect cheese pull.
- Watch Closely: Every oven is different, so keep an eye on them during the last few minutes of baking to prevent over-browning.
Variations to Try
One of the reasons I make these biscuit bombs so often is their versatility. Here are some of my favorite variations:
Cheese Variations:
- Cheddar Bombs: Substitute sharp cheddar for a more intense flavor
- Pepper Jack Bombs: Add a spicy kick with pepper jack cheese
- Four-Cheese Bombs: Use a combination of mozzarella, cheddar, provolone, and parmesan
Filling Add-ins:
- Pepperoni Pizza Bombs: Add a slice of pepperoni with the cheese
- Bacon Bombs: Include a piece of cooked bacon with the cheese
- Jalapeño Popper Bombs: Add a slice of jalapeño and a dab of cream cheese
- Garlic Herb Bombs: Mix softened butter with minced garlic and herbs, add a small dollop with the cheese
Topping Variations:
- Everything Bagel Bombs: Sprinkle with everything bagel seasoning before baking
- Parmesan Bombs: Add grated parmesan to the butter mixture for the topping
- Ranch Bombs: Mix dry ranch seasoning into the butter topping
- Italian Bombs: Add extra Italian seasoning and a sprinkle of red pepper flakes
Make-Ahead and Storage Information
Make-Ahead Options:
If you’re planning for a party or want to prepare these in advance, you have several options:
- Prep Components: Cut cheese into portions and store in an airtight container in the refrigerator up to 3 days ahead.
- Assemble and Refrigerate: You can assemble the unbaked biscuit bombs, cover them tightly with plastic wrap, and refrigerate for up to 24 hours before baking. Add about 2 minutes to the baking time if cooking from cold.
- Assemble and Freeze: Place assembled, unbaked biscuit bombs on a baking sheet and freeze until solid (about 2 hours). Transfer to a freezer-safe bag and store for up to 3 months. When ready to bake, place frozen bombs on a baking sheet and bake at 375°F for 15-18 minutes.
Storage and Reheating:
While these are best enjoyed fresh from the oven, leftovers can be stored and reheated:
- Refrigerator: Store cooled biscuit bombs in an airtight container for up to 3 days.
- Freezer: Baked biscuit bombs can be frozen for up to 1 month in a freezer-safe container.
- Reheating: For best results, reheat in a 350°F oven for 5-7 minutes until warmed through. Microwave for 15-20 seconds if you’re in a hurry, but note that the texture won’t be as good.
Nutritional Information
For those who are tracking their nutritional intake, here’s a breakdown per biscuit bomb:
| Nutrient | Amount per Serving (1 Biscuit Bomb) |
|---|---|
| Calories | 142 |
| Total Fat | 8g |
| Saturated Fat | 4g |
| Cholesterol | 18mg |
| Sodium | 385mg |
| Total Carbohydrates | 12g |
| Dietary Fiber | 0g |
| Sugars | 2g |
| Protein | 5g |
Note: Nutritional values are approximate and may vary based on specific brands and products used.
Serving Suggestions
These gooey mozzarella biscuit bombs are versatile enough to serve in multiple ways:
As an Appetizer:
- Arrange on a serving platter with warmed marinara sauce in the center
- Serve alongside a variety of dipping sauces (pesto, ranch, alfredo)
- Include as part of an appetizer spread with vegetable crudités and dips
As a Side Dish:
- Pair with a hearty soup like minestrone or tomato bisque
- Serve alongside a fresh green salad for dinner
- Complement grilled chicken or steak
For Breakfast or Brunch:
- Add cooked breakfast sausage to the filling
- Serve with scrambled eggs and fresh fruit
- Offer as part of a brunch buffet

Common Issues and Troubleshooting
Even experienced cooks encounter challenges. Here are solutions to common issues when making biscuit bombs:
Cheese Leakage:
Problem: Cheese oozes out during baking Solution: Ensure all seams are tightly pinched closed. Double-check for any thin spots in the dough. Place seam-side down on the baking sheet.
Doughy Centers:
Problem: Outside is golden but inside is still doughy Solution: Lower oven temperature to 350°F and bake for a few minutes longer. Make sure biscuit bombs aren’t too large.
Tough Biscuits:
Problem: The finished biscuit bombs are tough rather than tender Solution: Don’t overwork the dough when flattening and shaping. Handle gently and minimally.
Pale Appearance:
Problem: Biscuit bombs don’t brown properly Solution: Brush with additional melted butter before baking. Position rack in the upper third of the oven.
Perfect Pairings
To create a complete meal experience, consider these pairing suggestions:
Soups:
- Classic tomato soup
- Italian wedding soup
- Roasted red pepper soup
- Creamy mushroom soup
Salads:
- Caesar salad with homemade dressing
- Simple garden salad with balsamic vinaigrette
- Mediterranean cucumber and tomato salad
- Italian chopped salad
Beverages:
- Sparkling water with lemon or lime
- Iced tea with fresh mint
- Lemonade
- Italian soda
Cost Analysis
One of the things I love about this recipe is how budget-friendly it is, especially when feeding a crowd:
| Ingredient | Approximate Cost |
|---|---|
| Can of refrigerated biscuits | $2.50 |
| Mozzarella cheese sticks | $3.99 |
| Butter | $0.75 |
| Garlic and herbs | $0.50 |
| Marinara sauce (optional) | $1.99 |
| Total | $9.73 |
| Cost per serving (16 pieces) | $0.61 |
Note: Prices may vary based on location and specific stores.
Environmental Impact and Sustainability Tips
As someone who cares about reducing kitchen waste, here are some sustainability considerations:
- Reduce packaging waste by buying cheese in larger blocks rather than individually wrapped sticks
- Make your own biscuit dough from scratch to avoid the can waste (plus it tastes better!)
- Use homemade marinara sauce during tomato season when tomatoes are plentiful and affordable
- Save energy by baking these alongside other dishes when the oven is already on
- Compost any vegetable scraps from the garlic, herbs, or marinara ingredients
The Science Behind the Perfect Cheese Pull
Have you ever wondered why some cheese pulls beautifully and others don’t? Here’s the science behind that Instagram-worthy cheese stretch:
Mozzarella has a unique protein structure that allows it to stretch when heated to the right temperature (around 160°F to 170°F). The proteins in the cheese form into chains when heated, creating that signature stretch. When the cheese cools too much, these protein structures tighten, and the cheese becomes less stretchy.
This is why timing is so important when serving these biscuit bombs – you want them hot enough for maximum stretch but not so hot that they burn your mouth.
Why This Recipe Works
After making countless batches of these mozzarella biscuit bombs, I’ve identified exactly what makes this recipe so successful:
- The Dough-to-Cheese Ratio: The proportion of biscuit dough to cheese creates the perfect balance of crisp exterior and gooey interior.
- Double Flavor Application: Applying flavor both before baking (with the herb butter) and after (with the garlic butter) creates layers of taste.
- The Right Baking Temperature: 375°F is hot enough to cook the dough quickly but not so hot that the outside burns before the inside cooks.
- Proper Sealing Technique: Taking time to properly seal the cheese inside prevents leakage and disappointment.
- Quality Ingredients: Using good quality mozzarella with high moisture content ensures the best cheese pull experience.
Frequently Asked Questions
Based on questions I’ve received when sharing this recipe, here are the most common queries and their answers:
Q: Can I use homemade biscuit dough instead of refrigerated? A: Absolutely! Homemade dough works wonderfully. Just make sure it’s not too sticky and can be easily sealed around the cheese.
Q: My cheese didn’t get gooey and stretchy. What went wrong? A: This usually happens if you’re using low-moisture mozzarella. For the best cheese pull, use whole milk, high-moisture mozzarella cheese sticks or fresh mozzarella.
Q: Can I make these gluten-free? A: Yes, you can substitute gluten-free biscuit dough. Many brands now offer gluten-free refrigerated biscuits, or you can make your own gluten-free biscuit dough.
Q: How do I know when they’re done baking? A: The biscuit bombs should be golden brown on the outside. If you’re unsure, you can gently lift one with a spatula – the bottom should also be golden.
Q: Can I add meat to these? A: Definitely! Small pieces of cooked bacon, pepperoni, or ham work great. Just make sure any meat additions are fully cooked before adding them to the biscuit bombs.
Q: What if I don’t have Italian seasoning? A: You can make your own by combining equal parts dried basil, oregano, rosemary, and thyme. Or simply use whatever dried herbs you have on hand.
Q: Can I air fry these instead of baking? A: Yes! Air fry at 350°F for about 6-8 minutes, checking frequently since air fryers can vary in temperature.
Q: Why did my biscuit bombs open up during baking? A: This happens when the seams aren’t properly sealed. Make sure to pinch the dough very firmly and roll between your palms to reinforce the seal.
Final Thoughts
There’s something so satisfying about creating a simple yet impressive dish like these Gooey Mozzarella Biscuit Bombs. I love seeing the look on people’s faces when they take that first bite and experience the perfect cheese pull – it’s a small moment of food joy that makes all the effort worthwhile.
Whether you’re a seasoned cook or just starting out in the kitchen, this recipe is approachable, adaptable, and guaranteed to please. The combination of warm, flaky biscuit with molten cheese at its center hits all the right comfort food notes.
I encourage you to make these your own by trying different cheese combinations or add-ins. Who knows? You might create a variation that becomes your family’s new favorite tradition. Happy baking, and enjoy that cheese pull!