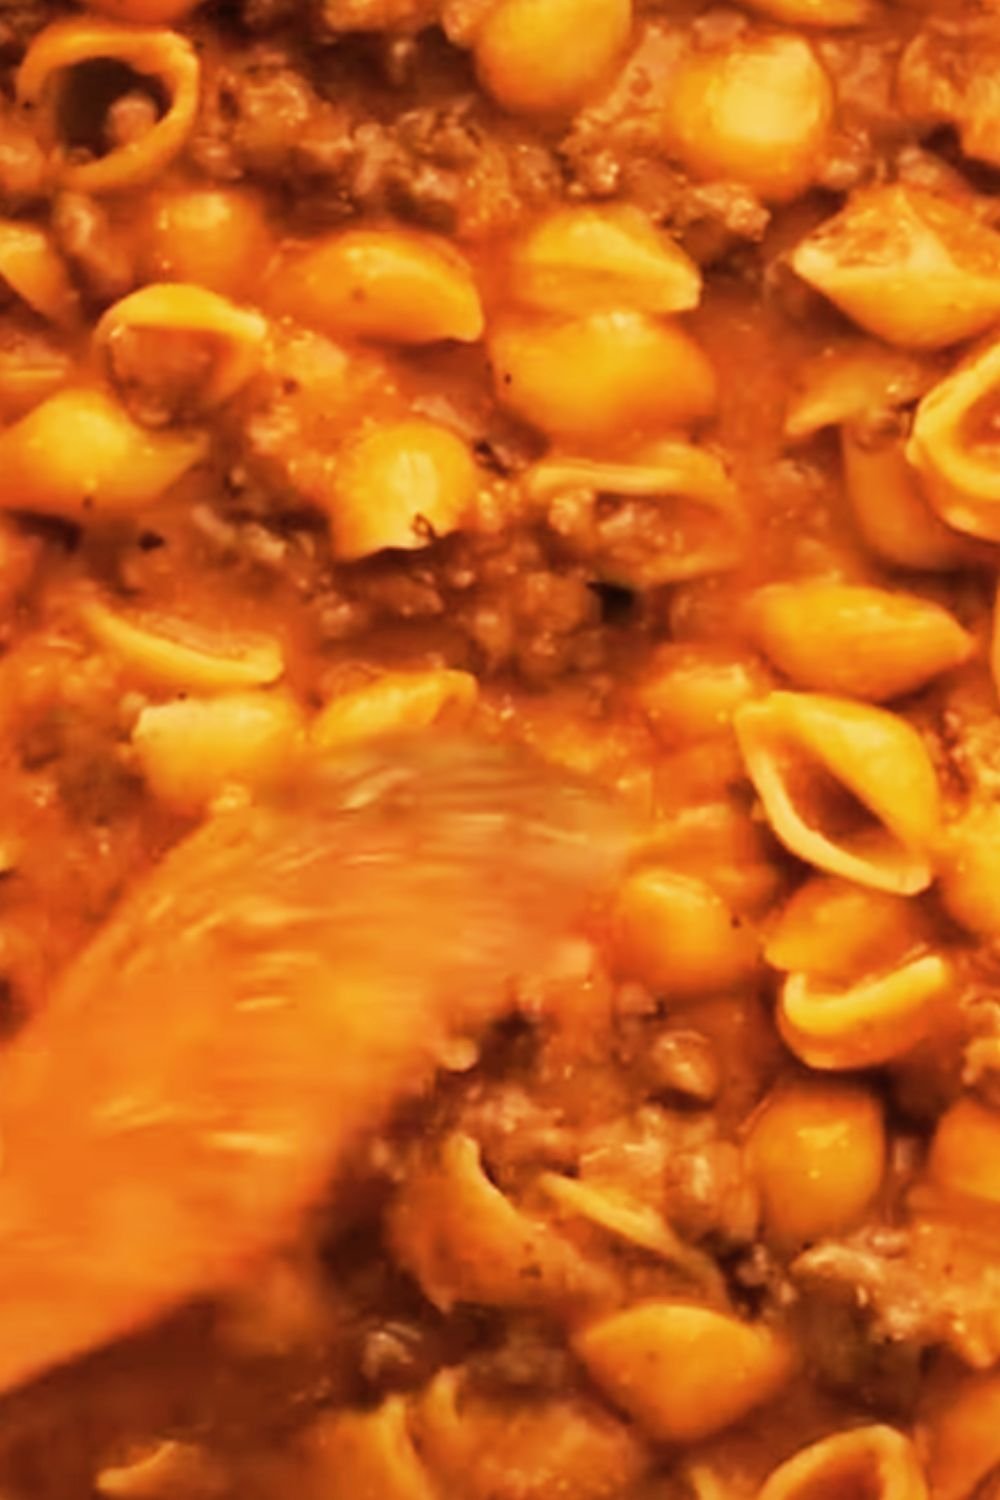
There’s something beautifully chaotic about cooking a dish that looks like complete mayhem in the pan but somehow transforms into pure comfort food magic. That’s exactly what happens when I make my creamy beef and shells. The pasta water bubbles furiously, the ground beef sizzles and pops, cheese melts into creamy swirls, and for a moment, my kitchen looks like a delicious disaster zone. Yet somehow, this organized chaos creates one of the most satisfying one-pot meals I’ve ever made.
I’ve been perfecting this recipe for over a decade, and what started as a desperate weeknight attempt to feed my family with whatever I had in the pantry has evolved into our most requested comfort meal. The beauty of creamy beef and shells lies not just in its incredible flavor, but in how it embraces the beautiful mess of home cooking while delivering restaurant-quality results.
The Heart of Organized Chaos
When I first attempted this dish, I was skeptical about cooking everything in one pot. My culinary school training had taught me to be methodical, to cook each component separately for optimal control. But life with three hungry kids doesn’t always allow for such luxury. What I discovered was that the seemingly chaotic process of browning beef, building a sauce, and cooking pasta all in the same vessel actually creates layers of flavor that separate cooking methods simply can’t achieve.
The rendered fat from the beef becomes the foundation for our sauce base. The pasta water, instead of being drained away, becomes part of our creamy matrix. Every splatter and bubble contributes to the final masterpiece. It’s controlled chaos at its finest, and once you understand the rhythm, you’ll find yourself craving both the process and the result.
Essential Ingredients Breakdown
Ground Beef Selection : I prefer 80/20 ground beef for this recipe. The fat content provides flavor and helps create the sauce base, while still maintaining enough lean meat for substance. Avoid going leaner than 85/15, as you’ll miss out on crucial flavor development.
Pasta Shell Variety : Medium shells work best because they hold the creamy sauce beautifully. The curves and ridges capture every bit of the cheese sauce, creating perfect bites. Large shells can be unwieldy, while small shells don’t provide enough surface area for optimal sauce adhesion.
Cheese Combination : Sharp cheddar provides tang and melts smoothly, while cream cheese adds richness and helps prevent the sauce from breaking. I sometimes add a handful of mozzarella for extra stretch and mild flavor.
Aromatics Foundation : Yellow onions offer sweetness when sautéed, while garlic provides the aromatic backbone. Fresh herbs like thyme or oregano elevate the entire dish from simple to sophisticated.
The Science Behind the Chaos
Understanding why this recipe works helps you execute it confidently, even when things look messy. When we brown the ground beef first, we’re creating what chefs call the “fond” – those delicious brown bits that stick to the bottom of the pan. These concentrated flavor compounds will dissolve into our sauce later, providing depth that can’t be achieved any other way.
The pasta cooking liquid contains starches that naturally thicken our sauce. Instead of draining this liquid gold, we harness it to create creaminess without flour or heavy cream. The key is controlling the liquid ratios so the pasta cooks properly while leaving enough starchy water to build our sauce.
Temperature control becomes crucial during the final stages. Too high heat will cause the cheese to seize and become grainy. Too low, and the sauce won’t come together properly. I’ve learned to work at medium-low heat during the cheese incorporation phase, stirring constantly and adding liquid gradually.
Step-by-Step Execution
Phase One: Building the Foundation
I start by heating my heavy-bottomed pot over medium-high heat. Cast iron or enameled Dutch ovens work beautifully for this recipe because they retain heat evenly and can handle the transition from stovetop to oven if needed. Once the pot is properly heated, I add the ground beef without any oil – the fat content will render naturally.
This is where the organized chaos begins. The beef will release moisture initially, creating steam and bubbling. Don’t stir immediately! Let it brown for 3-4 minutes, allowing those beautiful caramelized bits to form. When I do start breaking it up with my wooden spoon, I work in sections, leaving some pieces to continue browning while others cook through.
The key indicator that Phase One is complete is when most of the moisture has evaporated and the beef has developed rich, golden-brown color. This usually takes 8-10 minutes of active cooking. I season generously with salt and black pepper at this stage, as the beef is still releasing juices that will carry the seasoning throughout.
Phase Two: Aromatics and Sauce Base
Without removing the beef, I push it to one side of the pot and add diced onions to the cleared space. The residual fat and those beautiful fond bits will start working their magic immediately. The onions will begin caramelizing in the beef fat while picking up all those concentrated flavors from the bottom of the pan.
After about 5 minutes, when the onions become translucent and fragrant, I add minced garlic and stir everything together. The garlic should become fragrant within 30 seconds – any longer and it risks burning and becoming bitter.
Now comes the sauce base construction. I add tomato paste first, stirring it into the beef and onion mixture. This concentrates the tomato flavor and adds richness. Then comes the liquid components: beef broth forms the primary base, while a splash of heavy cream adds richness without overwhelming the beef flavor.
Phase Three: The Pasta Integration
This is where things get beautifully chaotic. I bring the liquid to a rolling boil and add the pasta shells directly to the pot. The liquid should just barely cover the pasta – if there’s too much, the sauce will be thin; too little, and the pasta won’t cook evenly.
The pasta will initially seem crowded, and the liquid will foam and bubble vigorously. This is exactly what we want! I stir occasionally, ensuring the pasta doesn’t stick to the bottom, and watch for the liquid levels. As the pasta cooks, it absorbs liquid and releases starch, naturally thickening our sauce.
The timing is crucial here. I test the pasta starting at the minimum cooking time listed on the package. We want it just shy of al dente, as it will continue cooking in the residual heat while we finish the sauce.
Phase Four: The Creamy Finale
When the pasta reaches the perfect texture and most of the liquid has been absorbed, I remove the pot from direct heat. This is the moment where organized chaos transforms into creamy perfection. Working quickly but calmly, I add chunks of cream cheese, stirring gently until they melt and incorporate smoothly.
Next comes the shredded cheddar, added gradually while stirring constantly. The residual heat should be sufficient to melt the cheese without causing it to seize. If the mixture seems too thick, I add pasta cooking liquid or warm broth, one tablespoon at a time, until I achieve the desired consistency.
Nutritional Profile and Variations
| Component | Per Serving | Daily Value % | Notes |
|---|---|---|---|
| Calories | 485 | 24% | Based on 6 servings |
| Protein | 28g | 56% | High-quality complete protein |
| Carbohydrates | 42g | 14% | Complex carbs from pasta |
| Fat | 22g | 34% | Includes saturated fat from cheese |
| Fiber | 3g | 12% | Can increase with vegetable additions |
| Sodium | 890mg | 39% | Can reduce with low-sodium broth |
| Calcium | 285mg | 28% | Significant from dairy components |
| Iron | 4.2mg | 23% | From beef and enriched pasta |
Dietary Modifications
Gluten-Free Version : Substitute pasta shells with your favorite gluten-free variety. Corn-based shells work particularly well, though they may require slightly different cooking times. Add an extra 2-3 minutes to the cooking process and monitor liquid levels carefully.
Dairy-Free Adaptation : Replace cream cheese with cashew cream and use nutritional yeast instead of cheddar cheese. The texture will be different but still satisfying. Coconut cream can substitute for heavy cream, though it will add a subtle coconut flavor.
Vegetarian Alternative : Ground mushrooms or a combination of lentils and walnuts can replace the beef. Sauté mushrooms until they release their moisture and develop a meaty texture. Season aggressively to compensate for the missing umami from beef.
Lower-Carb Option : Replace pasta shells with cauliflower florets or zucchini chunks. Reduce the liquid accordingly and adjust cooking times. The dish becomes more of a creamy beef and vegetable skillet but maintains the same comfort food appeal.
Troubleshooting Common Issues
Grainy Cheese Sauce : This usually occurs when cheese is added to liquid that’s too hot or when the temperature fluctuates too dramatically. Always remove from direct heat before adding cheese, and add it gradually while stirring constantly. If graininess occurs, try whisking in a tablespoon of cold butter to help emulsify the sauce.
Pasta Overcooking : The pasta continues cooking in the hot liquid even after you remove it from heat. Start testing for doneness a full minute before the package directions suggest. Remember, we want it slightly underdone when we remove it from heat.
Sauce Too Thin : If your finished dish is soupy, return it to low heat and simmer uncovered for 5-10 minutes, stirring occasionally. The pasta will absorb more liquid, and evaporation will concentrate the flavors. Alternatively, mix a tablespoon of cornstarch with cold water and stir it in.
Sauce Too Thick : Thin with warm pasta cooking liquid, chicken broth, or milk, adding one tablespoon at a time until you reach the desired consistency. Reheat gently if necessary.
Serving Suggestions and Accompaniments
This dish is substantial enough to serve as a complete meal, but I love pairing it with simple sides that complement rather than compete with the rich flavors. A crisp green salad with lemon vinaigrette cuts through the richness beautifully. The acidity and fresh vegetables provide a perfect contrast to the creamy, hearty pasta.
Roasted vegetables make excellent companions, particularly those with some natural sweetness like carrots, Brussels sprouts, or butternut squash. The caramelized edges and concentrated flavors of roasted vegetables add textural interest and nutritional value to the meal.
For bread lovers, a simple garlic bread or crusty dinner rolls work wonderfully for sopping up any remaining sauce. I prefer lighter options like focaccia or herb-crusted artisan bread that won’t overwhelm the pasta dish.
Storage and Reheating Strategies
| Storage Method | Duration | Quality Rating | Reheating Instructions |
|---|---|---|---|
| Refrigerator | 3-4 days | Excellent | Add 2-3 tbsp liquid, reheat covered |
| Freezer | 2-3 months | Good | Thaw overnight, add liquid when reheating |
| Meal Prep Portions | 5 days | Very Good | Individual containers, reheat with splash of broth |
Refrigerator Storage: Cool completely before transferring to airtight containers. The sauce will thicken considerably when cold, which is completely normal. When reheating, add a few tablespoons of broth, milk, or water to restore the creamy consistency.
Freezing Guidelines: This dish freezes reasonably well, though the texture of the pasta will change slightly. Portion into freezer-safe containers, leaving space for expansion. Label with date and reheating instructions.
Reheating Best Practices: Whether from refrigerated or frozen storage, gentle reheating is key. Use low heat and add liquid gradually. Microwave reheating works in a pinch, but stovetop reheating produces better results. Stir frequently and add liquid as needed.
Make-Ahead Strategies
For busy weeknights, I often prep components in advance. The beef mixture can be browned and cooled up to two days ahead. The cheese can be shredded and stored in the refrigerator. Having these components ready makes the final assembly much quicker and less chaotic.
Another strategy I employ is partial cooking. I’ll prepare the dish through Phase Three, stopping just before adding the cheese. This can be refrigerated for up to 24 hours. When ready to serve, I gently reheat and complete the cheese addition process.
Seasonal Variations and Add-Ins
Spring Addition : Fresh peas and asparagus pieces added during the last few minutes of cooking bring bright color and fresh flavor. The vegetables should retain some bite for textural contrast.
Summer Enhancement : Diced tomatoes and fresh basil transform this into a summery dish. Add cherry tomatoes during the pasta cooking phase and fold in fresh basil at the very end.
Fall Comfort : Roasted butternut squash cubes and a pinch of sage create an autumn-inspired version. The squash can be roasted separately and folded in just before serving.
Winter Heartiness : Additional root vegetables like carrots and parsnips, diced small and sautéed with the onions, add substance and nutrition for cold weather comfort.
The Psychology of Organized Chaos
There’s something deeply satisfying about embracing the beautiful mess of this cooking process. In our perfectly curated social media world, it’s refreshing to engage in a cooking method that celebrates the imperfect, the bubbling, the splattered reality of real home cooking.
I’ve found that people who are initially intimidated by the apparent chaos of this recipe become its biggest advocates once they experience the process. The key is understanding that the seeming disorder is actually part of a well-orchestrated sequence of flavor development.
The confidence that comes from mastering this technique extends to other areas of cooking. Once you’re comfortable with the organized chaos of one-pot cooking, you’ll find yourself more willing to experiment, to trust the process, and to embrace the beautiful imperfection of home cooking.
Nutritional Benefits Deep Dive
Beyond the obvious comfort food appeal, this dish provides substantial nutritional value. The ground beef supplies complete protein with all essential amino acids, plus significant amounts of iron, zinc, and B vitamins. These nutrients are particularly important for growing children and active adults.
The pasta contributes complex carbohydrates for sustained energy, while the dairy components provide calcium and additional protein. When I add vegetables to my variations, the nutritional profile becomes even more impressive, with increased fiber, vitamins, and antioxidants.
The one-pot cooking method actually preserves more nutrients than traditional methods where pasta water is discarded. The starchy cooking liquid that becomes part of our sauce retains water-soluble vitamins that would otherwise be lost.
Cost-Effectiveness Analysis
| Ingredient Category | Approximate Cost | Servings Provided | Cost Per Serving |
|---|---|---|---|
| Ground Beef (1 lb) | $6.50 | 6 | $1.08 |
| Pasta Shells (12 oz) | $1.25 | 6 | $0.21 |
| Cheese Combination | $3.00 | 6 | $0.50 |
| Aromatics & Seasonings | $1.50 | 6 | $0.25 |
| Total | $12.25 | 6 | $2.04 |
This cost analysis demonstrates the excellent value proposition of this dish. At roughly $2 per serving, it provides restaurant-quality flavor and satisfaction at a fraction of the cost of dining out. The ingredients are pantry-friendly and often available at bulk pricing, making it even more economical for larger families.
Advanced Techniques and Tips
Temperature Management: I use an instant-read thermometer to monitor the sauce temperature during cheese addition. Keeping it below 180°F prevents the cheese from seizing and ensures smooth incorporation.
Pasta Selection Science: The shape and size of pasta shells affects both cooking time and sauce retention. Medium shells (about 1-inch length) provide the optimal balance of cooking time and sauce-holding capacity.
Fond Development: Those brown bits on the bottom of the pan are flavor gold. I sometimes add a splash of wine or broth specifically to deglaze and incorporate these concentrated flavors into the sauce.
Emulsification Tricks: A small amount of cold butter whisked in at the end helps create a glossy, restaurant-style finish to the sauce. This technique, called “mounting,” is borrowed from classical French cooking.
Q&A Section
Q: Can I use ground turkey instead of beef? Ground turkey works well as a substitute, though you’ll need to add a tablespoon of oil since turkey is much leaner. Season more aggressively to compensate for turkey’s milder flavor profile. I recommend 93/7 ground turkey for the best texture.
Q: What if I don’t have heavy cream? You can substitute with whole milk, though the sauce will be less rich. For a lighter version, evaporated milk works beautifully and creates excellent creaminess. Half-and-half splits the difference nicely between richness and lighter texture.
Q: How do I prevent the pasta from sticking together? Stir the pasta gently but regularly during the first 5 minutes of cooking. The starch release is highest during this period. Using enough liquid and maintaining a gentle boil also helps prevent sticking.
Q: Can I double this recipe? Absolutely! Use a larger pot and increase cooking times slightly. The browning phase will take longer with more beef, and the pasta may need an extra few minutes. Watch liquid levels carefully and adjust as needed.
Q: Why does my cheese sauce sometimes break? Cheese sauce breaks when the temperature is too high or when acid is present. Remove the pot from heat before adding cheese, add it gradually, and stir constantly. If it breaks, try whisking in cold butter or a splash of cold milk.
Q: What’s the best way to reheat leftovers? Add 2-3 tablespoons of broth or milk to the cold pasta before reheating. Use low heat and stir frequently. The microwave works for quick reheating, but stovetop gives better texture control.
Q: Can I make this ahead for a potluck? Yes! Prepare completely but slightly undercook the pasta. Transport in a slow cooker on warm setting, adding a bit of extra liquid to prevent drying out. The flavors actually improve after resting.
Q: How do I know when the pasta is perfectly cooked? Test pasta 2 minutes before the package time suggests. It should have just a tiny bit of firmness in the center when you bite it. Remember, it continues cooking in the hot sauce after you remove it from heat.
Q: What vegetables work best as additions? Bell peppers, mushrooms, and spinach are my top choices. Add heartier vegetables like peppers and mushrooms with the onions. Leafy greens like spinach should be stirred in during the last minute of cooking.
Q: Is there a way to make this healthier without sacrificing flavor? Use 90/10 ground beef, whole wheat pasta, and add extra vegetables. You can reduce the cheese slightly and bulk up with roasted vegetables for fiber and nutrients. Greek yogurt can replace some of the cream cheese for added protein.