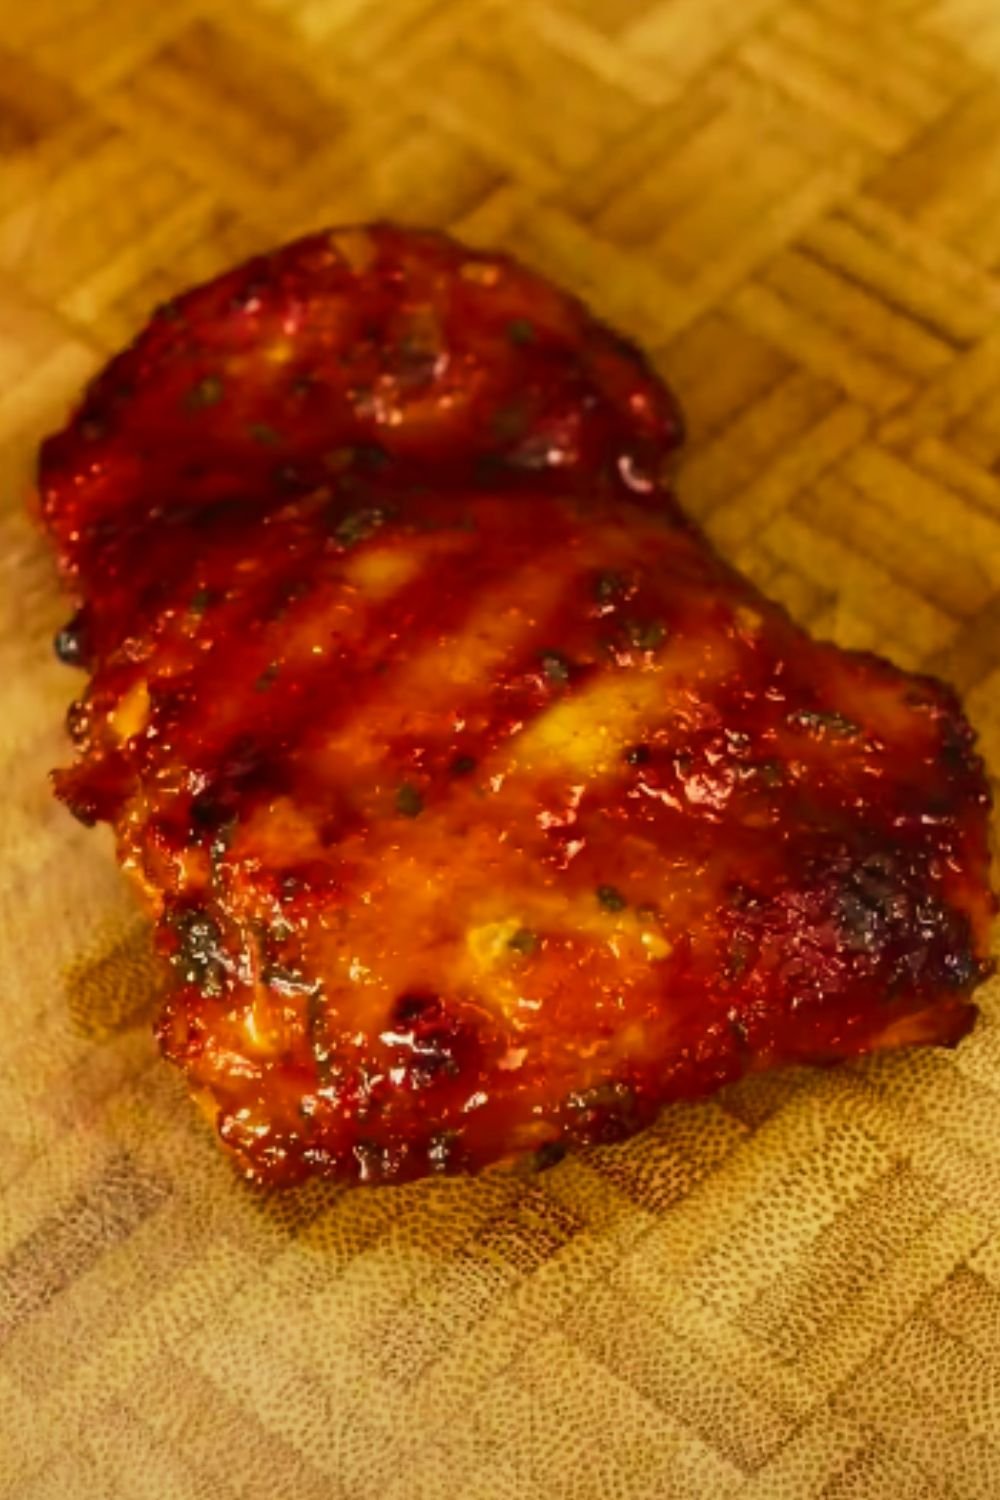
Have you ever found yourself staring at the clock, realizing dinner should have been started an hour ago? I’ve been there more times than I care to admit. That’s why this 15-Minute Garlic Butter Chicken Bites recipe has become my ultimate weeknight savior.
As a busy parent juggling work deadlines and after-school activities, I’ve perfected this one-pan wonder that delivers restaurant-quality flavor in less time than it takes to scroll through your social media feed. These juicy, garlicky chicken bites have transformed my family’s dinner routine, and I’m excited to share this game-changer with you.
Why You’ll Love This Recipe
I remember the first time I made these chicken bites. My picky 7-year-old actually asked for seconds! The combination of golden-brown exterior and tender, juicy interior makes these chicken bites irresistible. Plus:
- They cook in just 15 minutes (for real, not “internet recipe 15 minutes” that actually takes 45)
- Everything happens in one pan, meaning minimal cleanup
- The ingredient list is refreshingly short
- The garlic butter sauce is versatile enough to please both sophisticated palates and picky eaters
- Leftovers (if you have any) make amazing next-day lunch bowls
Ingredients You’ll Need
For the chicken bites:
- 1.5 pounds boneless, skinless chicken breasts (about 3 medium breasts)
- 2 tablespoons olive oil
- 1 teaspoon salt
- 1/2 teaspoon black pepper
- 1/2 teaspoon paprika
- 1/4 teaspoon cayenne pepper (optional, for heat lovers)
For the garlic butter sauce:
- 4 tablespoons unsalted butter
- 6 cloves garlic, minced (about 2 tablespoons)
- 1 tablespoon fresh lemon juice
- 2 tablespoons fresh parsley, chopped
- 1/4 teaspoon red pepper flakes (optional)
- Salt and pepper to taste
Kitchen Tools
I don’t believe in fancy equipment for everyday cooking. Here’s what you’ll actually need:
- Large skillet or frying pan (cast iron works beautifully here)
- Sharp knife
- Cutting board
- Measuring spoons
- Wooden spoon or heat-resistant spatula
Detailed Nutritional Information
I know many of you are tracking macros or have specific dietary needs, so I’ve broken down the nutritional content per serving:
| Nutrient | Amount per Serving | % Daily Value |
|---|---|---|
| Calories | 312 | – |
| Protein | 35g | 70% |
| Total Fat | 18g | 23% |
| Saturated Fat | 7g | 35% |
| Carbohydrates | 3g | 1% |
| Fiber | 0.5g | 2% |
| Sugar | 0.5g | – |
| Sodium | 680mg | 30% |
| Potassium | 620mg | 18% |
| Vitamin A | 410IU | 8% |
| Vitamin C | 6mg | 7% |
| Calcium | 22mg | 2% |
| Iron | 1.2mg | 7% |
Values based on 4 servings using listed ingredients. Actual values may vary.
Step-by-Step Instructions
Preparing the Chicken
- Pat the chicken breasts dry with paper towels. This might seem like an unnecessary step, but it helps achieve that perfect golden sear.
- Cut the chicken into 1-inch cubes. Try to make them relatively uniform in size to ensure even cooking.
- Place the chicken pieces in a bowl and drizzle with olive oil.
- Sprinkle with salt, black pepper, and paprika (plus cayenne if using). Toss until all pieces are evenly coated.
Cooking Process

- Heat a large skillet over medium-high heat until hot but not smoking.
- Add the seasoned chicken pieces to the pan in a single layer. Don’t crowd the pan – work in batches if needed. Overcrowding leads to steaming rather than searing, and we want that beautiful caramelization.
- Let the chicken cook undisturbed for 2-3 minutes until golden brown on the bottom. This is where I usually wipe down counters or set the table instead of constantly fussing with the chicken.
- Flip each piece and cook for an additional 2-3 minutes until golden on all sides and the internal temperature reaches 165°F (74°C).
- Transfer the chicken to a clean plate and reduce heat to medium-low.
Making the Garlic Butter Sauce
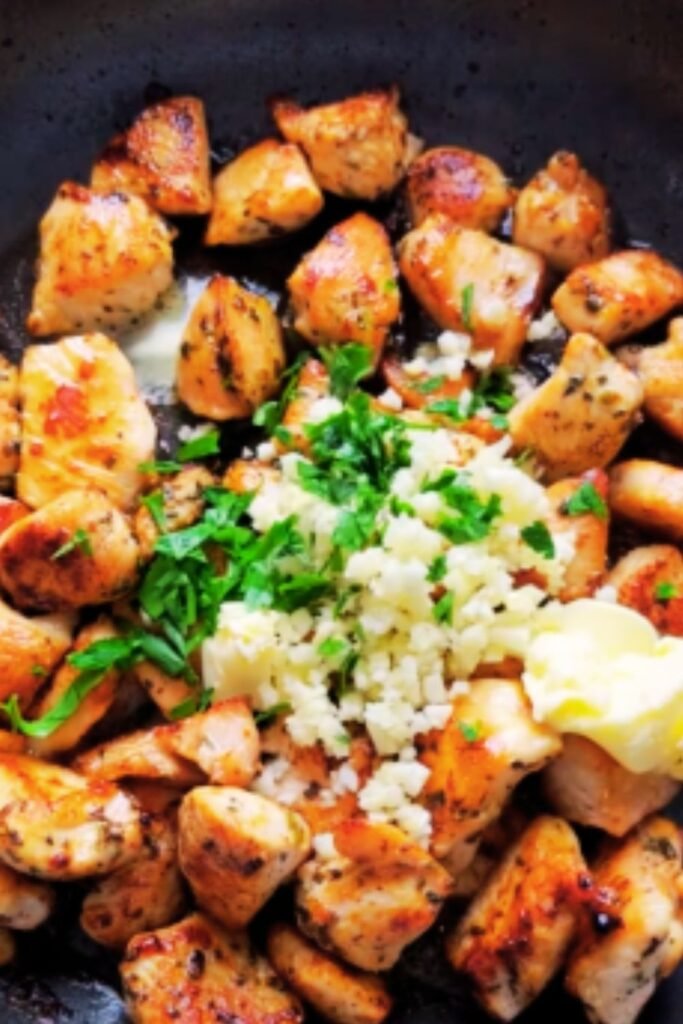
- In the same pan, add the butter and allow it to melt slowly.
- Once melted, add the minced garlic and cook for 30-60 seconds until fragrant but not browned. Burnt garlic turns bitter – nobody wants that!
- Add lemon juice and let it sizzle for about 30 seconds. The acidity helps balance the richness of the butter.
- Return the chicken to the pan and toss to coat in the garlic butter sauce.
- Sprinkle with fresh parsley and red pepper flakes (if using), then toss again to combine.
- Taste and adjust seasoning if needed.
- Remove from heat and serve immediately.
Common Mistakes to Avoid
I’ve made plenty of errors perfecting this recipe, so learn from my mishaps:
- Cutting chicken unevenly: This leads to some pieces being overcooked while others remain undercooked. Take your time dicing the chicken into similar-sized pieces.
- Cold chicken from the refrigerator: For best results, let your chicken sit at room temperature for 15 minutes before cooking. This helps it cook more evenly.
- Constantly stirring the chicken: Let those pieces get golden and caramelized by resisting the urge to constantly move them around.
- Burning the garlic: Garlic burns quickly and turns bitter. Keep the heat medium-low when making the sauce and watch it carefully.
- Overcooking the chicken: Chicken breast becomes dry and tough when overcooked. As soon as the internal temperature hits 165°F, it’s done!
Flavor Variations to Try
After making this recipe dozens of times, I’ve experimented with these delicious variations:
| Variation | Added Ingredients | Flavor Profile |
|---|---|---|
| Lemon Herb | +1 tbsp lemon zest, +1 tbsp fresh thyme | Bright, fresh, Mediterranean |
| Honey Garlic | +2 tbsp honey, +1 tbsp soy sauce | Sweet, savory, umami-rich |
| Cajun | +2 tsp cajun seasoning, swap butter for cajun butter | Spicy, complex, Southern-inspired |
| Italian | +1 tsp Italian herbs, +2 tbsp grated parmesan | Herbal, cheesy, classic |
| Coconut Curry | +2 tbsp coconut milk, +1 tsp curry powder | Creamy, exotic, warming |
Serving Suggestions
These chicken bites are incredibly versatile. Here are my favorite ways to serve them:
- Over fluffy jasmine rice to soak up that incredible sauce
- Alongside roasted vegetables like broccoli or Brussels sprouts
- Wrapped in warm tortillas with fresh greens for quick tacos
- Tossed with pasta and a splash of cream for an easy pasta dish
- On top of a fresh salad for a protein-packed lunch
- Served with crusty bread for dipping into the sauce
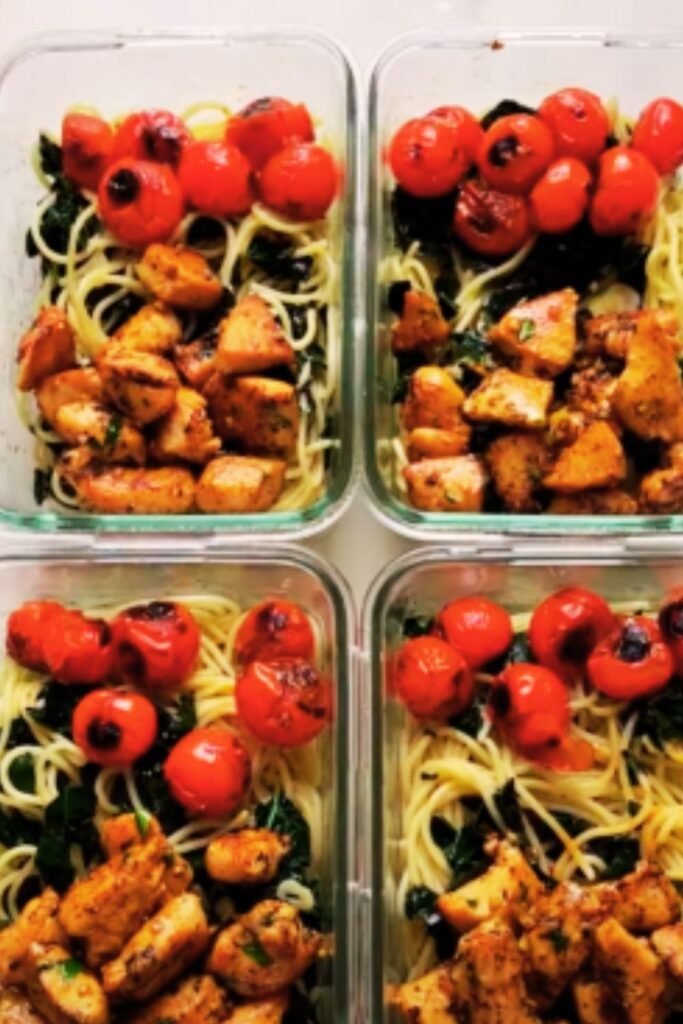
- In meal prep containers with cauliflower rice for healthy lunches
Storing and Reheating Tips
I often make a double batch of these chicken bites for meal prep. Here’s how to properly store and reheat them:
Refrigeration: Store cooled chicken bites in an airtight container for up to 3 days.
Freezing: These chicken bites freeze surprisingly well! Place cooled chicken in a freezer-safe container, separating layers with parchment paper. Freeze for up to 2 months.
Reheating Methods:
- Microwave: Heat for 1-2 minutes, stirring halfway through. Add a splash of chicken broth to rejuvenate the sauce.
- Stovetop: Warm gently in a skillet over medium-low heat with a splash of chicken broth or water.
- Oven: Bake at 350°F (175°C) for 10 minutes or until heated through.
Time-Saving Tips
As someone who values efficiency in the kitchen, here are my best time-savers for this recipe:
- Pre-cut chicken: Many stores sell chicken breast already cut into bite-sized pieces. While slightly more expensive, this saves significant prep time.
- Garlic shortcuts: Quality jarred minced garlic works fine in this recipe when you’re truly pressed for time. I sometimes use garlic paste from a tube for even faster prep.
- Mise en place: Measure and prepare all ingredients before turning on the stove. This streamlines the cooking process significantly.
- Double batch strategy: Making twice the amount takes barely any extra time but gives you another meal ready to go.
Dietary Adaptations
This recipe is naturally:
- Gluten-free
- Low-carb
- Keto-friendly
- Paleo-compatible
For specific dietary needs:
- Dairy-free: Substitute the butter with ghee (if tolerated) or olive oil and a splash of coconut milk
- Lower sodium: Reduce salt and use unsalted butter
- Higher protein: Add an extra 8 oz of chicken without increasing the sauce ingredients
Recipe Cost Breakdown
I’m all about budget-friendly cooking. Here’s roughly what this recipe costs me to make:
| Ingredient | Approximate Cost |
|---|---|
| Chicken breasts (1.5 lbs) | $7.50 |
| Olive oil (2 tbsp) | $0.40 |
| Butter (4 tbsp) | $0.75 |
| Garlic (6 cloves) | $0.30 |
| Lemon (for juice) | $0.50 |
| Fresh parsley | $0.75 |
| Spices | $0.30 |
| Total Cost | $10.50 |
| Cost Per Serving | $2.63 |
Prices based on average US grocery costs as of 2024. Regional prices may vary.
Frequently Asked Questions
Q: Can I use chicken thighs instead of breasts?
Absolutely! Chicken thighs will give you even juicier results. Just be aware they may take 1-2 minutes longer to cook through.
Q: How do I know when the chicken is fully cooked?
The safest method is using a meat thermometer to ensure the internal temperature reaches 165°F (74°C). If you don’t have one, cut into the largest piece – it should be white throughout with no pink.
Q: Can I make this recipe ahead of time?
While best served fresh, you can prepare the chicken pieces and store them seasoned in the refrigerator up to 24 hours before cooking. The sauce comes together so quickly that I recommend making it fresh.
Q: My sauce separated – what went wrong?
This usually happens when the heat is too high. Next time, reduce the heat before adding the butter and don’t let the sauce boil vigorously.
Q: What’s the best pan to use for this recipe?
I love using a well-seasoned cast iron skillet for the best sear, but any large non-stick or stainless steel pan will work well.
Q: How can I make the chicken even more tender?
Try brining the chicken pieces in saltwater (1 tablespoon salt dissolved in 4 cups water) for 15-30 minutes before cooking, then pat dry and proceed with the recipe.
Q: My garlic burns too quickly – help!
Add the garlic just 30 seconds before adding the lemon juice. The added moisture helps prevent burning, and lower heat is key.
Why This Recipe Works
After making this chicken dozens of times, I’ve figured out why it’s so consistently good:
- The quick cooking time preserves the chicken’s moisture while still developing flavor.
- The two-stage cooking process (first searing the chicken, then creating the sauce) builds layers of flavor.
- Using the same pan for both steps means you capture all those delicious browned bits (fond) from the chicken.
- Butter + garlic + lemon is a classic flavor combination that enhances the chicken without overpowering it.
- Allowing the chicken to rest briefly while making the sauce gives the juices time to redistribute.
I hope this 15-minute wonder brings as much joy to your dinner table as it has to mine. It’s proof that delicious, satisfying meals don’t require hours in the kitchen or fancy ingredients – just a few quality components and simple techniques.
Happy cooking!
Q&A Section
Q: Is this recipe suitable for meal prep?
Absolutely! These chicken bites retain their moisture well when reheated. I often make a double batch on Sunday for lunch meal prep throughout the week. Store them in airtight containers in the refrigerator for up to 3 days.
Q: Can I add vegetables to make this a complete one-pan meal?
Great idea! I frequently add quick-cooking vegetables like bell peppers, zucchini, or snap peas during the last 3-4 minutes of cooking. For harder vegetables like broccoli or cauliflower, give them a 2-minute head start before adding the chicken.
Q: My family doesn’t like spicy food. Can I still make this recipe?
Definitely! Simply omit the cayenne pepper and red pepper flakes. The recipe will still have wonderful flavor from the garlic, butter, and fresh herbs.
Q: What can I substitute for butter to make this dairy-free?
For a dairy-free version, use ghee (if tolerated) or substitute with olive oil and a splash of coconut cream for richness. The flavor profile will change slightly, but it will still be delicious.
Q: How can I make this dish more kid-friendly?
Kids usually love these chicken bites! To make them even more appealing to little ones, you can reduce the garlic to 2-3 cloves and skip the red pepper flakes. Serving the chicken with a side of honey for dipping is another kid-approved modification.