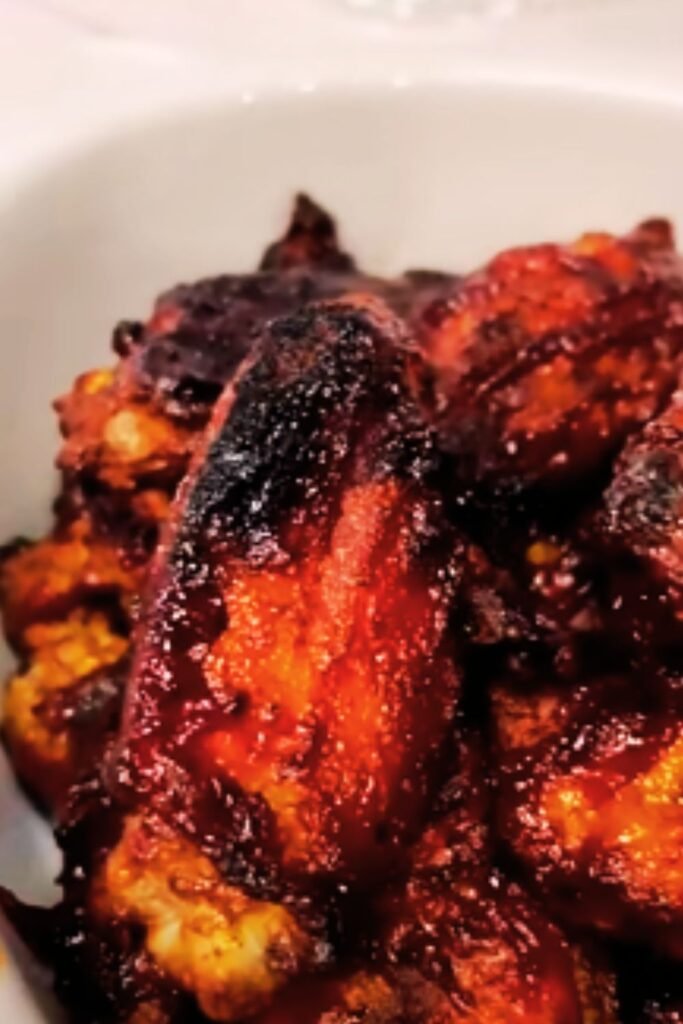
When summer arrives, my grill becomes the center of my culinary universe. And among all the delicious possibilities, there’s nothing quite like perfectly grilled BBQ chicken – juicy on the inside, caramelized and slightly charred on the outside, with that irresistible smoky flavor that only comes from cooking over an open flame.
I’ve spent years perfecting my grilled BBQ chicken technique through countless cookouts, neighborhood gatherings, and family dinners. What I’ve learned is that truly exceptional BBQ chicken requires understanding a few fundamental principles and techniques that make all the difference between mediocre and magnificent results.
In this comprehensive guide, I’ll share everything I’ve discovered about creating the perfect BBQ chicken on the grill – from selecting the right cuts and creating flavor-packed marinades to mastering temperature control and achieving that perfect balance of tenderness and char. Whether you’re a grilling novice or a seasoned backyard chef looking to refine your technique, this article will help you elevate your BBQ chicken game to new heights.
Choosing the Right Chicken
The foundation of great BBQ chicken begins with selecting the right cuts. While you might be tempted to reach for boneless, skinless chicken breasts for their convenience, I’ve found that bone-in, skin-on pieces deliver significantly better results for several reasons:
- The bones help conduct heat evenly throughout the meat
- The skin protects the meat from drying out
- Bone-in cuts have more flavor compounds
- The skin becomes deliciously crispy when properly cooked
Here’s my breakdown of the best chicken cuts for grilling:
| Cut | Cooking Time | Best For | Flavor Profile | Notes |
|---|---|---|---|---|
| Bone-in thighs | 25-30 minutes | All-purpose grilling | Rich, juicy, forgiving | Most foolproof cut, hard to overcook |
| Drumsticks | 20-25 minutes | Family cookouts | Savory, tender dark meat | Great for kids, easy to eat |
| Split chicken breasts | 30-35 minutes | White meat lovers | Leaner, milder flavor | Requires more attention to prevent drying |
| Whole spatchcocked chicken | 45-60 minutes | Impressive presentation | Complete flavor spectrum | Advanced technique, feeds a crowd |
| Wings | 15-20 minutes | Appetizers, game day | Crispy, rich flavor | Quick-cooking, great for parties |
When purchasing chicken, I always look for:
- Free-range or organic options when budget allows
- Fresh rather than frozen when possible
- Plump pieces with pinkish meat (not gray or translucent)
- Packages with minimal liquid in the container
Preparation: The Secret to Flavor-Packed Results
Brining: The Game-Changer
After years of experimentation, I’m convinced that brining is the single most important step for juicy, flavorful grilled chicken. This simple process involves soaking the chicken in a salt solution before cooking, which:
- Seasons the meat throughout (not just on the surface)
- Alters the protein structure to retain moisture during cooking
- Creates a buffer against overcooking
- Provides a foundation for introducing additional flavors
My go-to basic brine recipe:
- 4 cups cold water
- ¼ cup kosher salt (not table salt)
- 2 tablespoons brown sugar
- 4 smashed garlic cloves
- 1 tablespoon whole black peppercorns
- 2 bay leaves
For bone-in chicken pieces, I brine for 2-4 hours in the refrigerator. Any longer and the texture can become too soft and ham-like.
Dry Rubs vs. Marinades
Both dry rubs and marinades have their place in BBQ chicken preparation, and I often use them in combination after brining.
Dry Rubs
Dry rubs create a flavorful crust on the chicken and typically consist of:
- Salt and pepper base
- Brown sugar for caramelization
- Dried herbs and spices for complexity
- Sometimes powdered aromatics like garlic or onion
My signature BBQ chicken dry rub:
- 2 tablespoons brown sugar
- 1 tablespoon paprika
- 1 tablespoon kosher salt
- 2 teaspoons garlic powder
- 2 teaspoons onion powder
- 1 teaspoon black pepper
- 1 teaspoon dried thyme
- ½ teaspoon cayenne pepper (adjust to taste)
Marinades
Marinades penetrate the meat more deeply and typically contain:
- An acid (vinegar, citrus juice, yogurt) to tenderize
- Oil to carry fat-soluble flavors and moisture
- Aromatics and seasonings for flavor complexity
- Sometimes sugar for caramelization
My favorite BBQ chicken marinade:
- ½ cup olive oil
- ¼ cup apple cider vinegar
- 3 tablespoons honey or maple syrup
- 4 cloves minced garlic
- 2 tablespoons Dijon mustard
- 1 tablespoon Worcestershire sauce
- 1 teaspoon dried oregano
- Salt and pepper to taste
I marinate chicken for at least 2 hours and up to overnight in the refrigerator. For best results, I remove it from the refrigerator 30-45 minutes before grilling to allow it to come closer to room temperature, which promotes more even cooking.
Mastering Grill Setup and Temperature Control
The difference between good and great BBQ chicken often comes down to how you set up your grill and manage temperature throughout the cooking process.
Two-Zone Fire Setup
Whether you’re using charcoal or gas, creating a two-zone fire is essential for perfect BBQ chicken:
For Charcoal Grills:
- Pile approximately 50-60 briquettes on one side of the grill
- Light and allow to heat until covered with gray ash (about 20-30 minutes)
- Leave the other side empty, creating a direct heat zone (over the coals) and an indirect heat zone (no coals underneath)
For Gas Grills:
- Turn burners on one side to medium-high
- Leave burners on the other side off completely
- Preheat with the lid closed for 10-15 minutes
This setup gives you:
- A hot zone for searing and caramelizing
- A cooler zone for gentle cooking and temperature management
- A safe area to move chicken if flare-ups occur
Temperature Management
I’ve found these temperature targets work best for BBQ chicken:
| Phase | Temperature | Purpose |
|---|---|---|
| Initial searing | 450-500°F (direct heat) | Develop color and flavor |
| Primary cooking | 325-350°F (indirect heat) | Cook through gently |
| Final glaze | 350-400°F (direct heat) | Caramelize sauce |
For accurate temperature readings, I recommend investing in:
- A good grill thermometer for ambient temperature
- An instant-read digital thermometer for checking internal meat temperature
Remember that opening the grill causes temperature fluctuations, so limit lid opening to essential tasks like turning the chicken or checking temperatures.
The Grilling Process
Step 1: Preparation and Preheating
- Remove chicken from brine or marinade 30 minutes before cooking
- Pat dry thoroughly with paper towels
- If using a dry rub, apply it now, pressing gently to adhere
- Set up your two-zone fire as described above
- Clean and oil your grill grates thoroughly
- Preheat to the appropriate temperature (450-500°F for initial searing)
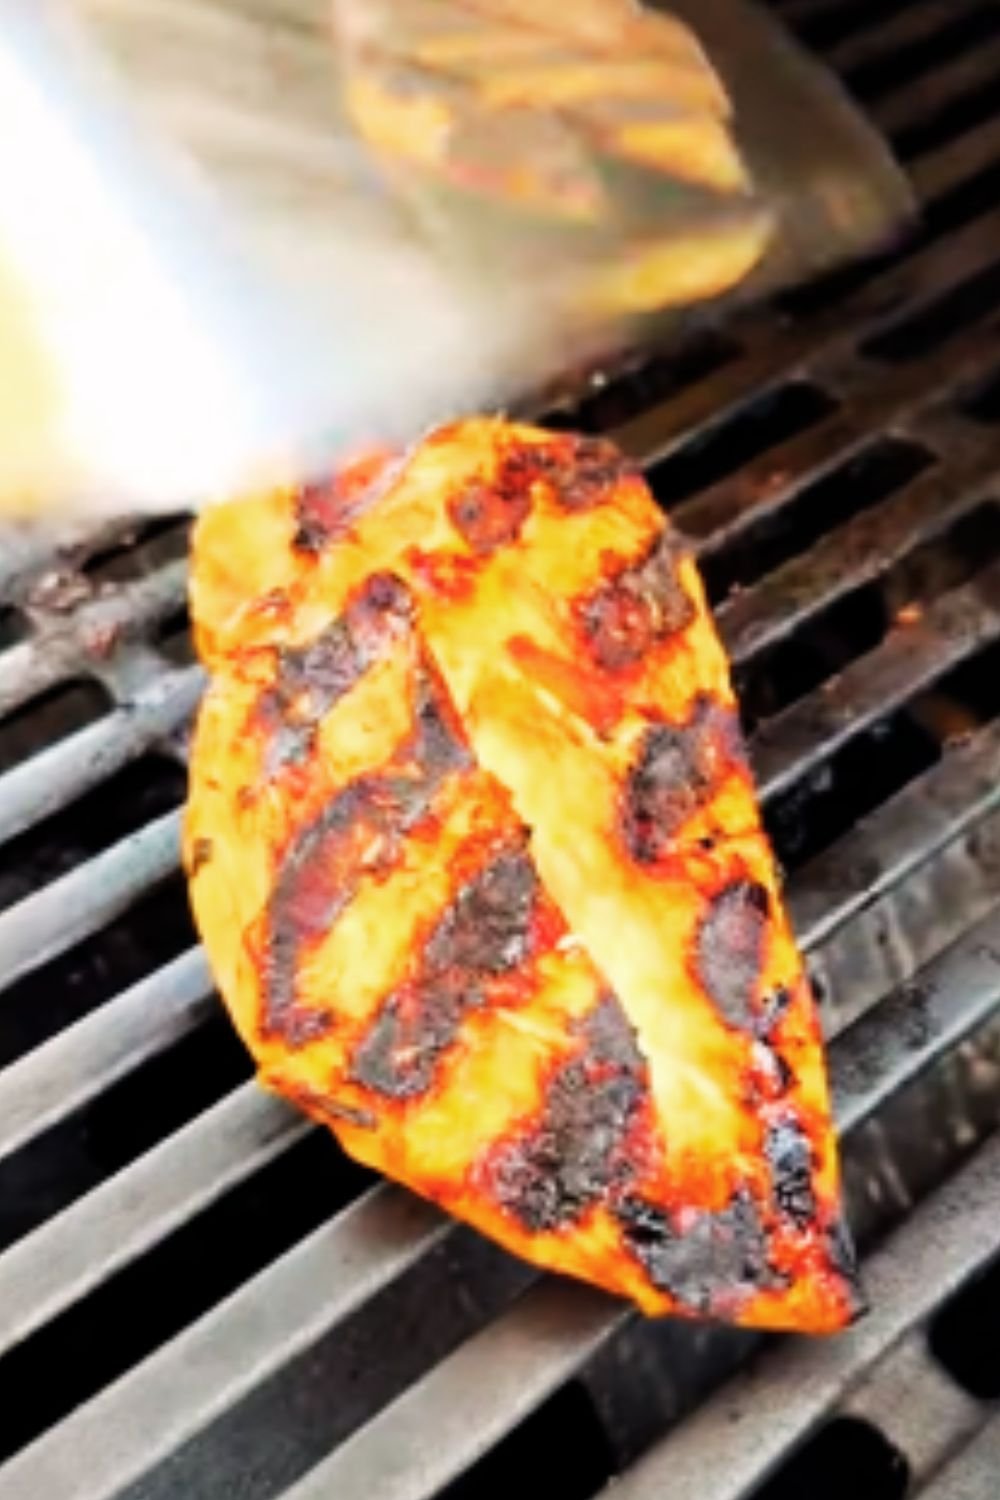
Step 2: The Searing Phase
- Place chicken skin-side down on the hot direct heat zone
- Close the lid and cook for 3-5 minutes until grill marks appear
- Rotate chicken 45 degrees (but keep skin-side down) and cook 2-3 minutes more for crosshatch grill marks
- Watch carefully for flare-ups caused by dripping fat
Step 3: Moving to Indirect Heat
After achieving good color on the skin side:
- Flip the chicken pieces over
- Move them to the indirect heat zone
- Close the lid
- Maintain a temperature of 325-350°F in the grill
This is where patience becomes important. Rushing this phase by using too high heat will result in chicken that’s burnt outside but raw near the bone.
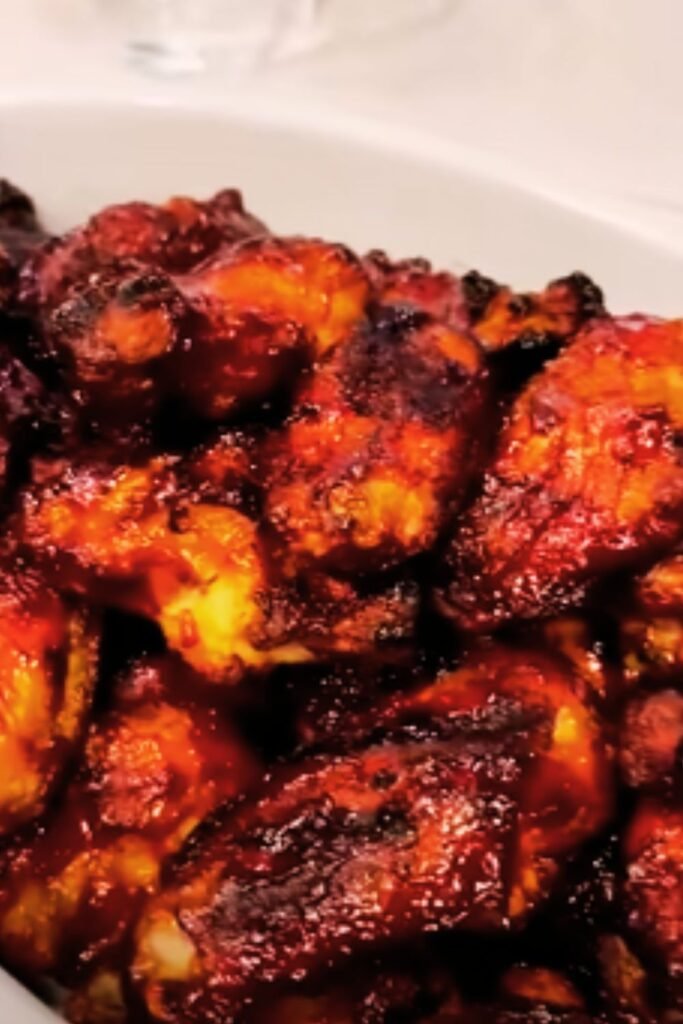
Step 4: Applying BBQ Sauce (If Using)
The timing of BBQ sauce application is crucial. Apply too early and it will burn; too late and it won’t develop that beautiful sticky glaze. My approach:
- Begin checking internal temperature after about 15 minutes of indirect cooking
- When the chicken reaches about 145°F internal temperature (about 10°F below target), apply the first coat of sauce
- Continue cooking over indirect heat for 5 minutes
- Apply a second coat of sauce
- Move back to direct heat for final caramelization, watching carefully to prevent burning
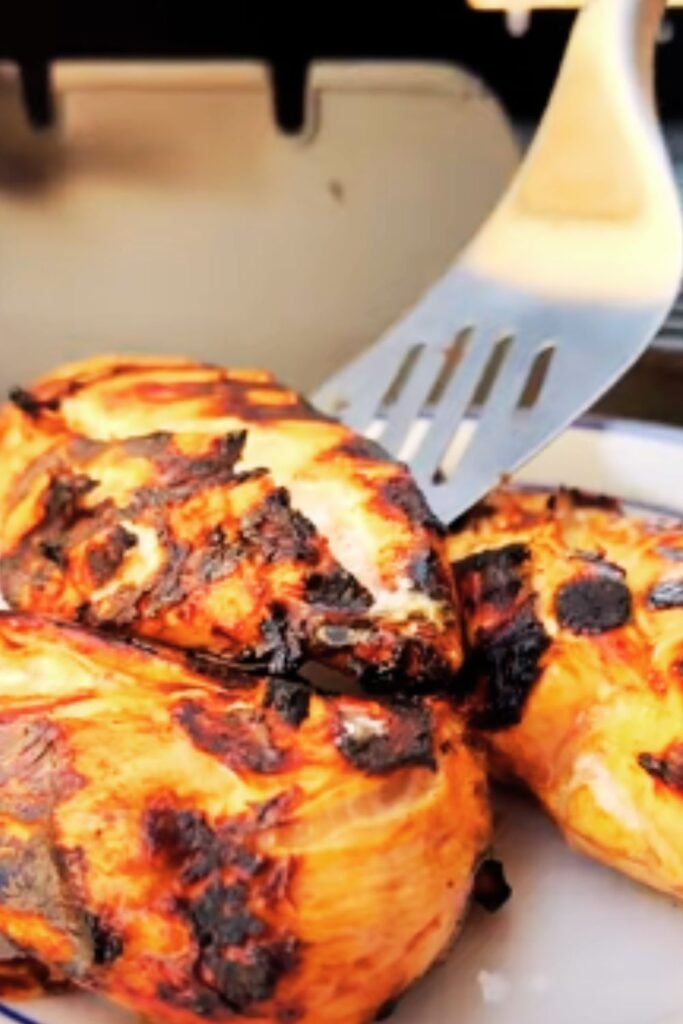
Step 5: Testing for Doneness
Forget about the old “clear juices” test – the only reliable method is temperature:
| Chicken Cut | Safe Internal Temperature |
|---|---|
| Breast | 160°F (carryover will reach 165°F) |
| Thighs/Drumsticks | 170-175°F for best texture |
| Wings | 165-170°F |
| Whole chicken | 165°F in the deepest part of the thigh |
Test in the thickest part without touching bone for an accurate reading. Remember that carryover cooking will raise temperatures by about 5°F during rest time.
Step 6: Resting Period
This often-skipped step is absolutely critical for juicy results:
- Remove chicken from the grill when it reaches target temperature
- Place on a platter and tent loosely with foil
- Rest for 5-10 minutes before serving
- If desired, apply a final light coating of sauce just before serving
During this resting period, the muscle fibers relax and reabsorb juices that would otherwise run out if cut immediately.
BBQ Sauce Strategies
While store-bought sauces are convenient, making your own BBQ sauce opens up endless flavor possibilities. Here are three of my favorite homemade BBQ sauce recipes that pair perfectly with grilled chicken:
Classic Sweet and Smoky BBQ Sauce
- 1 cup ketchup
- ¼ cup molasses
- ¼ cup apple cider vinegar
- 2 tablespoons Worcestershire sauce
- 2 tablespoons brown sugar
- 1 tablespoon Dijon mustard
- 2 teaspoons smoked paprika
- 1 teaspoon garlic powder
- 1 teaspoon onion powder
- ½ teaspoon black pepper
- ¼ teaspoon cayenne pepper
Combine all ingredients in a saucepan, simmer for 15 minutes until slightly thickened, stirring occasionally.
Honey-Chipotle BBQ Sauce
- 1 cup ketchup
- ⅓ cup honey
- 2 tablespoons apple cider vinegar
- 2-3 chipotle peppers in adobo sauce, finely chopped
- 1 tablespoon of the adobo sauce
- 2 cloves garlic, minced
- 1 tablespoon lime juice
- 1 teaspoon cumin
- Salt and pepper to taste
Blend all ingredients until smooth, then simmer for 10-15 minutes until desired consistency is reached.
Carolina-Style Mustard BBQ Sauce
- ¾ cup yellow mustard
- ¼ cup honey
- ¼ cup apple cider vinegar
- 2 tablespoons ketchup
- 1 tablespoon brown sugar
- 2 teaspoons Worcestershire sauce
- 1 teaspoon garlic powder
- 1 teaspoon onion powder
- ½ teaspoon cayenne pepper
- Black pepper to taste
Whisk all ingredients together in a bowl. For best results, refrigerate overnight before using to allow flavors to meld.
Troubleshooting Common BBQ Chicken Problems
Even experienced grillers encounter challenges. Here are solutions to the most common BBQ chicken issues:
| Problem | Possible Causes | Solutions |
|---|---|---|
| Burnt exterior, raw interior | Too high heat, direct cooking only | Use two-zone fire, start on direct heat then move to indirect |
| Dry, tough chicken | Overcooked, no brining, wrong cut | Brine first, use bone-in cuts, cook to proper temperature |
| Flare-ups and excessive charring | Too much fat dripping, grill too hot | Trim excess fat, control temperature, keep water spray bottle handy |
| BBQ sauce burning | Applied too early, heat too high | Apply sauce only in final 10-15 minutes of cooking |
| Skin not crispy | Not dry enough before grilling, wrong technique | Pat very dry, start skin-side down, maintain proper temperature |
| Inconsistent doneness | Different sized pieces, poor heat management | Cut pieces to similar size, understand hot spots, rotate pieces |
Serving Suggestions
BBQ chicken pairs beautifully with a variety of sides. Here are some of my favorite accompaniments:
Classic BBQ Sides
- Creamy coleslaw with a tangy dressing
- Southern-style baked beans
- Grilled corn on the cob with herb butter
- Cornbread with honey butter
- Macaroni and cheese
- Potato salad with fresh herbs
Lighter Options
- Grilled vegetable skewers
- Fresh green salad with vinaigrette
- Cucumber and tomato salad
- Quinoa with roasted vegetables
- Watermelon and feta salad
- Grilled peaches for dessert
Beverage Pairings
- Iced sweet tea
- Fresh lemonade
- Sparkling water with citrus
- Cold craft sodas
- Cucumber mint water
Make-Ahead and Storage Tips
BBQ chicken is excellent for meal prep and entertaining:
Make-Ahead Options:
- Complete the brining and apply dry rubs up to 24 hours in advance
- Pre-make BBQ sauces up to a week ahead and refrigerate
- Partially grill chicken (about 75% done) then finish just before serving
Storage Guidelines:
- Refrigerate leftover cooked chicken within 2 hours of cooking
- Store in airtight containers for up to 3-4 days
- Reheat gently in a 300°F oven covered with foil until warmed through
Freezing:
- Cool completely before freezing in airtight containers
- Freeze for up to 3 months
- Thaw overnight in refrigerator before reheating
- Best used in recipes like BBQ chicken pizza, quesadillas, or salads after freezing
Taking Your BBQ Chicken to the Next Level
Once you’ve mastered the basics, consider these advanced techniques:
Wood Smoke Infusion
Different wood types create distinct flavor profiles:
- Hickory: Classic strong BBQ flavor, traditional with chicken
- Apple: Mild and slightly sweet, very versatile
- Cherry: Subtly sweet with mild fruitiness
- Pecan: Rich and nutty without overwhelming
- Maple: Mild and slightly sweet, great for poultry
For gas grills, use soaked wood chips in a smoker box. For charcoal, add a few chunks of hardwood to the coals.
Spatchcocking (Butterflying)
This technique involves removing the backbone and flattening the chicken:
- Using kitchen shears, cut along both sides of the backbone to remove it
- Flip the chicken breast-side up and press firmly to flatten
- Tuck the wing tips behind the breasts
- Cook over indirect heat for about 45-60 minutes
Benefits include:
- Even cooking throughout
- Faster cooking time than a whole chicken
- More surface area for smoke flavor and seasoning
- Impressive presentation
Global BBQ Chicken Variations
Experiment with these international flavors:
Jamaican Jerk Chicken:
- Scotch bonnet peppers
- Allspice
- Thyme
- Cinnamon
- Ginger
- Green onions
Korean Gochujang Chicken:
- Gochujang (Korean chili paste)
- Soy sauce
- Honey
- Sesame oil
- Garlic
- Ginger
Mediterranean Herb Chicken:
- Lemon juice and zest
- Olive oil
- Oregano
- Rosemary
- Garlic
- Fresh herbs
Frequently Asked Questions
Q: Why is my chicken always dry even though I follow cooking times?
Different grills have different heat outputs, and chicken pieces vary in size. Always use a meat thermometer rather than relying solely on cooking time. Remember that bone-in, skin-on cuts are more forgiving and naturally juicier.
Q: How do I prevent chicken from sticking to the grill?
Make sure your grill is properly preheated before adding chicken. Clean grates thoroughly and oil them well just before placing the chicken. Most importantly, don’t try to flip the chicken too early – it will naturally release when it’s ready to be turned.
Q: Should I marinade AND use a dry rub?
You can definitely use both for maximum flavor. Marinate first, then pat dry and apply a light coating of dry rub just before grilling. Just be aware that sugar in either can burn, so monitor closely.
Q: What’s the best way to add smoke flavor on a gas grill?
Use a smoker box filled with soaked wood chips. Place it under the grates directly over one of the burners. You can also make a pouch out of aluminum foil, poke a few holes in it, and use it the same way.
Q: How do I get that restaurant-quality caramelized finish?
The key is patience and layering. Apply BBQ sauce in multiple thin layers during the final 10-15 minutes of cooking, allowing each layer to set before adding the next. A sauce with some sugar content helps with caramelization.
Q: Can I use this same technique for boneless chicken?
Yes, but cooking times will be significantly shorter, and you’ll need to be more vigilant about overcooking. Boneless breasts benefit greatly from brining to help them stay moist.
Q: How can I make my BBQ chicken healthier?
Use skinless pieces if you’re watching fat intake, but cook them exclusively over indirect heat to prevent drying out. Make your own BBQ sauce to control sugar and sodium. Consider using herb-focused marinades rather than sugar-heavy sauces.
Q: My BBQ sauce never gets that sticky glaze. What am I doing wrong?
Make sure your sauce has some sugar content (honey, brown sugar, molasses) which helps create that sticky texture. Apply it during the final stage of cooking and allow it to set between layers. Also, some commercial sauces are formulated to not caramelize as easily.
Conclusion
Mastering BBQ chicken on the grill is a journey that combines science, art, and patience. The principles I’ve shared – selecting the right cuts, properly preparing the meat, controlling temperature, understanding cooking phases, and perfecting sauce application – provide a foundation for consistently excellent results.
What I love most about grilled BBQ chicken is how it brings people together. There’s something primal and communal about gathering around a grill, sharing stories while the irresistible aroma of smoky chicken fills the air. It’s one of those dishes that creates memories and traditions that extend far beyond the meal itself.
I encourage you to use this guide as a starting point, but don’t be afraid to experiment and develop your own signature techniques. The most rewarding aspect of becoming proficient at grilling is discovering your personal preferences and creating flavor combinations that reflect your unique taste.
With practice, you’ll develop an intuitive sense of timing, temperature, and technique that elevates your BBQ chicken from simply good to truly exceptional. Happy grilling!